Securing GCP Instances using Firewall Rules

Overview of VPC Firewall Rules
In the Google Cloud Platform (GCP), firewall rules are implemented within the Virtual Private Cloud (VPC) network. These rules are applied at the project or network level and play a crucial role in securing instances within the VPC network, regardless of their operating system or configuration.
VPC firewall rules act as a distributed firewall, and they are defined at the network level. They enforce strict adherence to the enabled rules, determining which connections are permitted or denied on a per-instance basis. By controlling traffic at the network level, firewall rules regulate the flow of data to and from the resources connected to the VPC, such as Compute Engine VM instances and Google Kubernetes Engine (GKE) clusters.
The purpose of firewall rules is to allow or restrict the movement of traffic within the VPC network, ensuring that only authorized communication occurs between resources. This helps protect the instances and data within the VPC network, providing an additional layer of security for GCP deployments.
In GCP, every firewall rule needs to have a target defined, indicating the instances to which the rule should be applied. By default, a firewall rule targets all instances within the network. However, administrators have the flexibility to customize the target using network tags.
Network tags are used to specify the VMs in GCP to which a particular firewall rule should apply. By assigning specific tags to VM instances, administrators can selectively apply firewall rules to only those instances with the corresponding tags. This allows for more granular control and ensures that firewall rules are applied only where necessary, reducing unnecessary overhead and complexity.
Lab Objective
This lab will demonstrate the implementation of firewall rules in GCP.
Log on to your created GCP account. if you haven’t created an account kindly do that. If you don’t have a Project created on your GCP account, Check out the Lab on implementing Role Access control with GCP IAM.
Disclaimer
The Google Cloud console is subject to updates and changes over time. The information provided in this lab write-up is based on the console’s state at the time of writing and may not reflect the current user interface or functionality. It is recommended to refer to the official GCP documentation for the most up-to-date instructions when using the Google Cloud console.
Let's Dive in🚀
Currently, we have a project already created called “My First Project” from the previous lab.
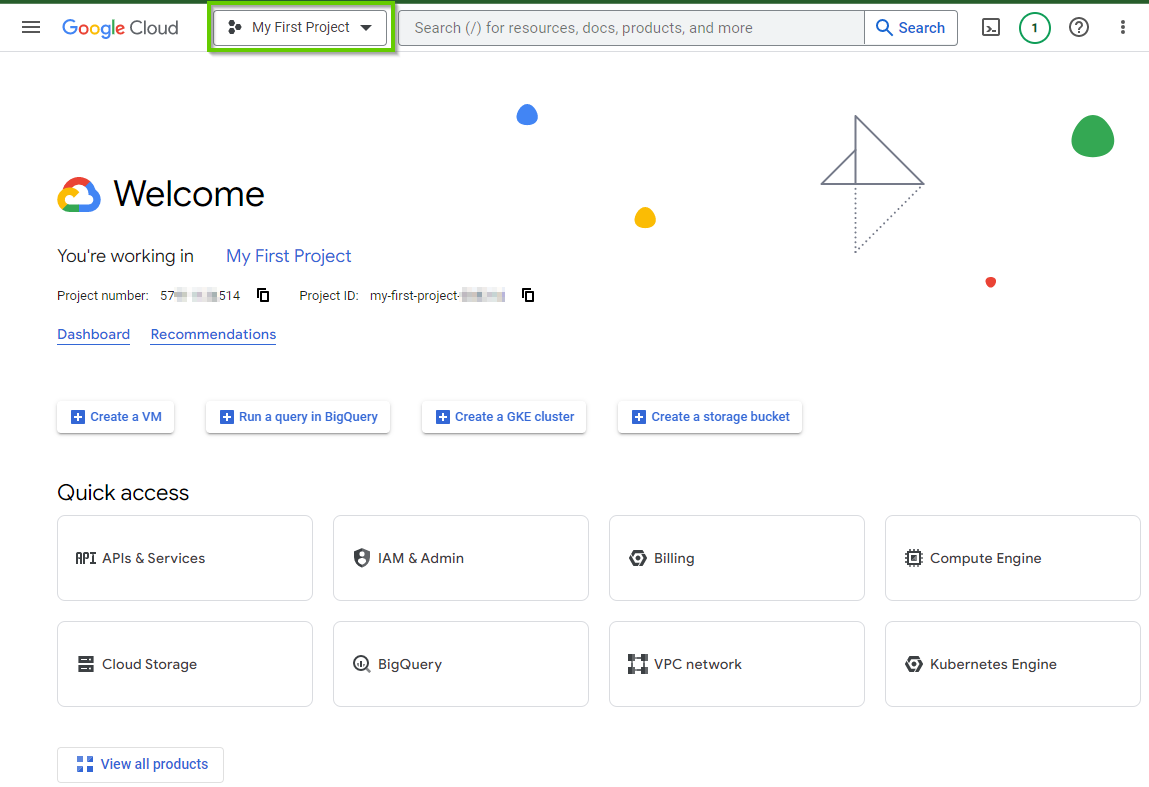
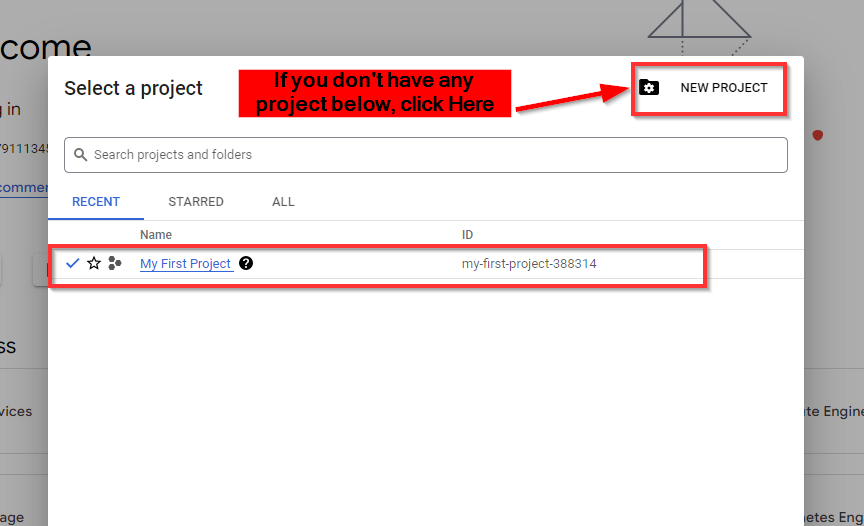
If you want to create a new project, click on “My First Project” at the top and a window pops up as shown below. Click on “New Project”, give it a name, and click on "Create".
Creating VM instance in a Project
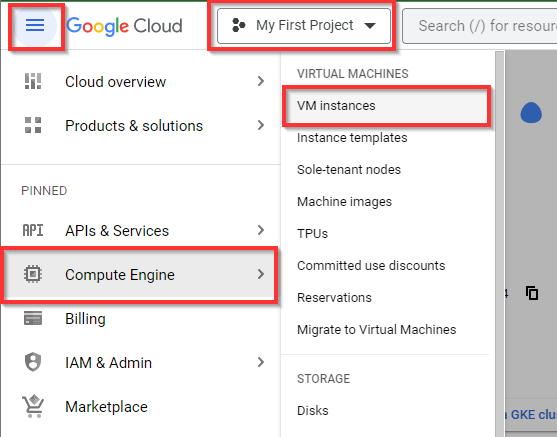
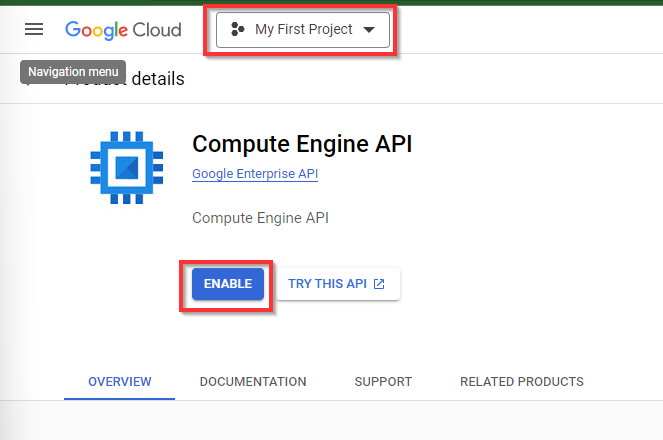
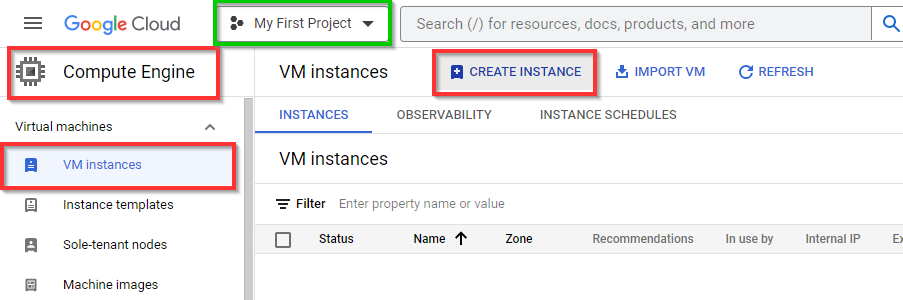
On the “My First Project” console, make sure you are on a selected project created by you with any name. Navigate to Compute Engine and select VM Instances in the console.
Click on “Enable”
This service might not work unless you have verified your billing while creating your GCP Account with your credit card.
Next, in the VM instance console, click on "Create Instance" to create a new instance.
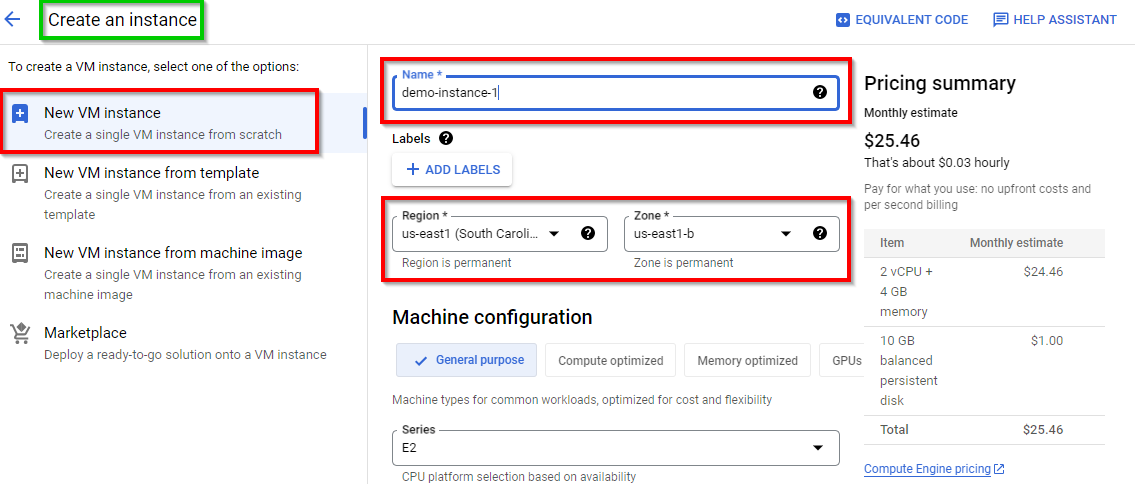
In the Create an instance window, give an appropriate name, region, and zone to the instance of your choice. In this lab, we have used the following details:
→ Name: demo-instance-1
→ Region: us-east1
→ Zone: us-east1-b
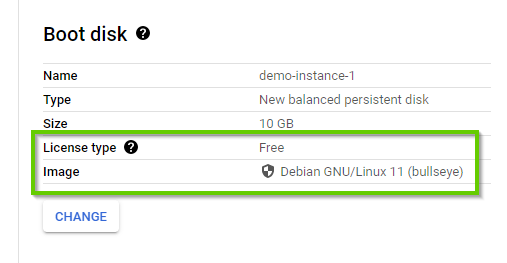
Scroll down to Boot Disk and ensure it is Debian GNU/Linux 11 (bullseye). Retain the other settings, Scroll to the end, and click on "Create".
Note: The green tick mark under Status confirms that your instance has been created.

Creating a Firewall in the VPC network
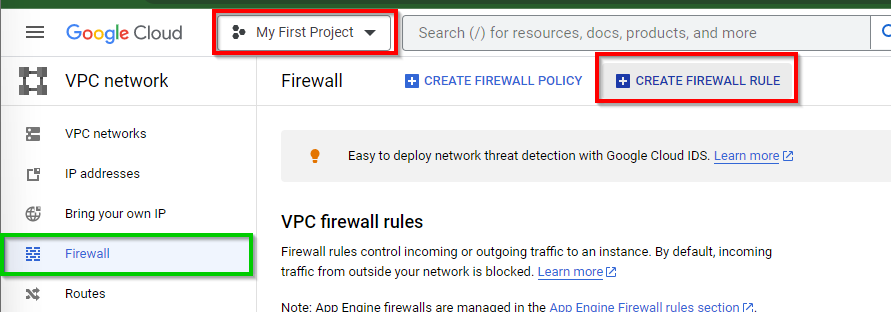
Navigate to the VPC network and select Firewall in the console.

Next, in the firewall dashboard, click on CREATE FIREWALL RULE at the top.
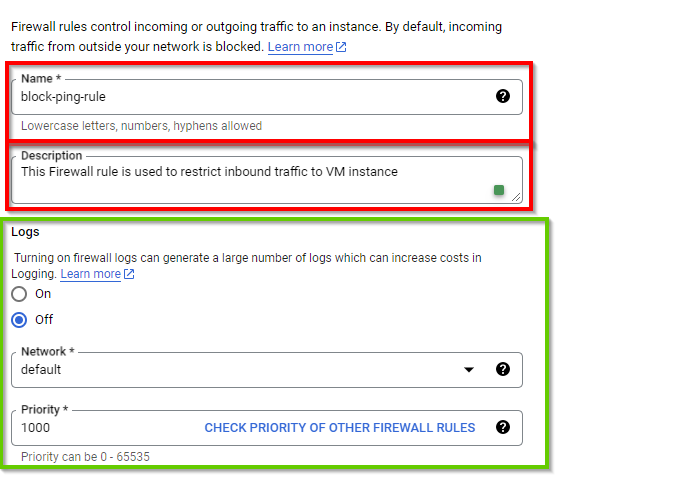
Type an appropriate Name for the firewall rule and description (optional). Now, we are creating a firewall rule named block-ping-rule, which will block ping requests to the VM instance. Also, retain the default settings for logs, network, and priority.
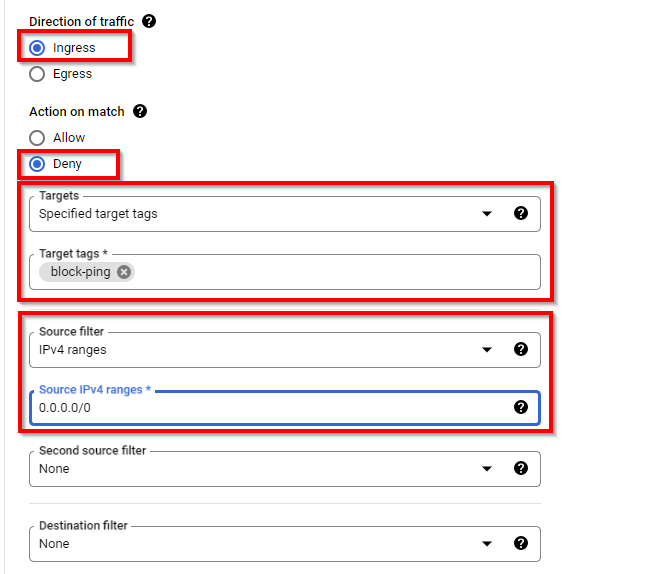
Now, scroll down to the bottom and add the following details:
→ Direction of Traffic: Ingress (as it is a firewall rule to block ping requests)
→ Action on match: Deny (To deny ping requests)
→ Targets: Specified target tags
→ Target tags: block-ping
→ Source IP ranges: 0.0.0.0/0 (to block all IPv4 traffic)
NB: Note or copy the Target tags which will be added to our created VM Instance later on in the lab.
Under Protocols and ports, select Specified protocols and ports. Then, select Other Protocols and add ICMP. Then, click on "Create".
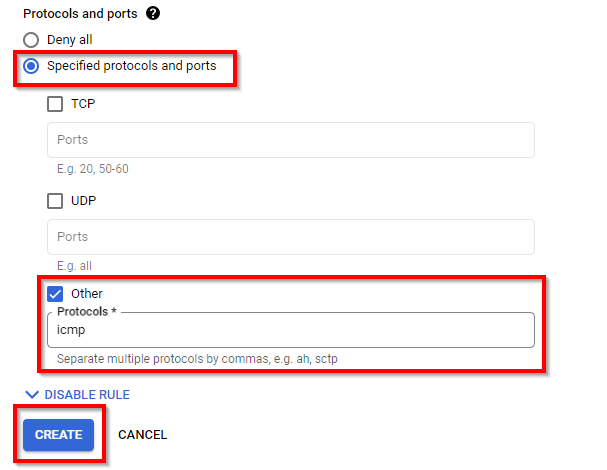
The firewall rule is successfully created.
Assigning Firewall to VM instance based on Network tags
Next, we assign the newly created firewall rule to the VM instance that was created at the beginning of the lab by navigating to Compute Engine and selecting VM instances from the console.

Click on the VM instance you created.

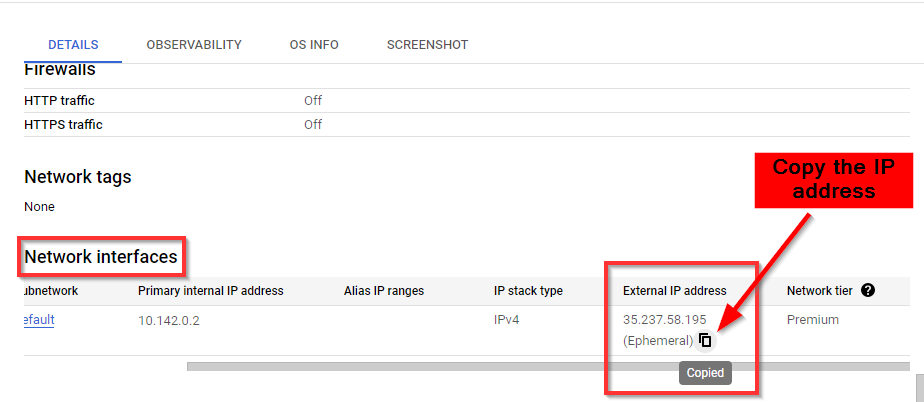
Scroll down and note the External IP of the instance under the Network Interface section.
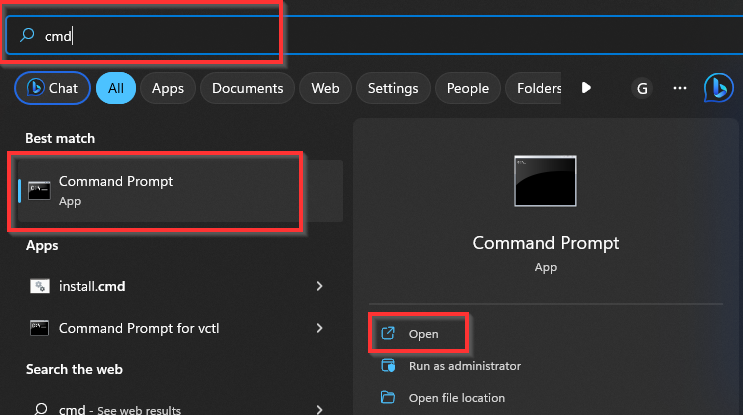
On your PC, Open CMD or terminal
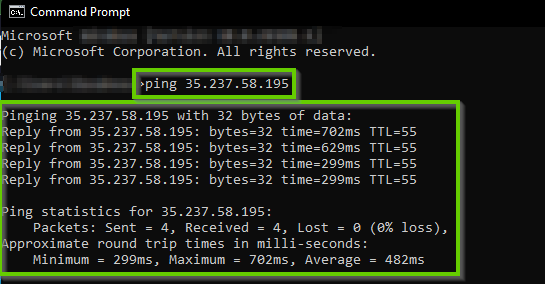
In the Command Prompt window, type ping < external IP address you copied in the previous step> For this lab, ping 35.237.58.195 and press Enter on the keyboard.
NB: The ping to the VM instance is successful, as shown in the screenshot below.
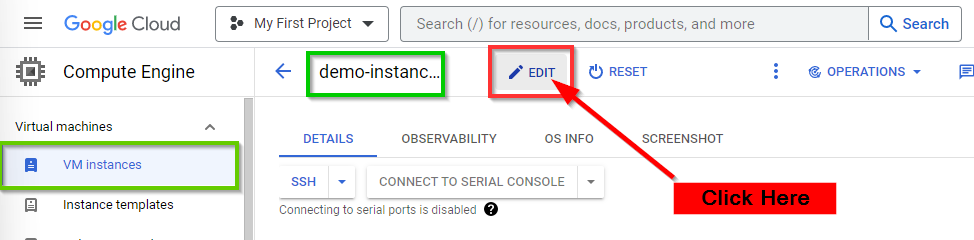
Next, go back to the GCP VM Instances console and click on demo-instance-1 (as shown in the previous steps above), Click on EDIT at the top.
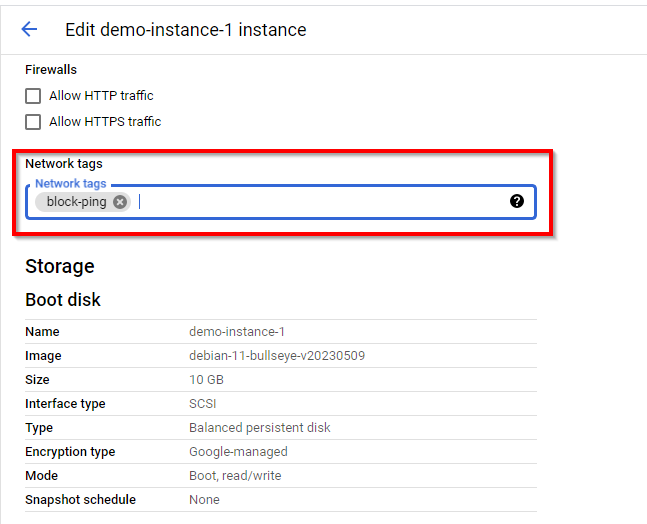
On the EDIT page, scroll down to the bottom. Under network tags, add the block-ping network tag. Once DONE, scroll down to the bottom and click on Save.
Now, The Create Firewall Rule (block-ping) when added to the (demo-instance-1 ) VM instance Restricts any request for Access to its resource.
Pinging VM instance after firewall has been enabled
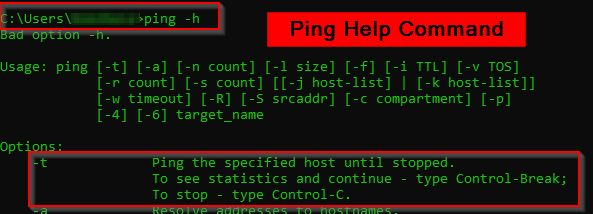
- Now, go back to the Command Prompt and run a continuous ping with the command, ping < external IP address > -t (replace < external IP address > with the external IP of your VM instance).
For this lab, type ping 35.237.58.195 -t, and then press Enter on the keyboard.
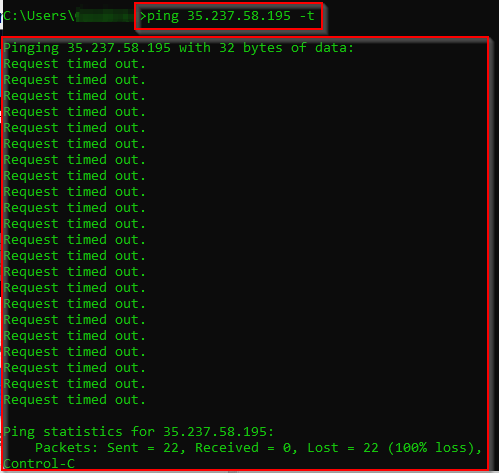
Press Ctrl + C to Stop
- The ping request to the VM instance is blocked by the firewall rule.
As a cloud security Engineer, it is important to secure VM instances from attacks using VPC firewall rules.
SHUTDOWN RESOURCES
It is important to delete, shut down, or terminate all the resources created or used in this lab to prevent billing your account.
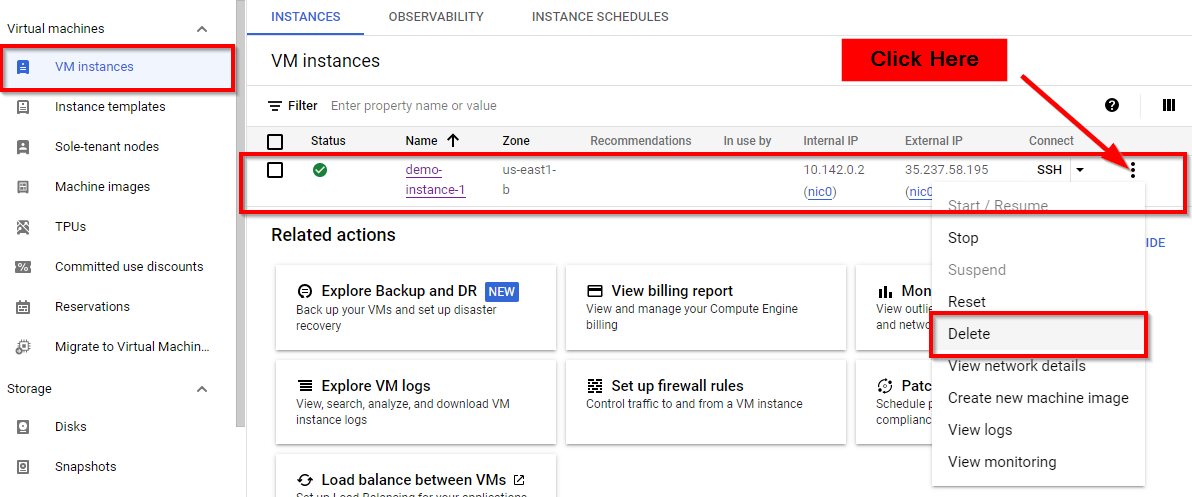
Now, to delete the instance that you have created, navigate to Compute Engine VM Instances window. Scroll horizontally in the Instances tab. Click on the three dots on the right side of your screen, for instance (demo-instance-1) that you have created, and click on Delete. As shown in the pop-up window below, click on Delete.
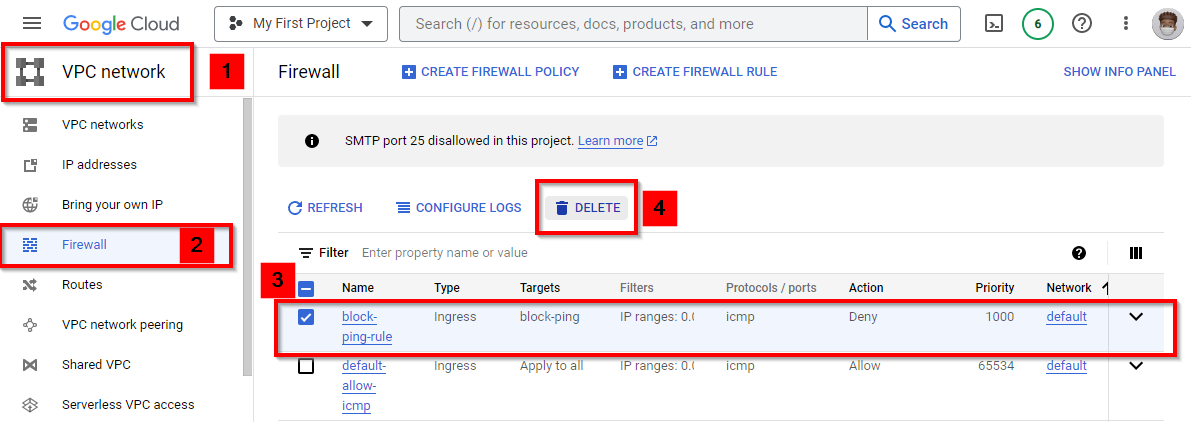
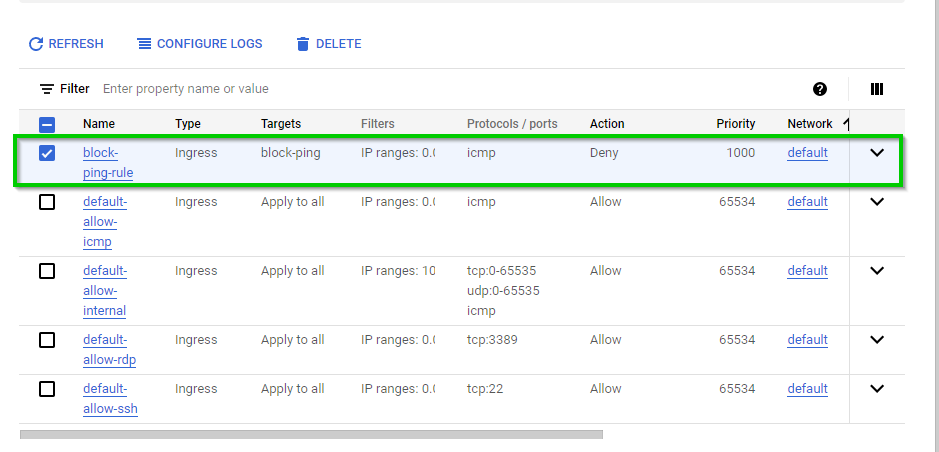
Next, delete the firewall rule you created for this lab. Navigate to the firewall window in the VPC network. Select the checkbox for the firewall rule (block-ping-rule) that you have created and click on Delete at the top. As shown in the pop-up window below, click on Delete.