Implementing Role Based Access Control with GCP IAM

Overview of GCP IAM Roles
INTRODUCTION
IAM roles consist of a collection of permissions that enable users assigned to those roles to carry out specific actions on particular cloud resources. These roles provide administrators with the ability to precisely control access to specific Google Cloud resources and ensure that unauthorized access to other resources is prevented.
GCP major IAM Roles
Predefined IAM roles: predefined roles are designed to cover common use cases and provide a convenient way to assign appropriate permissions to users or groups. These predefined roles are managed and regularly updated by Google to address evolving security requirements and new services introduced to the platform. By leveraging GCP's predefined IAM roles, administrators can easily assign appropriate access levels to users, groups, or even service accounts, reducing the risk of unauthorized access and ensuring that the principle of least privilege is followed.
Custom IAM roles: These are user-defined roles that allow the collection of supported permissions to meet an organization’s requirements. They provide granular access to cloud resources based on a user-specified list of permissions. These custom roles are neither maintained nor updated by Google Cloud. It is possible to create custom roles at the organization and project levels, but not at the folder level. When predefined roles do not meet the needs of the organization, custom roles are created and used to meet the security requirements.
Before starting this lab, you should create a GCP Free Trial account using the following link: https://cloud.google.com/free, in case you have already not created it for the previous lab. Once the registration is complete, perform the following tasks
Disclaimer
The Google Cloud console is subject to updates and changes over time. The information provided in this lab write-up is based on the console’s state at the time of writing and may not reflect the current user interface or functionality. It is recommended to refer to the official GCP documentation for the most up-to-date instructions when using the Google Cloud console.
Creating a Project in GCP
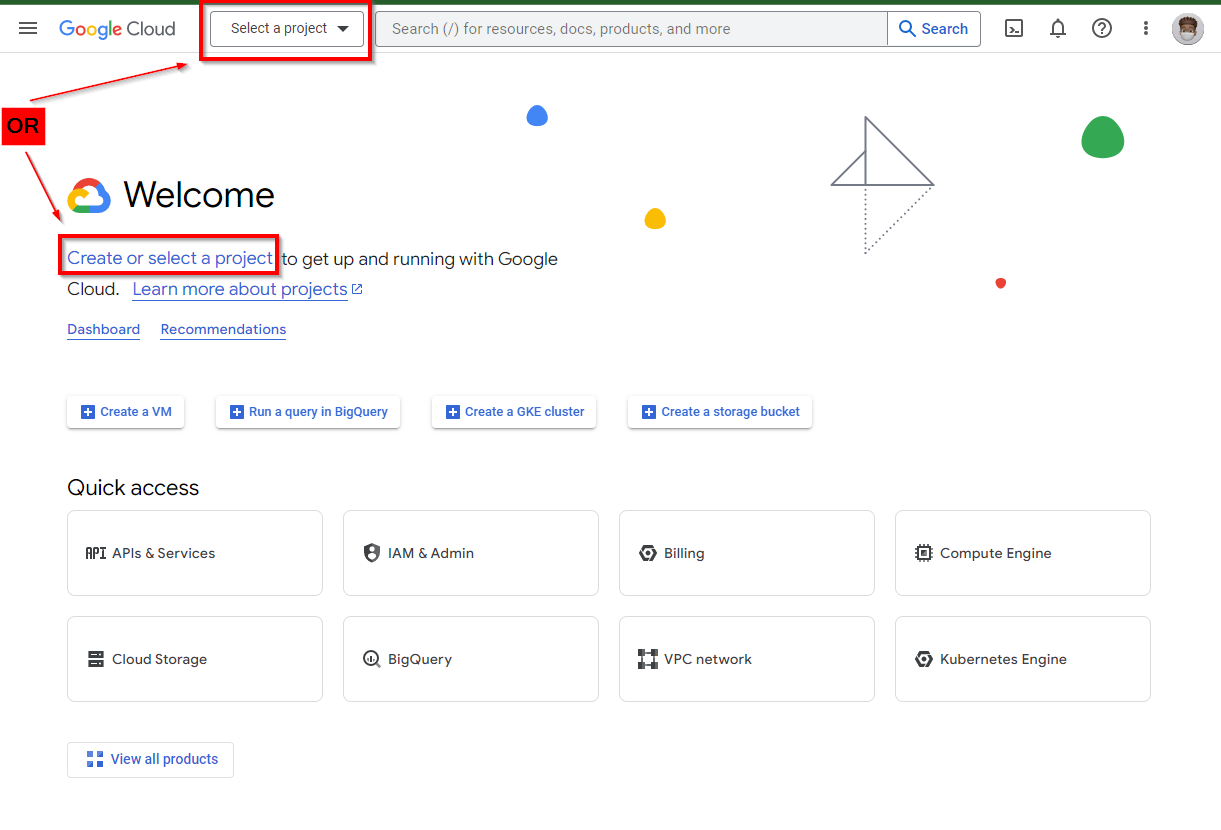
Once you have created your GCP account, you will get a welcome screen. On the top, click on “Select a Project” or “Create or Select a Project.”
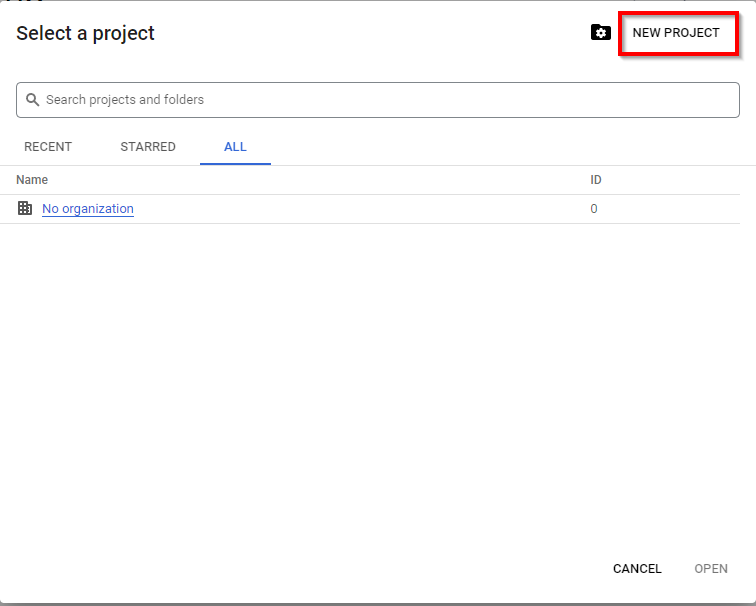
A window screen pops out, click on “NEW PROJECT”
Give the project a name of your choice. In the lab, we called it “My First Project”. then click on CREATE

Click on “Select a Project” at the top and click on the name of the project you created.
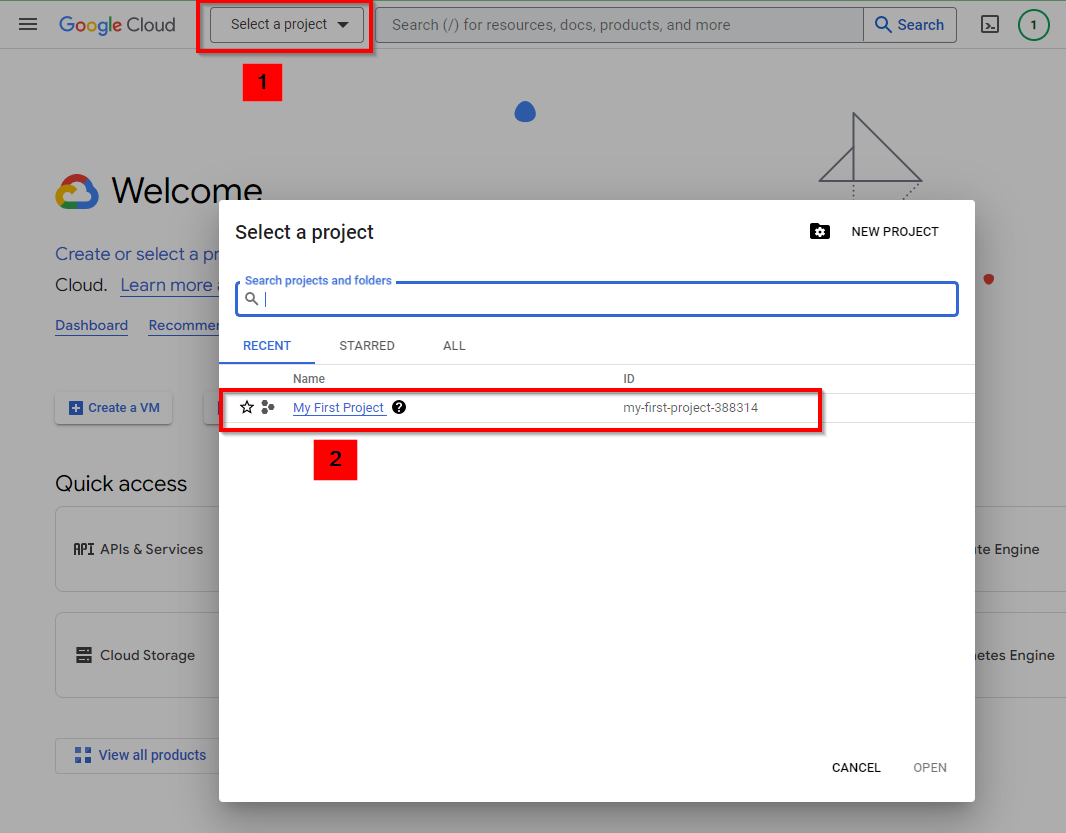
Now it appears at the Top

Assigning Predefined IAM Roles
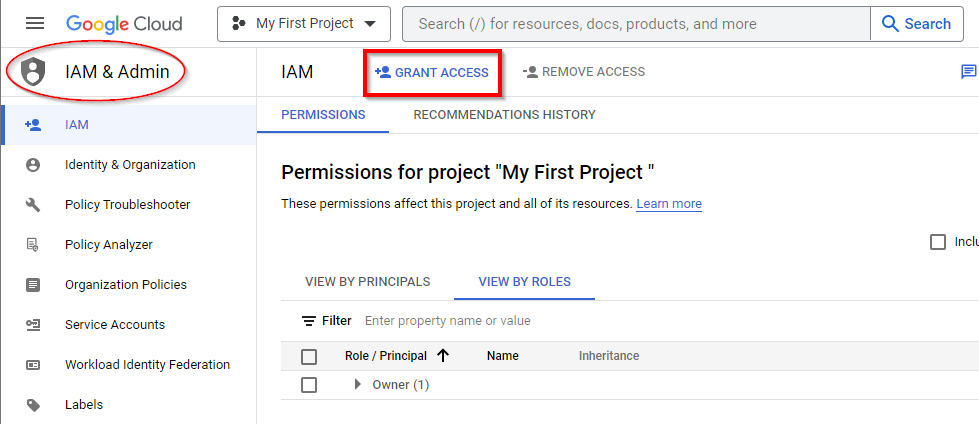
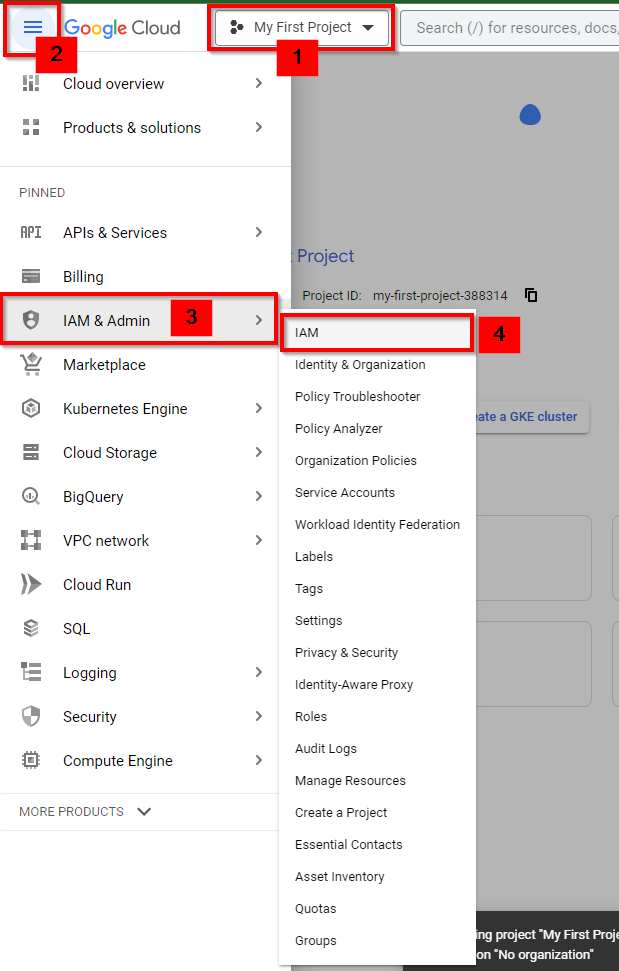
Navigate to IAM & Admin and select IAM in the console.

In the IAM dashboard, click on Grant Access at the top to start implementing predefined roles for users.
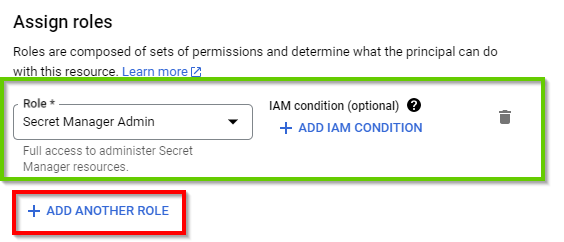
In the New Principals Box, enter a valid email address (e.g., abc@gmail) to assign roles (permissions) to the user in the project. Then, under “Assign roles”, click on Select a role and scroll down to the bottom to locate an appropriate service and its corresponding role. “Select Secret Manager as the service and Secret Manager Admin as the role”
NB: the Services are in alphabetical order
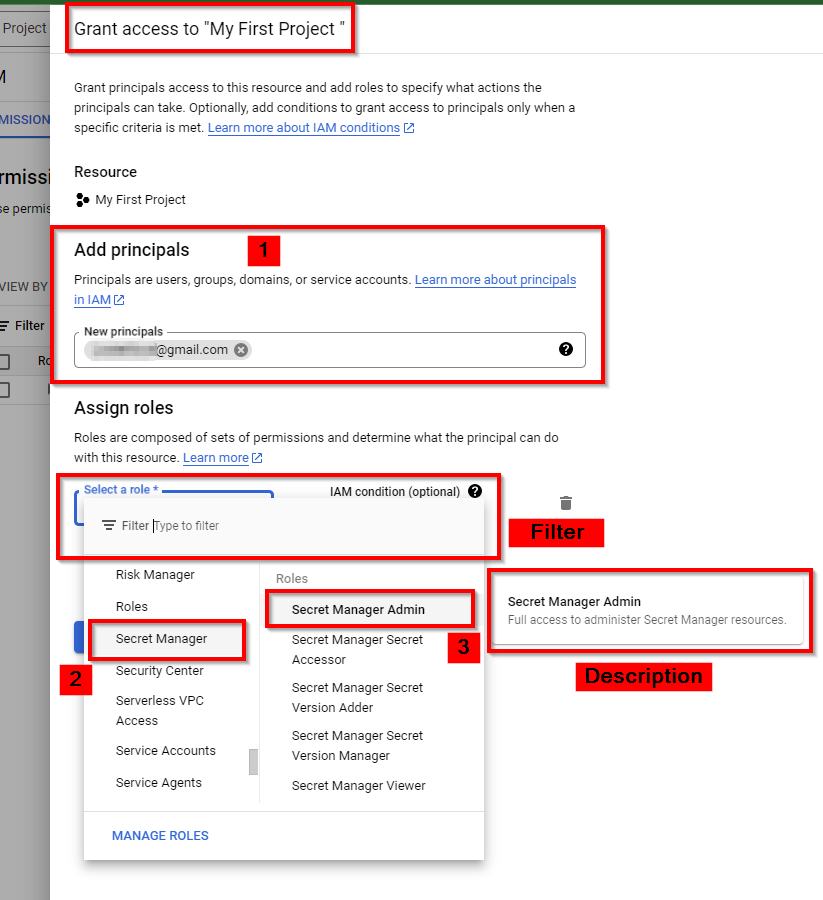
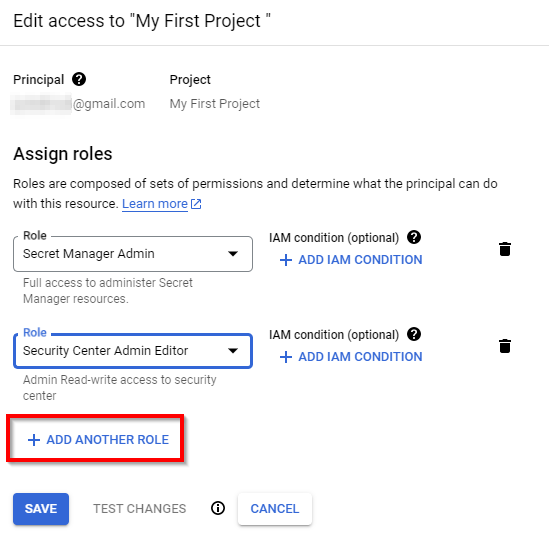
Next, scroll down and click on ADD ANOTHER ROLE to add a new role to the user.
Click on Select a Role again and scroll down to the bottom. Select Security Center as the service and Security Center Admin Editor as the role. Then click on SAVE.


Note: The roles granted here are for this lab only. In a Real World production environment, the IAM administrator can grant access based on the requirements.
Assigning Custom IAM Roles
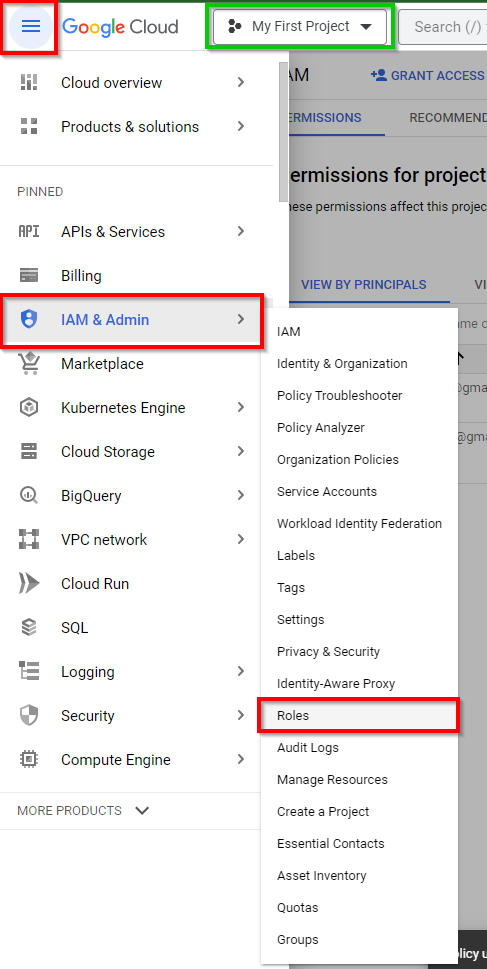
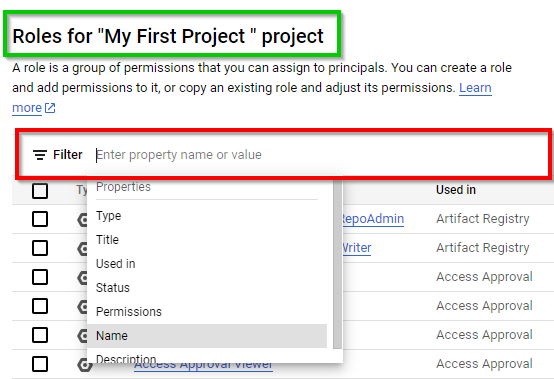
Navigate to IAM & Admin and select Roles in the console.
Click on Filter and filter by name to select the appropriate role.
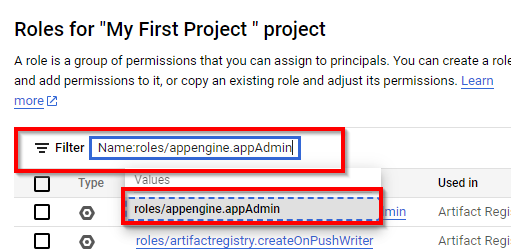
Now, type of role: ”roles/appengine.appAdmin” (App Engine Admin) role.
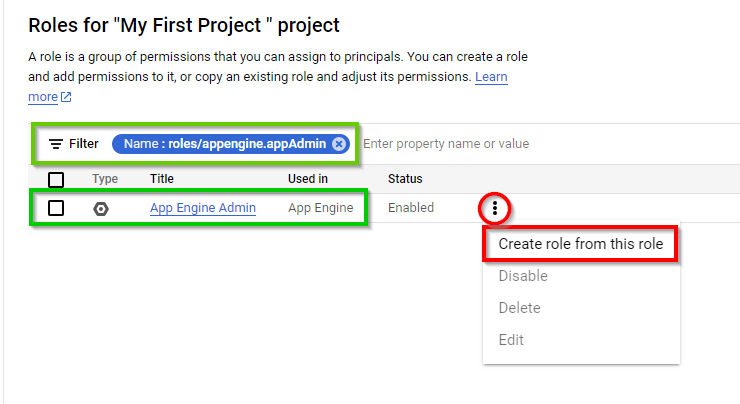
On the App Engine admin page, click on the three dots to the right of the selected role and select Create role from this role.
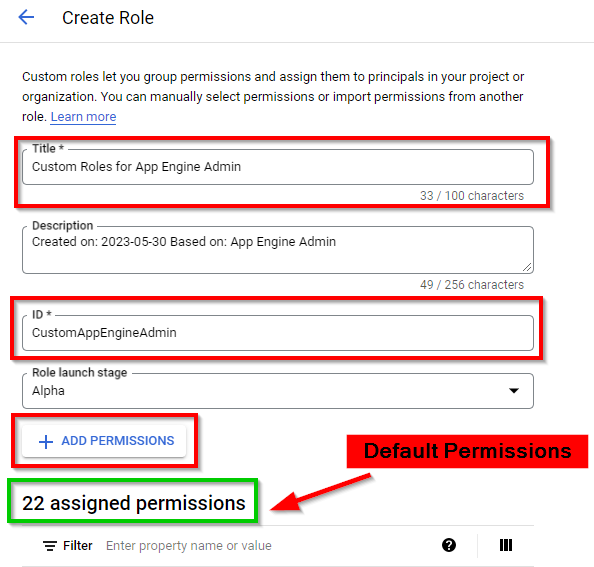
Type the title "Custom Roles for App Engine Admin" and the ID "CustomAppEngineAdmin" for the role. Next, click on ADD PERMISSIONS.
Now, select the following roles (permissions)
→ accessapproval.requests.approve,
→ accessapproval.settings.delete, and
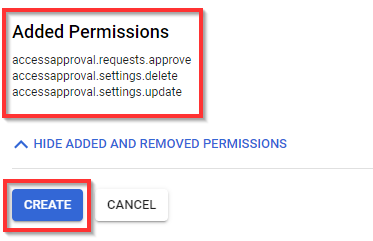
→ accessapproval.settings.update and click ADD.
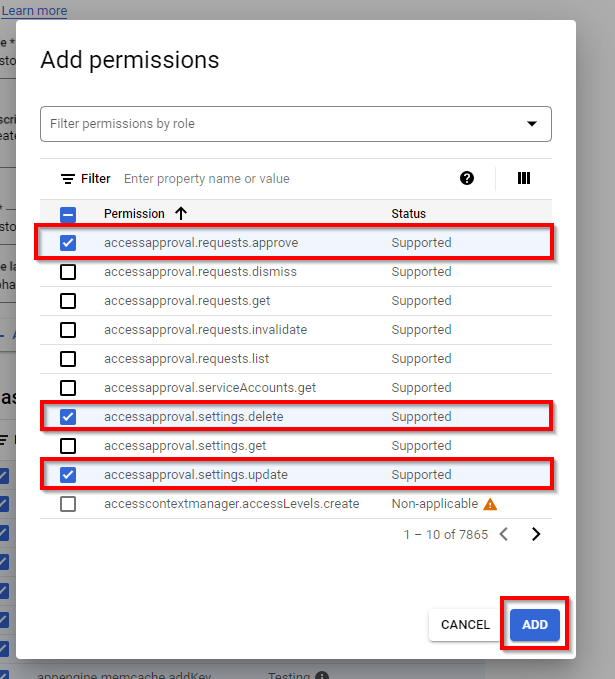
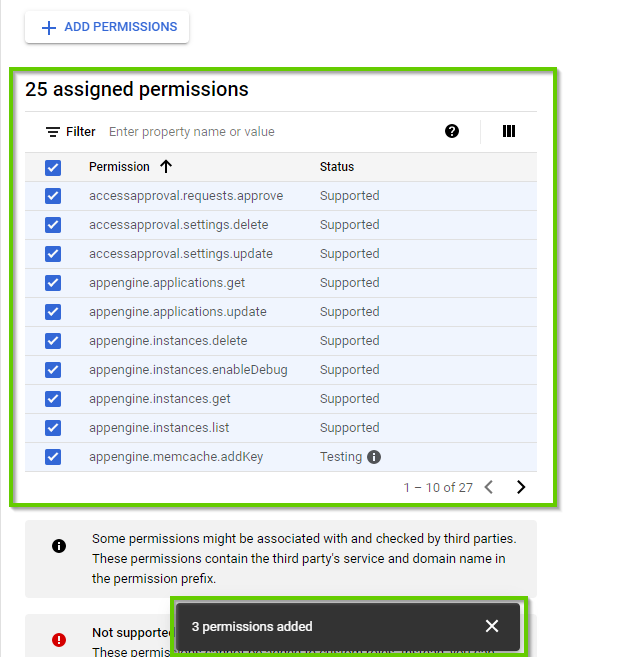
- Scroll down to the bottom to view the added permissions. Click on "Create".
NB: Now 3 customized permissions are added to App Engine Admin
You should have the custom role listed as shown below

ADDING CUSTOM ROLE TO USER (PRINCIPAL)
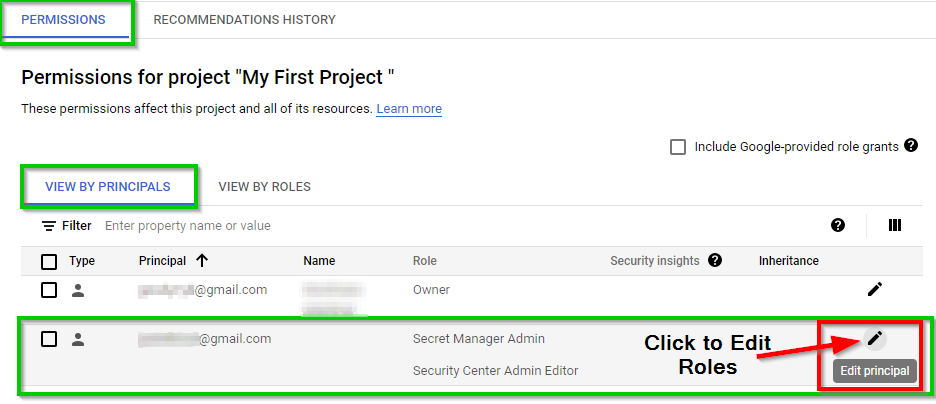
Now, navigate back to IAM & Admin and select IAM in the console. Then click on the edit icon to the right.
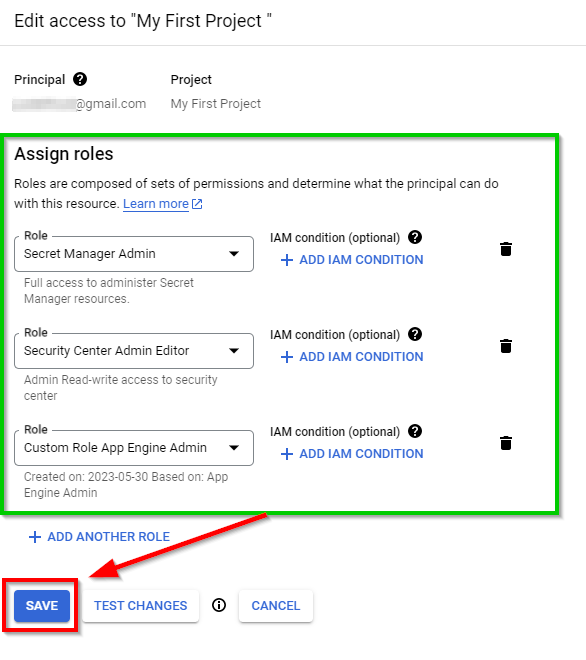
In the Edit access to "My First Project" view, click on ADD ANOTHER ROLE to add the custom role you just created.
Next, click SAVE.

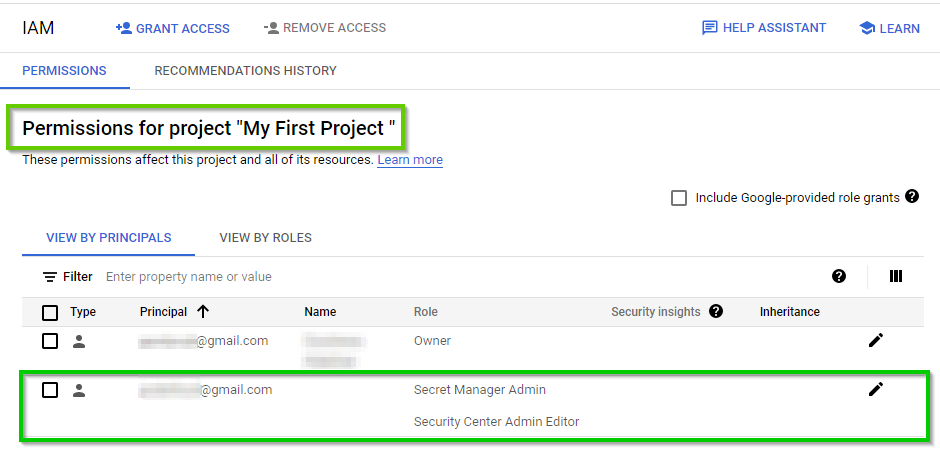
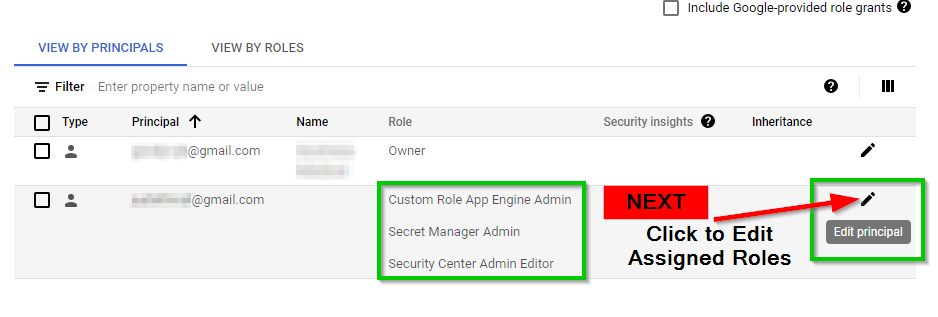
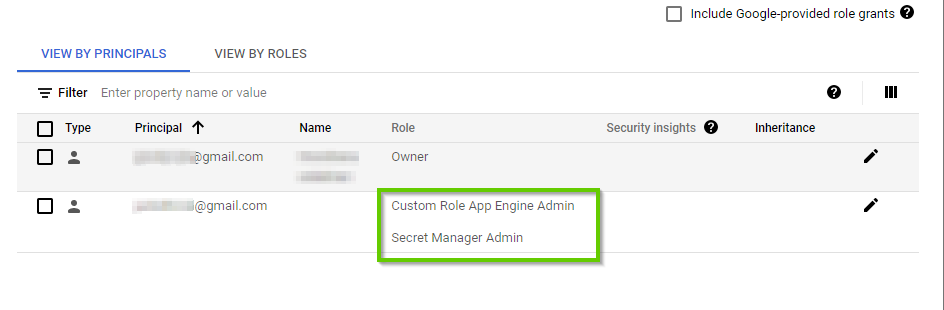
Now in your IAM dashboard, it displays the corresponding granted Role of the user.
Revoking Assigned Roles to the user
Next, we will revoke a certain set of roles for the users. To do this, go to the IAM dashboard (IAM) and click on the Edit icon on the right side of the user ID (As shown above)
- Next, click on the Delete icon on the right side of the particular role to be revoked. Click SAVE.
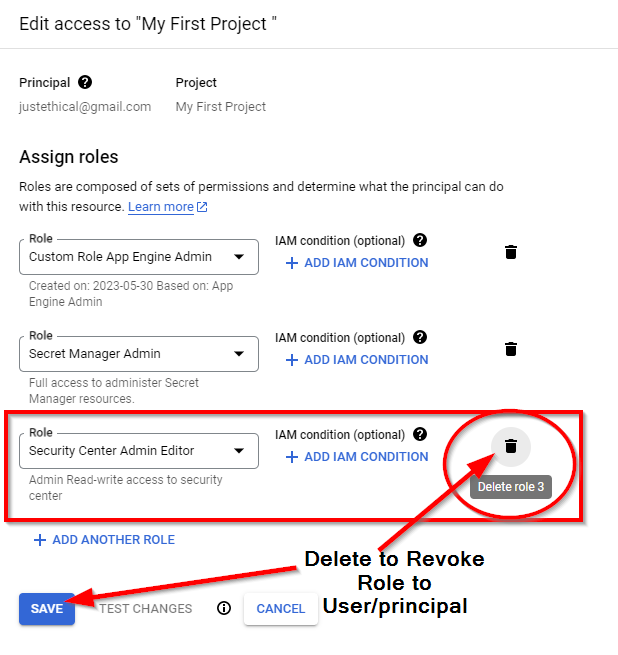
The roles corresponding to the user has been revoked.
This implementation of GCP IAM grants users access to cloud resources based on their roles and tasks to be done. This is known as the principle of least privilege.
Deleting Resources
Note: Ensure you delete, shut down, or terminate all the resources created and used in this lab to prevent billing on your GCP account.
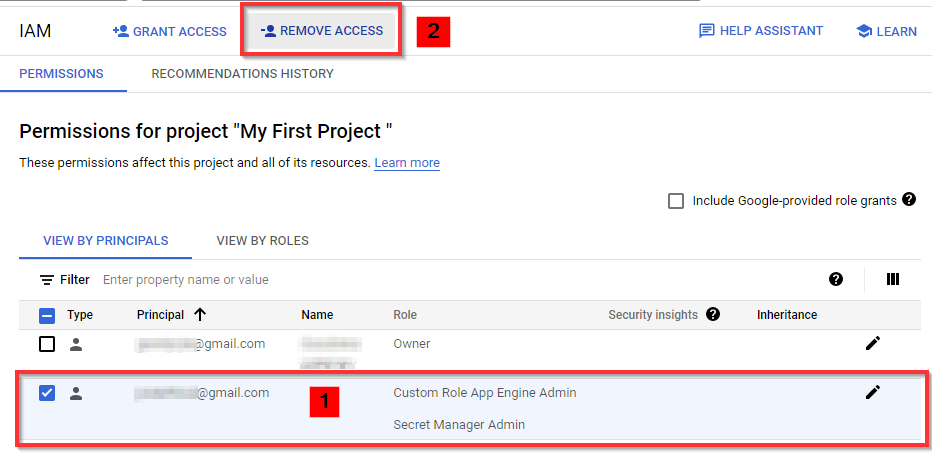
Now, to delete the user you have created, select the checkbox for the user in the IAM window and click on REMOVE ACCESS at the top, as shown in the screenshot below.
To delete the custom role you have created for the user, navigate to Roles in the left pane of the IAM & Admin view. Click on the three dots on the right-hand side, then click on Delete.
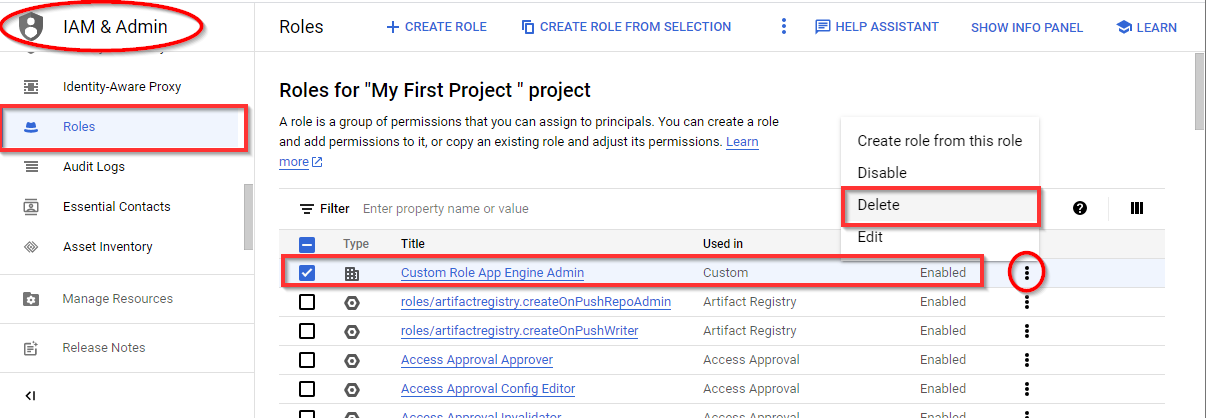
NOTE: The custom role will be marked as deleted and deleted permanently after 7 to 14 days.


