Implementing a Private, Secure Connection Between Instances with VPC Network Peering

Overview of VPC Network Peering
When virtual machine (VM) instances communicate with each other over the Internet, whether they are within the same project or different projects, it can introduce security risks in a cloud environment. To mitigate these vulnerabilities, virtual private cloud (VPC) networks in the cloud are designed as global resources. They utilize routes and firewall rules to enable communication between resources using internal IPv4 addresses.
In Google Cloud, VPC network peering establishes connectivity between two separate VPC networks. This connectivity allows workloads within these networks to communicate with each other using their internal IP addresses. VPC network peering enables secure and controlled communication between different VPC networks, ensuring that workloads can interact with each other while maintaining the desired level of security. Also, VPC network peering offers a lower latency because it uses internal IP addresses for connectivity
Lab Objective
This lab demonstrates how to implement a secure private connection between two VPC networks in different projects.
If you are logging into the GCP console for the first time, I recommend you check out my previous Blog Post on GCP IAM Roles implementation.
Disclaimer
The Google Cloud console is subject to updates and changes over time. The information provided in this lab write-up is based on the console’s state at the time of writing and may not reflect the current user interface or functionality. It is recommended to refer to the official GCP documentation for the most up-to-date instructions when using the Google Cloud console.
Let’s dive in.🚀
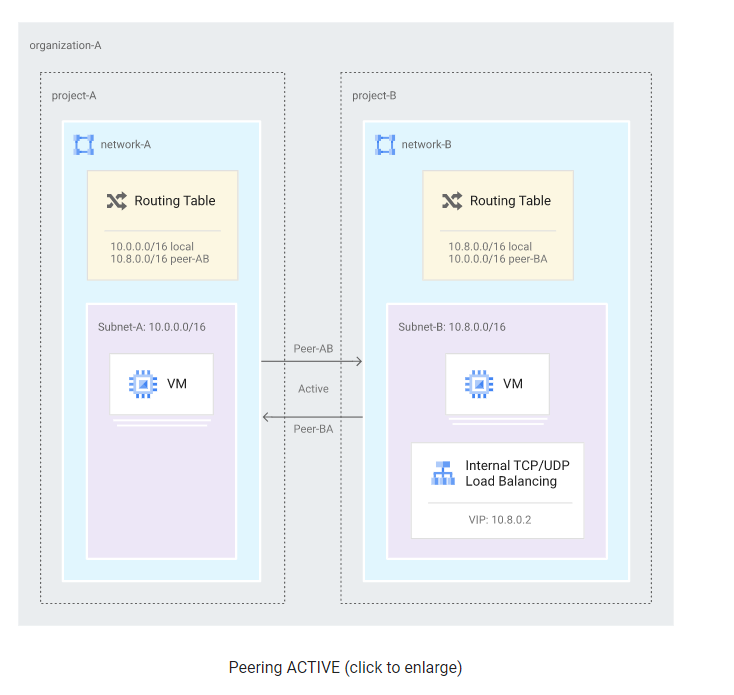
Source: Google Guide to VPC Peering
Project A: This will be the project where the source instances are located.
Project B: This will be the project where the destination instances are located.
Remember to configure the necessary firewall rules, ensure the proper network peering connection, and use the internal IP addresses of the instances for communication.
Creating Projects A & B
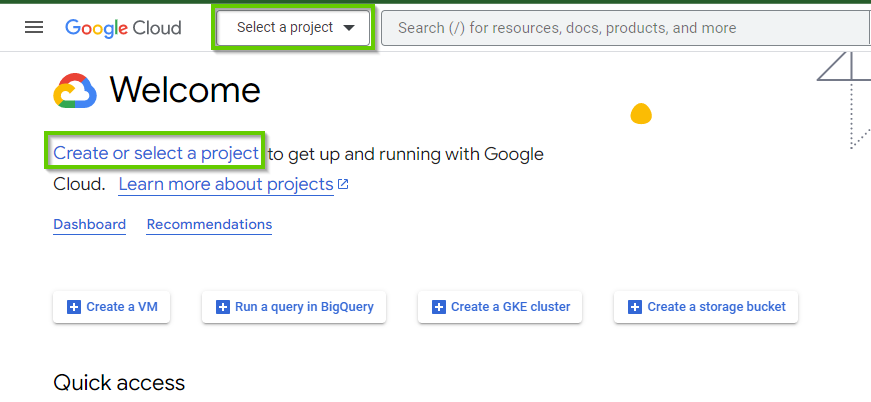
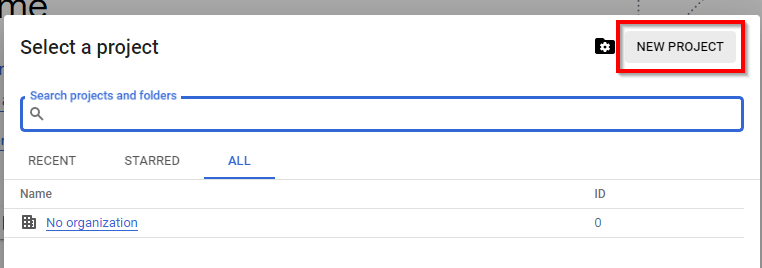
Click on “Create or Select a Project” or “Select a Project” at the top. in the pop-up window, click on “NEW PROJECT”
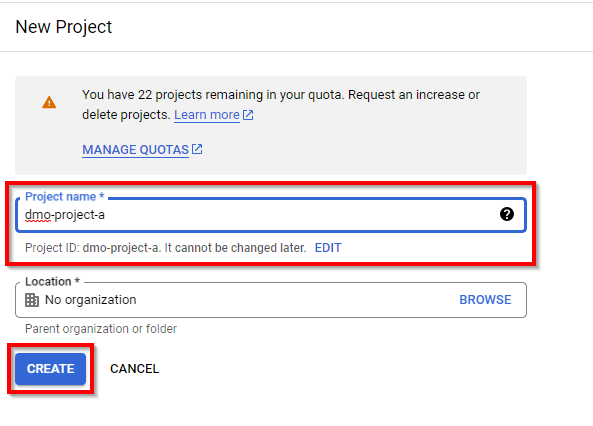
Give the first project name “dmo-project-a” or any name of your choice, and once done, click on CREATE.
Now we do the same step to create the second Project.
- Give the Second project Name: “dmo-project-b” or any name of your choice and then, click on CREATE.
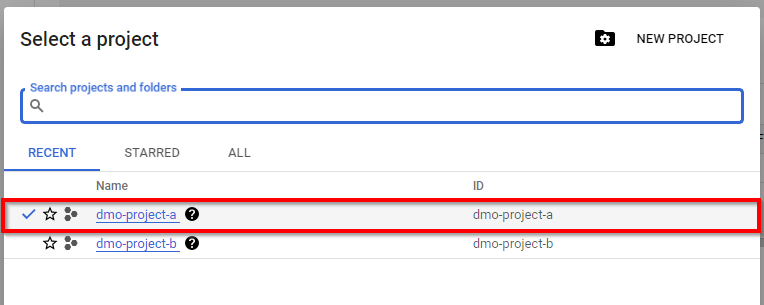
ONCE DONE, click on “Select a project” at the top again to verify whether the new project was created.
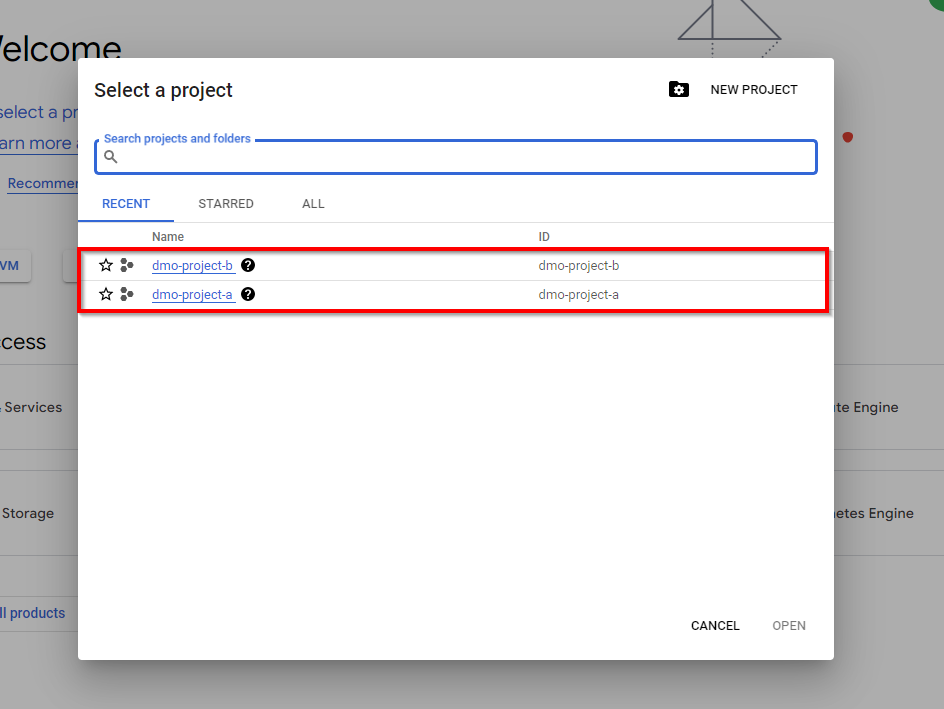
Now, we have successfully created the First and Second Projects.
Note the project IDs of both projects for future reference.
Creating VPCs in the Projects
Creating VPC Network in the First Project And Firewall rule to Enable SSH Connection
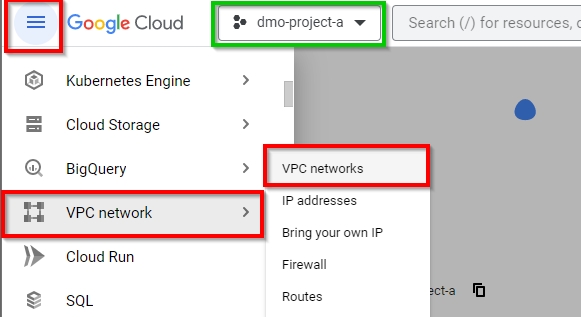
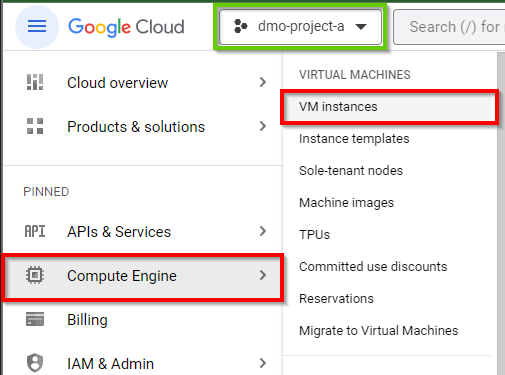
Make sure that you are in the first project. (dmo-project-a)
navigate to the VPC network and select VPC networks in the console.
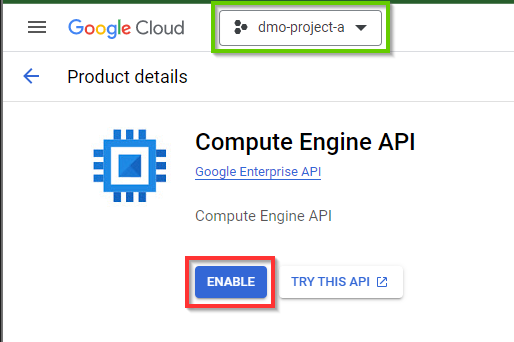
Click “Enable” to activate Compute Engine API
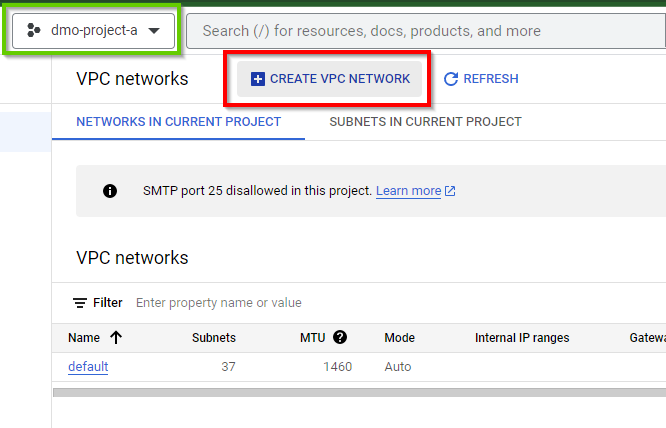
In the VPC networks console, click on CREATE VPC NETWORK at the top.
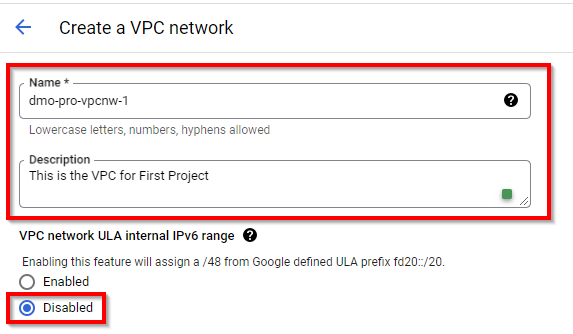
Type an appropriate Name of your choice for the first VPC network. In this lab, our VPC network is named dmo-pro-vpcnw-1. For Description, it is (optional)
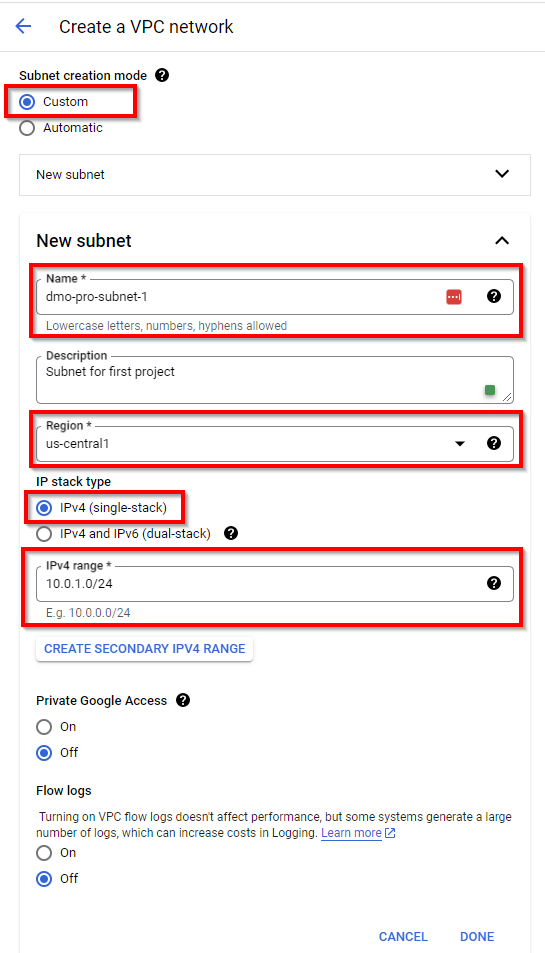
Scroll down under Subnet creation mode, and select Custom. Click on “ADD SUBNET” and provide the appropriate name, region, and IP range for the subnet. In this lab, we have created the subnet with the following details:
Name: dmo-pro-subnet-1
Description (optional): Subnet for the first project
Region: us-central1
IP address range: 10.0.1.0/24
Retain all other default settings and click DONE
Scroll down, retain the other default settings, and click on CREATE.

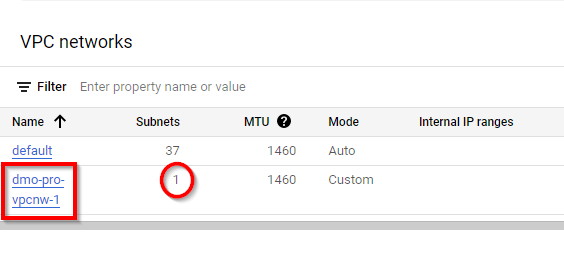
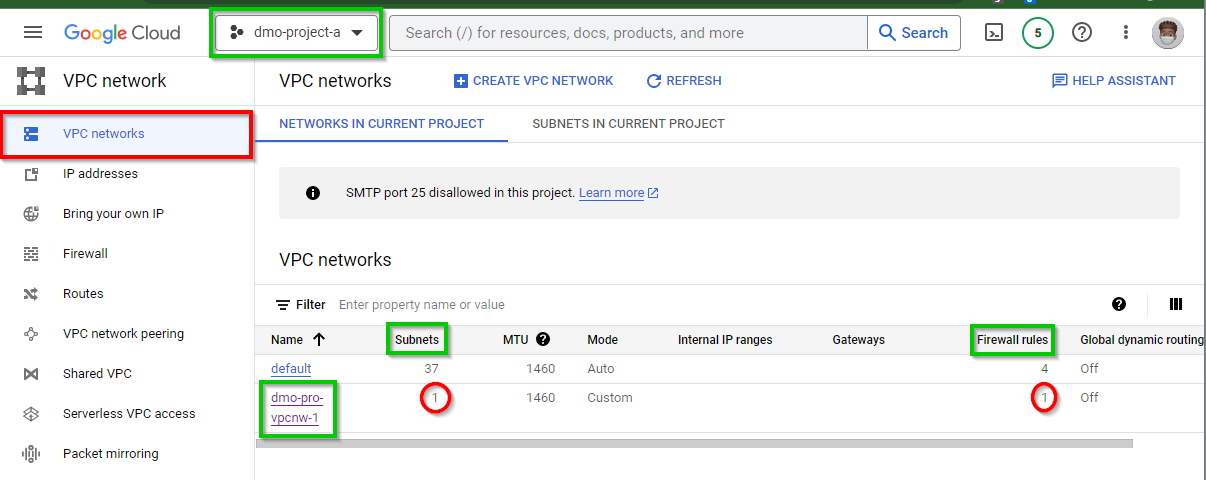
On the VPC networks page, verify that the VPC network is successfully created for the First Project.
Creating a Firewall Rule for the VPC instance to Allow SSH connections on First Project.
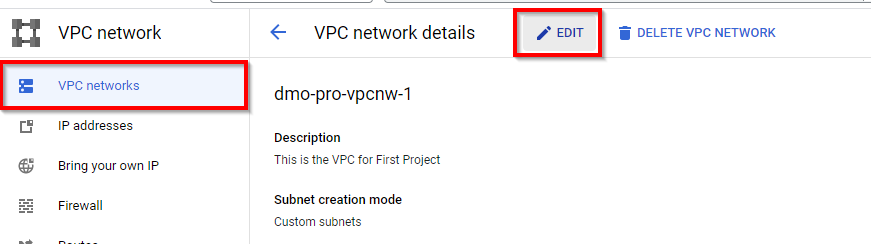
In the VPC network console, click on the VPC network that was just created (dmo-pro-vpcnw-1), {As shown in the previous image} Then in the “VPC network details” window, click on Edit at the top.
Next, scroll down to the bottom and click on FIREWALLS. Then Click on ADD FIREWALL RULE.
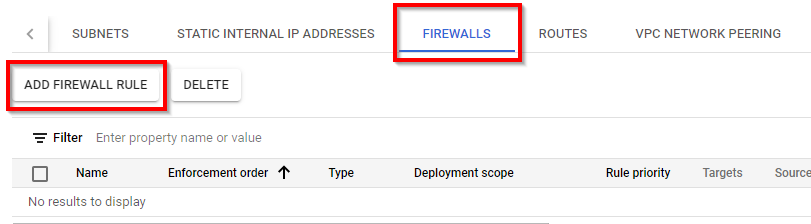
On the Create Firewall Rule page, type the appropriate Name for the firewall rule. Here, we have named the firewall rule "dmo-pro-fwssh-1”. Description (optional).
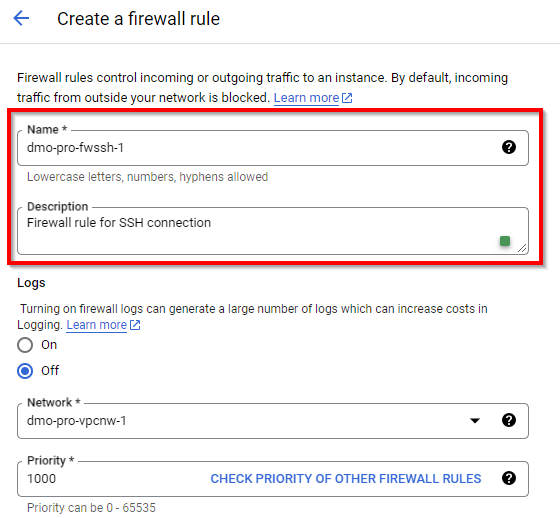
Retain default settings for logs, Network and priority. Then, scroll down to the bottom and select Ingress for the direction of traffic and Allow for Action on the match. For targets, select all instances in the network, and specify source IPv4 ranges as 0.0.0.0/0.
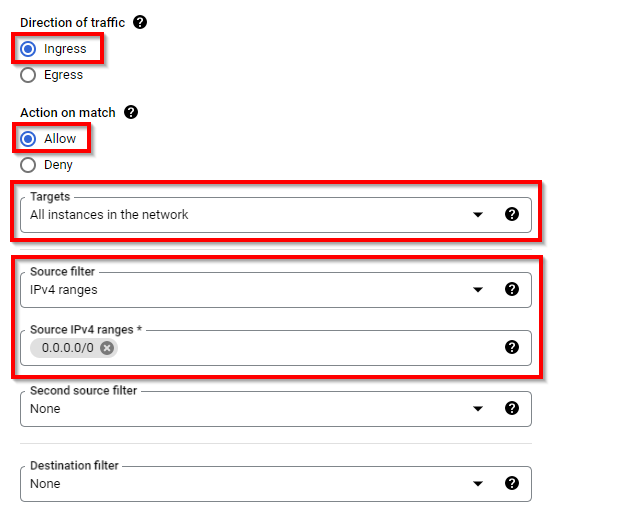
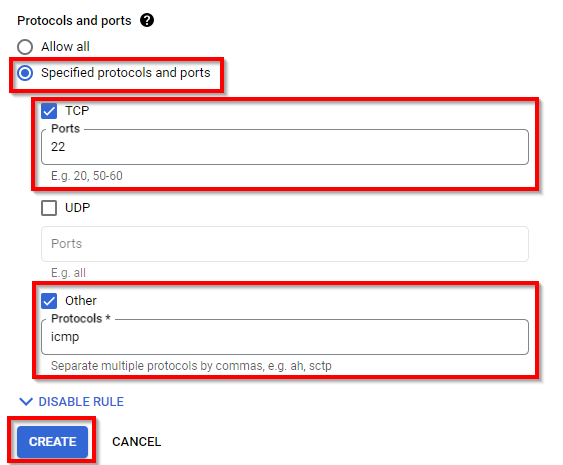
For protocols and ports, select Specified Protocols and Ports. Select TCP and enter port 22 to allow SSH connections. Select Other Protocols and enter ICMP. Finally, click on CREATE.
Now, we have the firewall rule assigned to the VPC network for First Project
Similarly, create a VPC network for the second project by repeating the same steps as in the first project. Switch the project by selecting the Project name on the top of the console.
Note: For configuring the second project, a new Google Chrome tab to the right is recommended

Creating a VPC network in the second project and a firewall rule to enable SSH connections
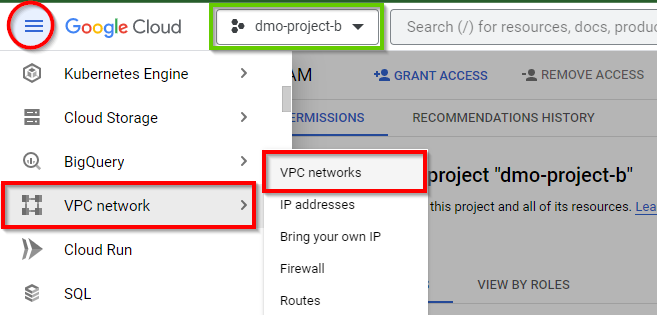
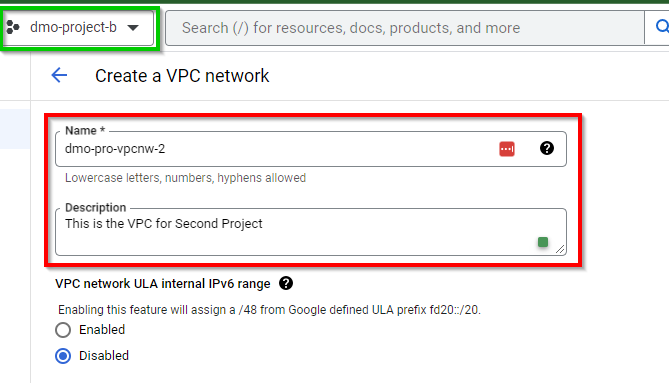
Make sure that you are in the second project. (dmo-project-b)
Navigate to the VPC network and select VPC networks in the console.
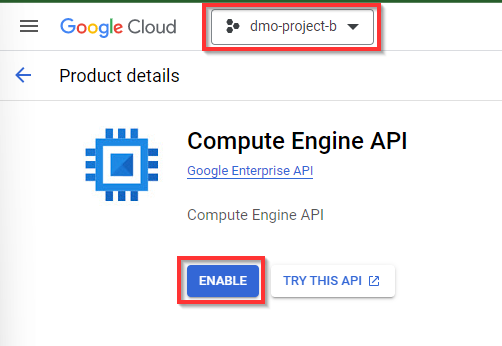
Click “Enable” to activate Compute Engine API
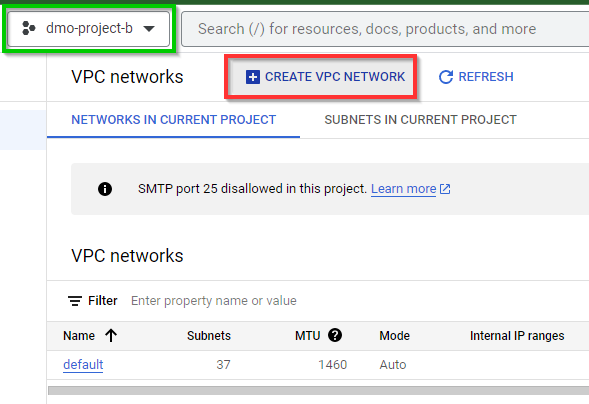
In the VPC networks console, click on CREATE VPC NETWORK at the top.
Type an appropriate Name of your choice for the first VPC network. In this lab, our VPC network is named dmo-pro-vpcnw-2. For Description, it is (optional)
Scroll down under Subnet creation mode, and select Custom. Click on “ADD SUBNET” and provide the appropriate name, region, and IP range for the subnet. In this lab, we have created a subnet with the following details:
Name: dmo-pro-subnet-2
Description (optional): Subnet for the second project
Region: us-central1
IP address range: 10.0.2.0/24
Retain all other default settings and click DONE
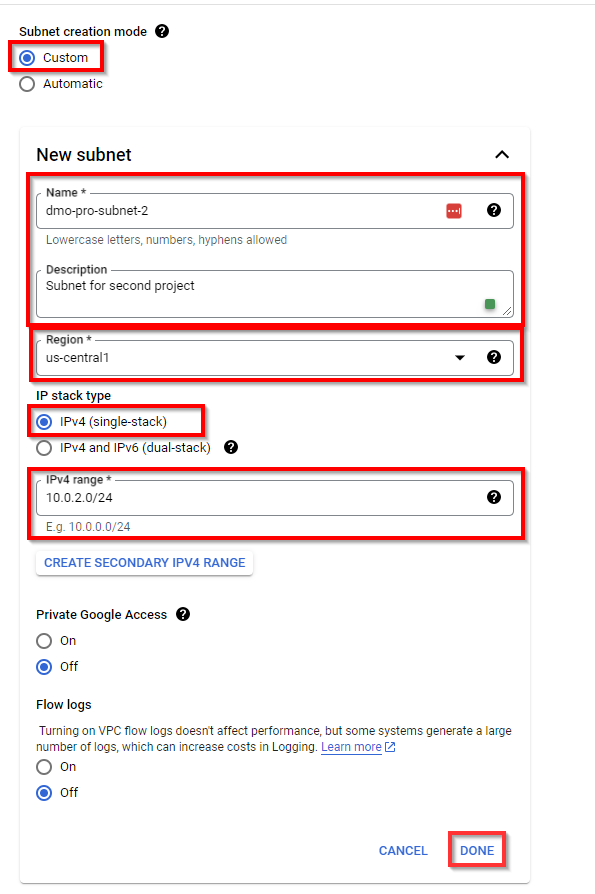
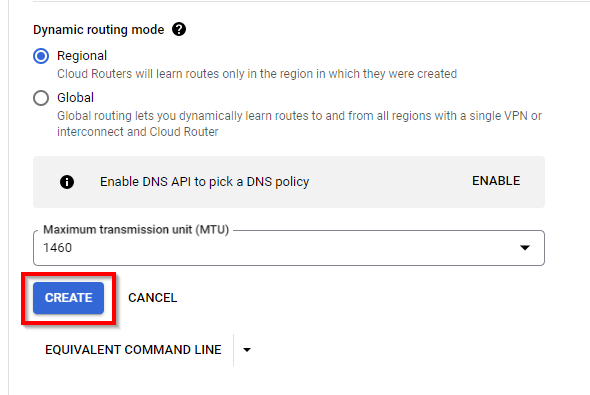
Scroll down, retain the other default settings, and click on CREATE.
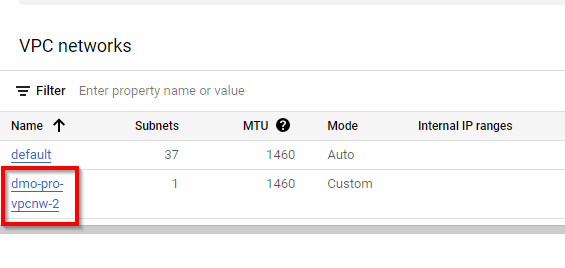
On the VPC networks page, verify that the VPC network has been successfully created for the first project.
Creating a Firewall Rule for the VPC instance to Allow SSH connection on Second Project.
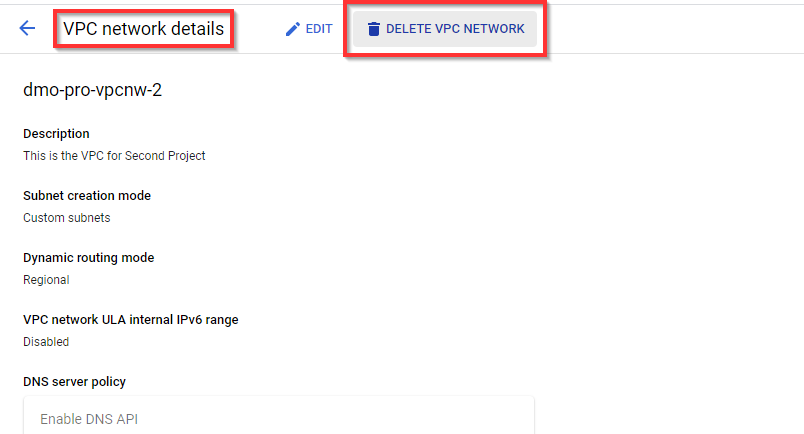
In the VPC network console, click on the VPC network that was just created (dmo-pro-vpcnw-2) as shown in the previous image}. Then, in the “VPC network details” window, click on Edit at the top.
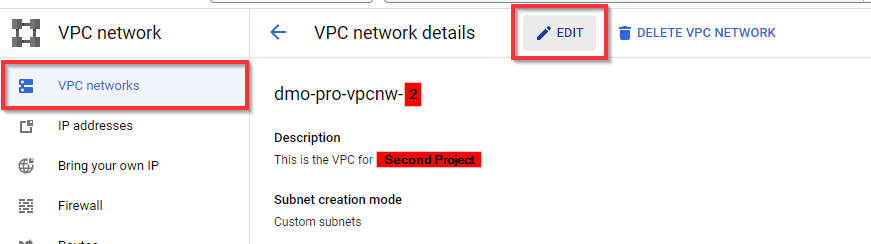
Next, scroll down to the bottom and click on FIREWALLS. Then Click on ADD FIREWALL RULE.

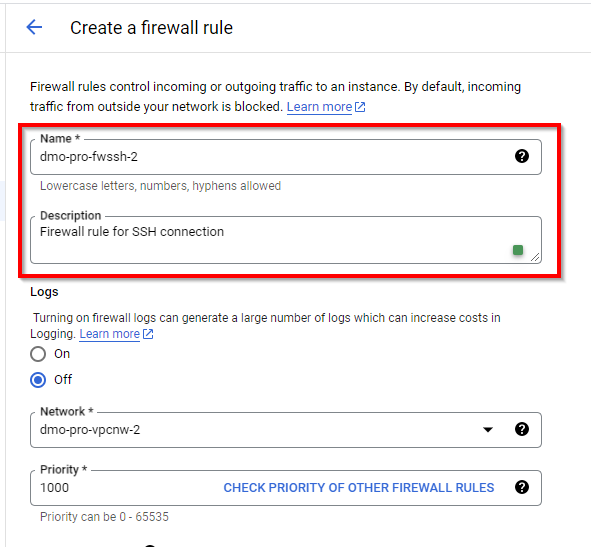
On the Create Firewall Rule page, type the appropriate Name for the firewall rule. Here, we have named the firewall rule ”dmo-pro-fwssh-2”. Description (optional). Retain default settings for logs, network, and priority.
Scroll down to the bottom and select Ingress for Direction of traffic and Allow for Action on the match. For Targets, select All instances in the network, and specify Source IPv4 range ranges as 0.0.0.0/0.
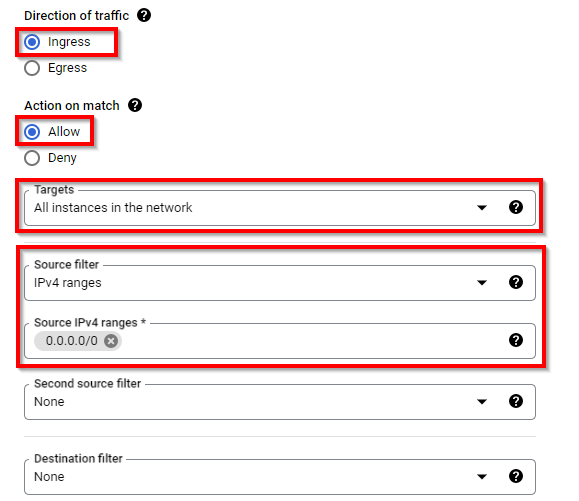
For Protocols and ports, select Specified Protocols and Ports. Select TCP and enter port 22 to allow SSH connections. Select Other Protocols and enter icmp. Finally, click on CREATE.

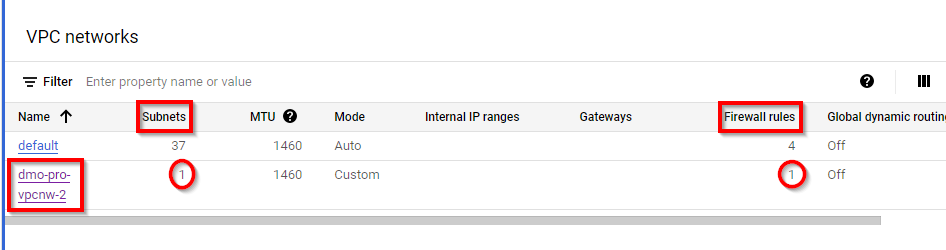
Now, we have the firewall rule assigned to the VPC network for Second Project
Creating VM instances in both projects and configuring the VPC networks for communication
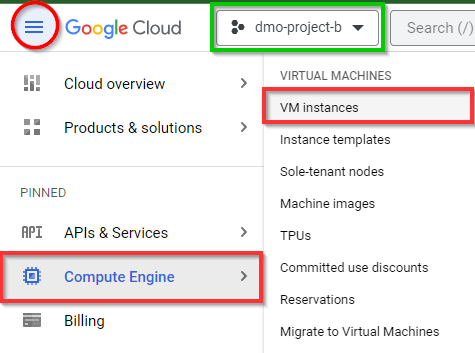
Switch to the first project.
Navigate to Compute Engine and select VM Instances in the console.
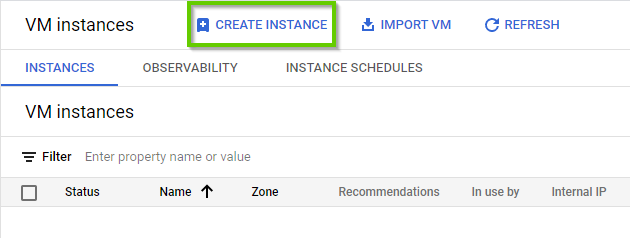
In the VM instance console, click on CREATE INSTANCE at the top

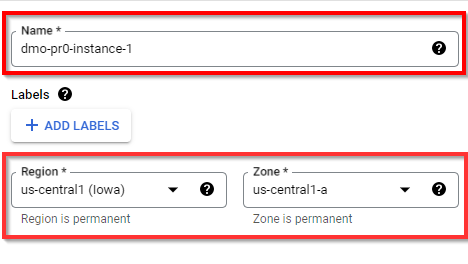
Provide appropriate details of your choice for the new instance. In this lab, we are creating an instance with the following details:
Name: dmo-pr0-instance-1
Region: us-central1 (lowa)
Zone: us-central1-a
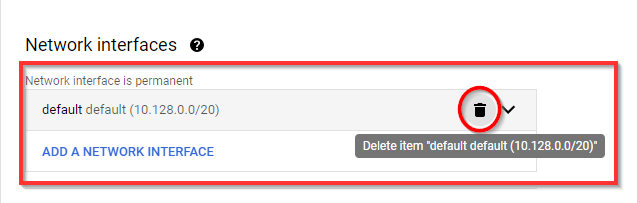
Scroll down to the bottom Expand “Advanced options” and click on Networking to expand it. Scroll down to the “Network interfaces” Section, DELETE the Default Network INTERFACE, and click on ADD NETWORK INTERFACE to Add your Network interface.
Select (dmo-pro-vpcnw-1) from the drop-down menu
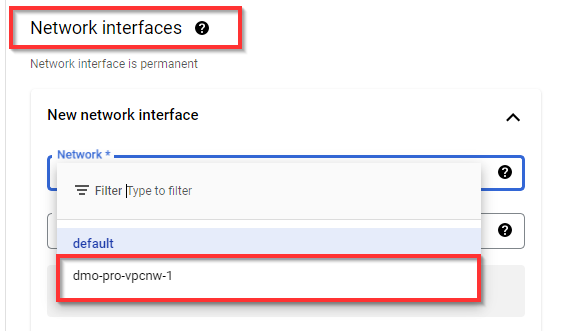
NB: you might have a different VPC created so make sure you select the created VPC for the first project (dmo-pro-vpcnw-1).
Retain the other default settings and click on Done.
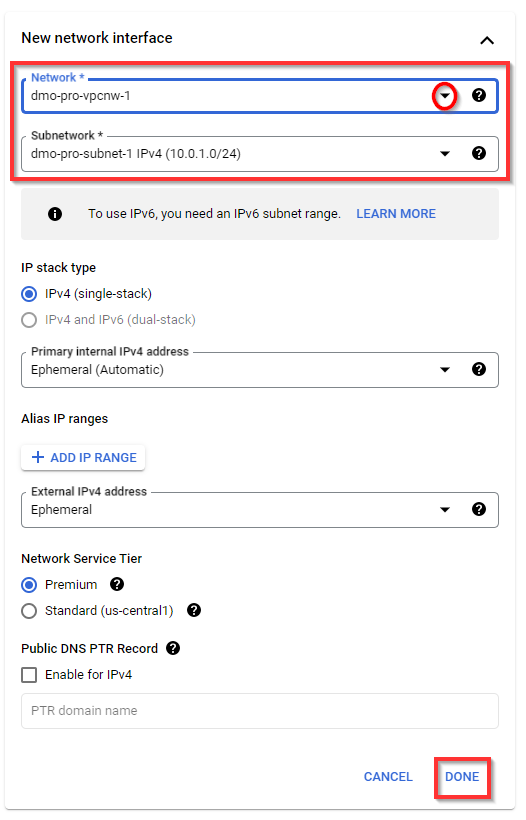
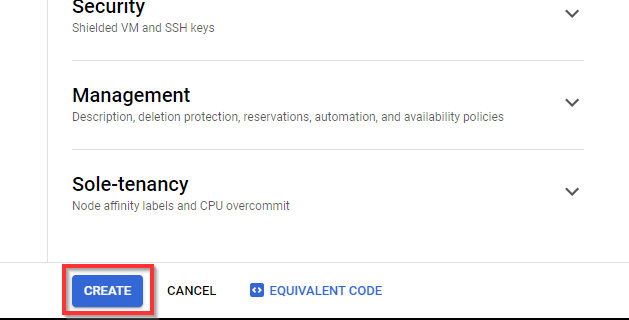
Scroll down and click on Create to finish creating the new instance with the configured VPC network.

Note the Internal IP of the instance for future reference

Now, switch to the second project. (dmo-project-b)
- Navigate to Compute Engine and select VM Instances.
In the VM instance console, click on CREATE INSTANCE at the top
Provide appropriate details of your choice for the new instance. In this lab, we are creating an instance with the following details:
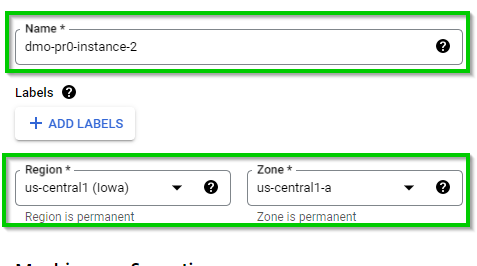
Name: dmo-pr0-instance-2
Region: us-central1 (lowa)
Zone: us-central1-a
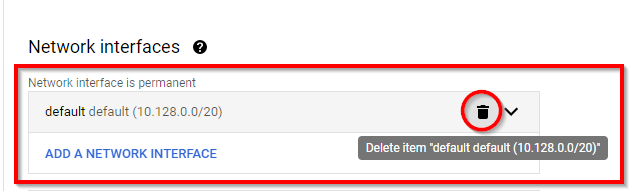
Scroll down to the bottom Expand “Advanced options” and click on Networking to expand it. Scroll down to the “Network interfaces” Section, DELETE the Default Network INTERFACE, and click on ADD NETWORK INTERFACE to Add your Network interface.
Select (dmo-pro-vpcnw-2) from the drop-down menu
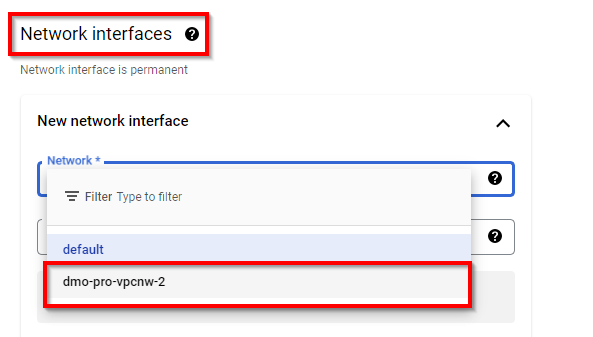
NB: you might have a different VPC created so make sure you select the created VPC for the first project (dmo-pro-vpcnw-2).
Retain the other default settings and click on Done.
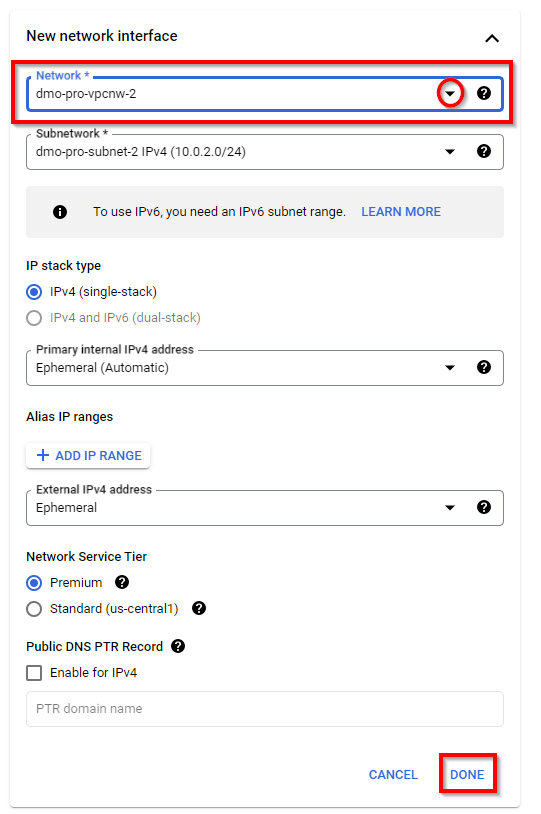
Scroll down and click on Create to finish creating the new instance with the configured VPC network.
Note the Internal IP of the instance for future reference

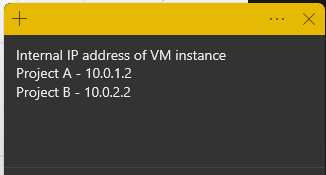
NOTE: Write out the Project ID, and VPC network name for both Projects on a Note pad or sticky note; you mustn’t make mistake in the next Configuration
Verifying SSH connectivity between VM instances in different Projects.
Now, switch to the first project. Navigate to Compute Engine and select VM Instances. Then, navigate to the right of the VM instance and click on SSH under Connect.
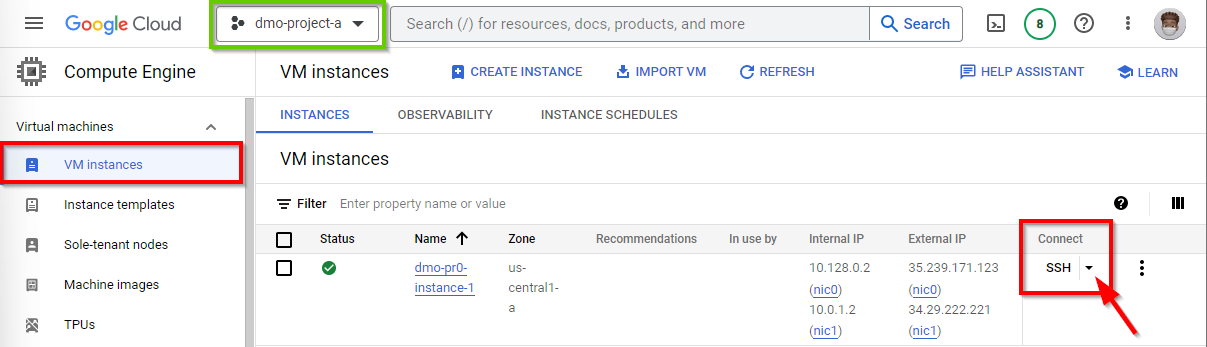
In the SSH-in-browser type: ping < internal IP address>
NB: (replace < internal IP address> with the internal IP address of the second project instance).
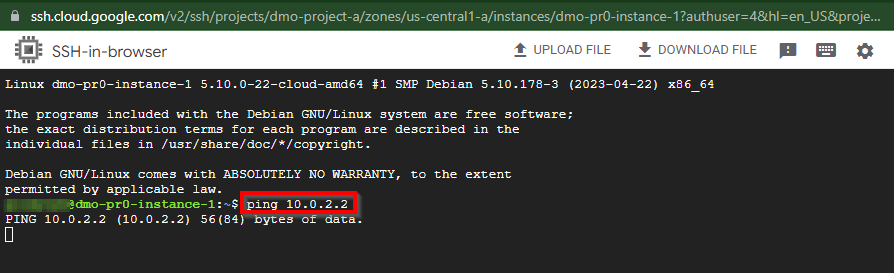
NB: There is no ping reply, as seen in the screenshot below, which indicates no connection has been established between the instances.
Enabling VPC Peering between the instances to establish a secure connection between them.
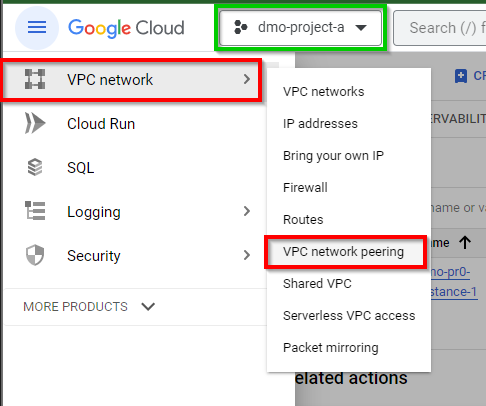
Make sure you are still on the first project (dmo-project-a)
navigate to the VPC network and select VPC network peering
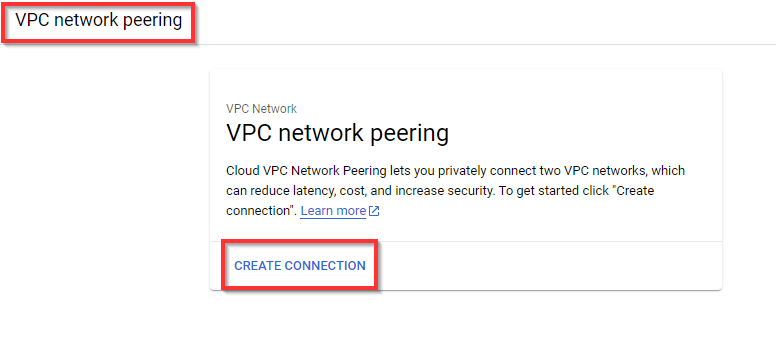
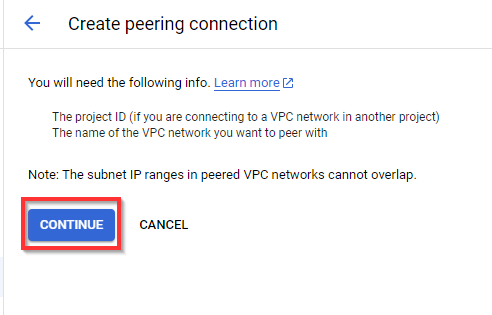
Click on CREATE CONNECTION and then CONTINUE
In the Create Peering Connection window, provide the appropriate details of your choice for the peering connection. In this lab, we have used the following details:
Name: dmo-pro-inst-1-to-2
Your VPC network: dmo-pro-vpcnw-1
Peered VPC Network: In another project
Here, you provide the Details for the Second Project
Project ID: dmo-project-b
VPC network name: dmo-pro-vpcnw-2
Note: Replace [project_ID] with the project ID of the second project.
Retain the other default settings and click on CREATE.
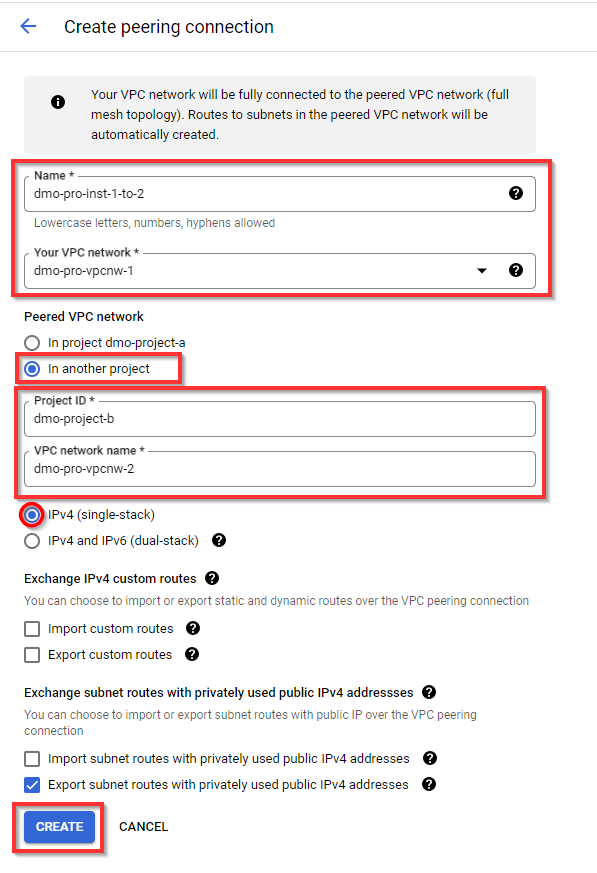
VPC network peering for the first project instance has been created successfully.
Note: The status of a VPC becomes active only after configuring the next VPC for the other project.
Next, switch to the second project (dmo-project-b), navigate to the VPC network, and select VPC network peering. Then, Click on CREATE CONNECTION and CONTINUE.
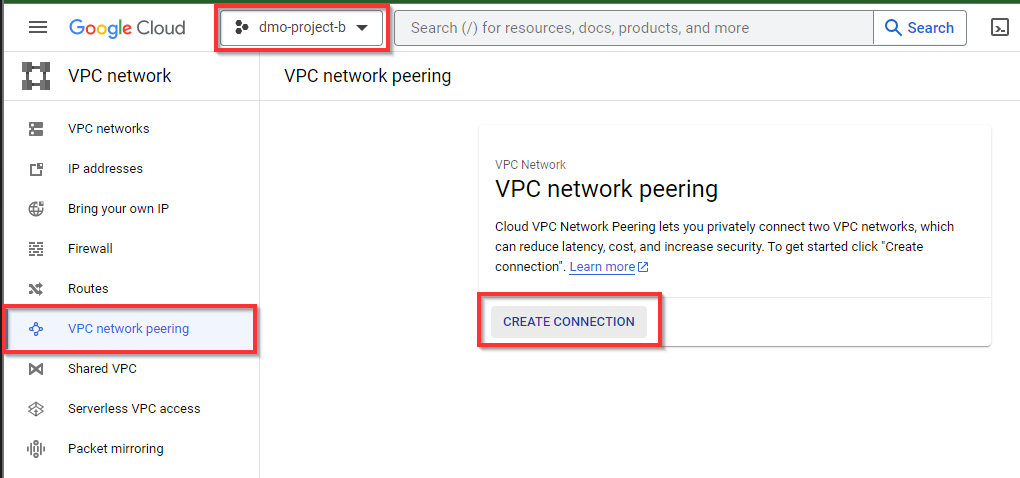

In the Create Peering Connection window, provide the appropriate details of your choice for the peering connection. In this lab, we have used the following details:
Name: dmo-pro-inst-2-to-1
Your VPC network: dmo-pro-vpcnw-2
Peered VPC Network: In another project
Here, you provide the Details for the Second Project
Project ID: dmo-project-a
VPC network name: dmo-pro-vpcnw-1
Note: Replace [project_ID] with the project ID of the second project.
Retain the other default settings and click on CREATE.
The VPC network peering is now activated, and the status is Active for both Projects.


- Now, go back to the SSH shell of the first project’s VM instance in Compute Engine, ping the command given below, and press Enter.
ping < internal IP address> (Replace internal IP with the internal IP of the second project instance) or ssh < internal IP address>
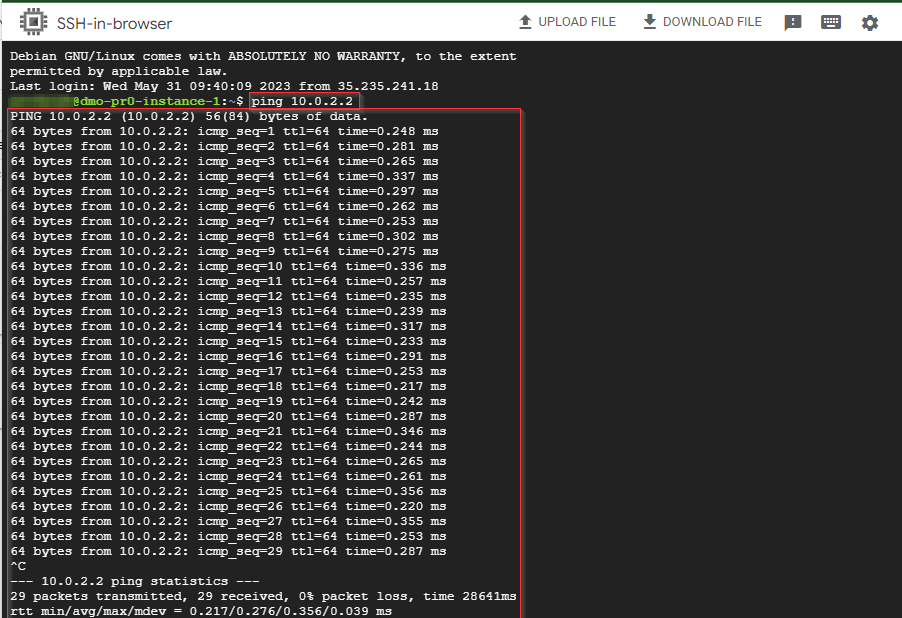
- The connection is successfully established
Press Ctrl + C to stop the ping
SHUTDOWN RESOURCES
Ensure you delete, shut down, or terminate all the resources created and used in this lab to prevent billing your GCP account.
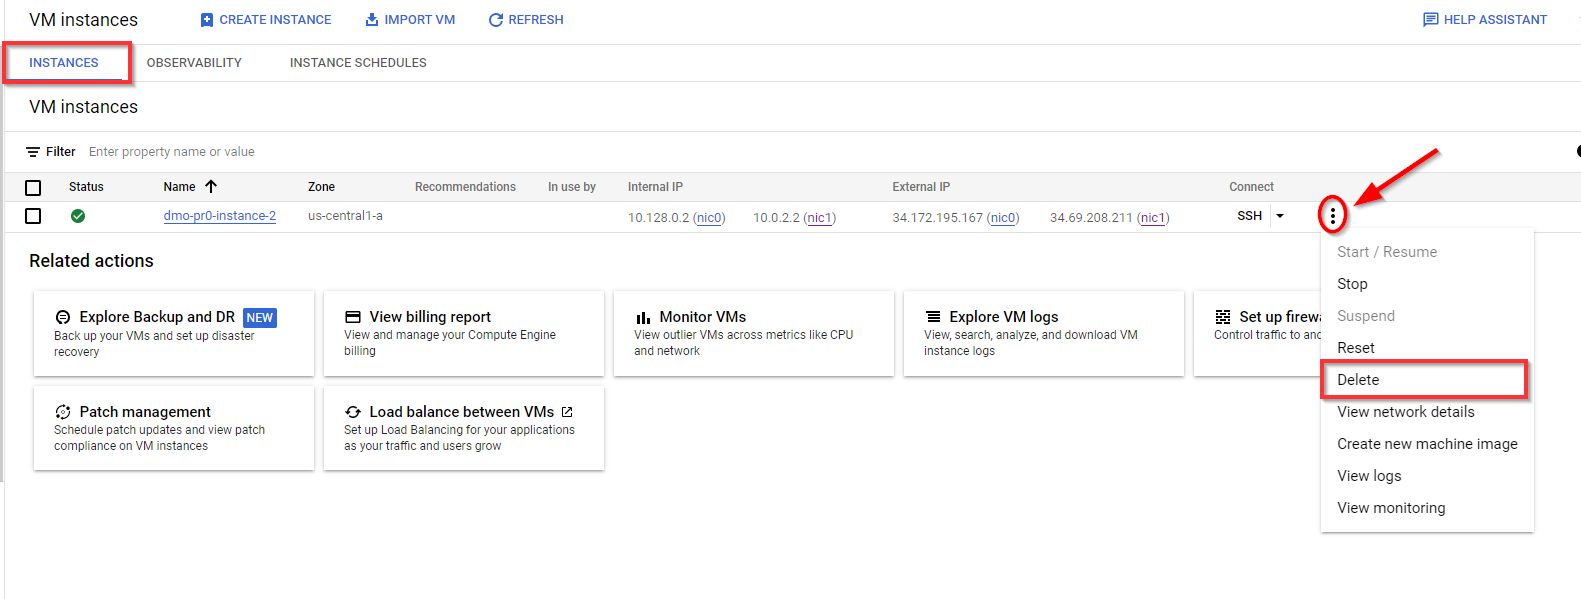
Now, to delete the Compute Engine VM instance that you have created for the first project, navigate to the VM instances section in Compute Engine. Click on the three dots and then on the menu, click on Delete. Repeat the step for deleting the VM instance of the second project. and then, click on DELETE.
Next, delete VPC network peering. Navigate to the VPC network peering section in the VPC network. Click on the three dots for the VPC network peering connection you have created and click on Delete. Repeat the step for deleting the VPC network peering connection of the second project. In the pop-up window, click on DELETE.

Next, to delete the VPC network that you have created for the first project, open the VPC network that you have created and click on DELETE VPC NETWORK at the top. Repeat the step for deleting the VPC network of the second project
Boost your GCP skills
To boost your GCP skills, check out cloudskillsboost and sign up
Thanks for reading 😃|| Happy learning !!✌️
Let’s connect on Linkedin || Twitter


