

Introduction
Amazon Macie is an AWS service specializing in data security, particularly for safeguarding sensitive information. It automatically detects such data in S3 buckets, alerting users to potential security risks. Macie is crucial for organizations handling sensitive personal data, like employee bank details. The service uses machine learning and pattern matching to monitor S3 buckets, highlighting security concerns like unencrypted or publicly accessible data. This capability is vital for cloud security engineers tasked with ensuring the confidentiality and integrity of stored information. Macie's detailed reports on data exposure risks enhance an organization's data protection strategies. Amazon Macie's findings include details such as encryption status, public accessibility, and sensitive data type.
Lab Objective
In this lab, you will learn how to create a publicly accessible S3 bucket, upload a dummy bank account data to it, and then use Amazon Macie to identify sensitive data within the file. This process will be guided step-by-step, demonstrating the crucial role of Amazon Macie in detecting and protecting sensitive information stored in AWS.
Disclaimer
Please note that the AWS management console is subject to change over time. While the instructions provided are accurate at the time of writing, there may be updates or modifications to the console's interface or functionality. It is advisable to refer to the official AWS documentation for the most up-to-date and accurate information regarding the AWS management console.
Lab Tasks
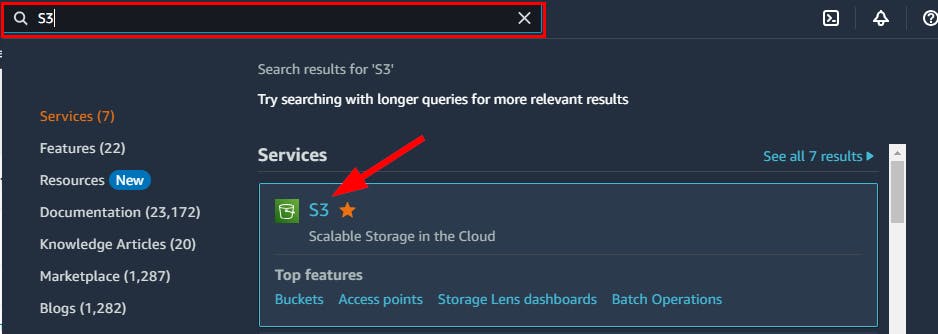
- Sign in to your AWS Management Console and navigate to Amazon S3 service by searching from the Search bar.
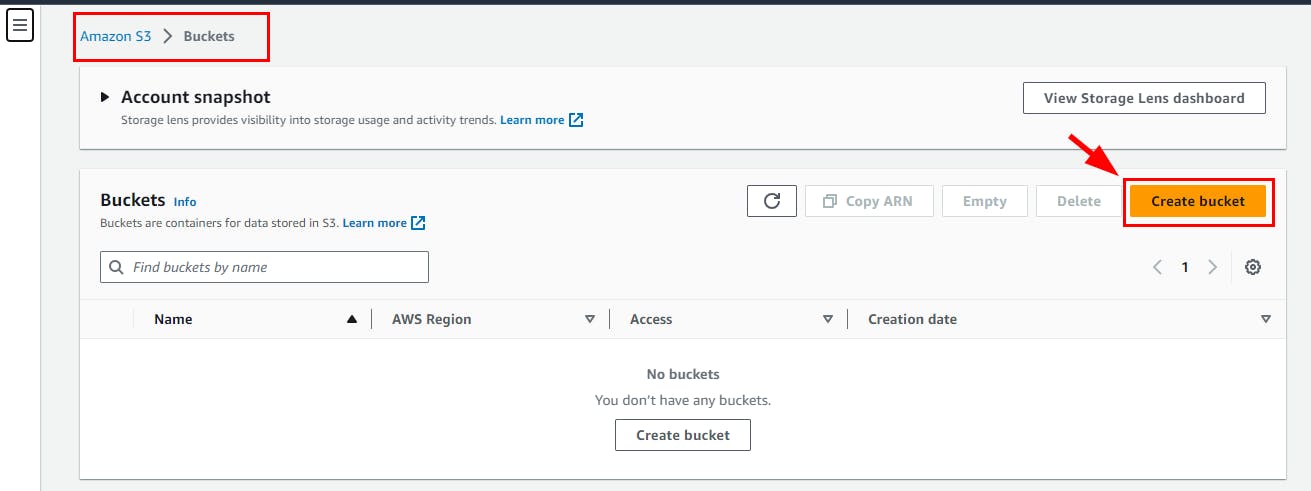
- On the Amazon S3 console page, click on Create Bucket.
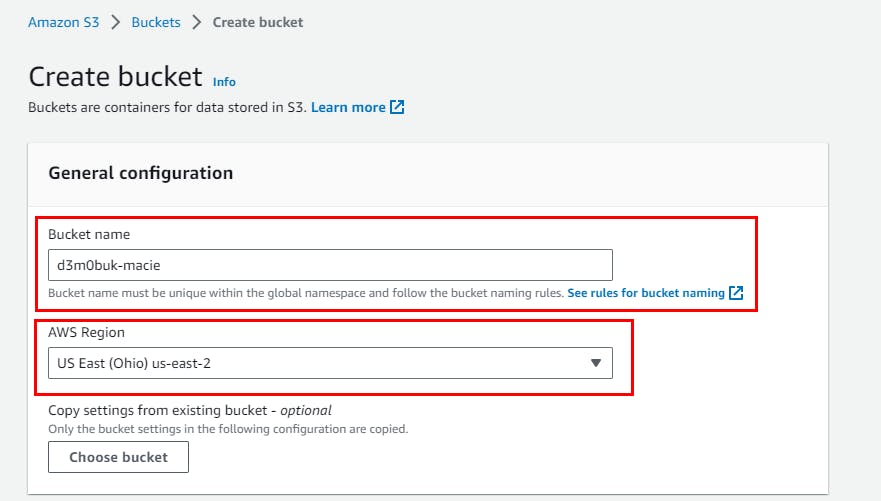
- On the Create bucket Page, give any Bucket name of your choice; (in this lab, we used d3m0buk-macie. Under AWS Region, select us-east-2.
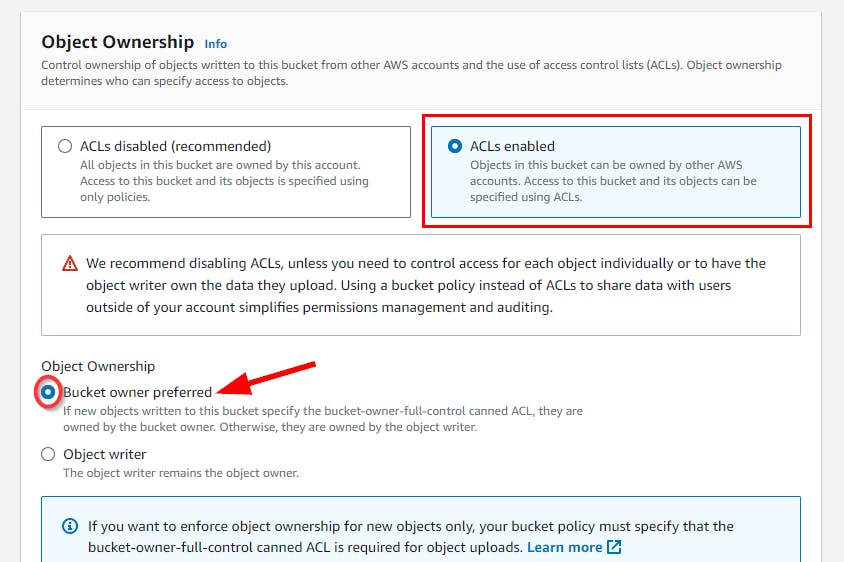
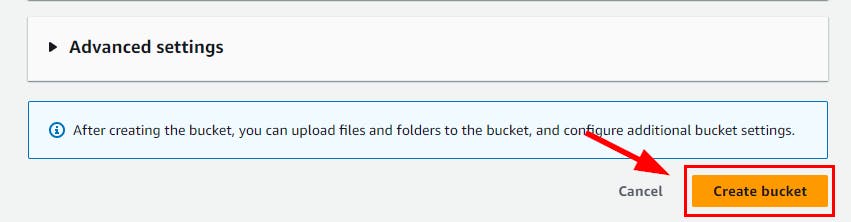
- Scroll down under Object Ownership, and select the ACLs Enabled radio button. Next, scroll down and retain all default settings then click on Create bucket.
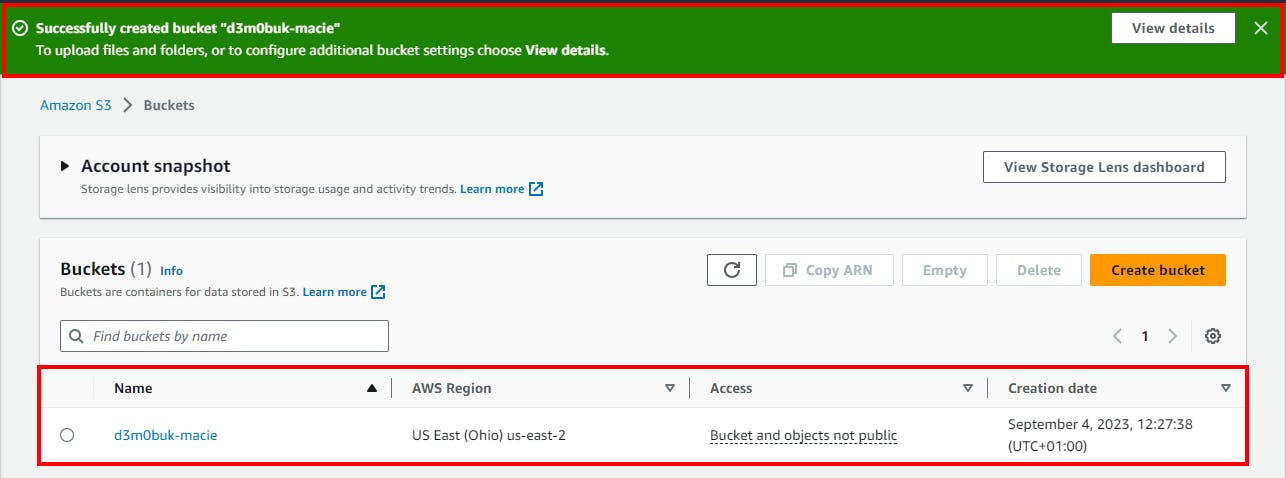
- A message will be displayed at the top of the console stating Successfully created bucket "d3m0buk-macie"
Creating Sensitive files to upload to the S3 bucket
- Create a
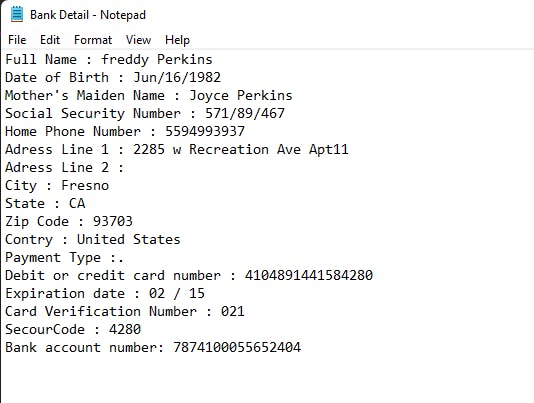
.csvfile using Notepad with sensitive information within it.
you can use the below dummy data
Full Name : freddy Perkins
Date of Birth : Jun/16/1982
Mother's Maiden Name : Joyce Perkins
Social Security Number : 571/89/467
Home Phone Number : 5594993937
Adress Line 1 : 2285 w Recreation Ave Apt11
Adress Line 2 :
City : Fresno
State : CA
Zip Code : 93703
Contry : United States
Payment Type :.
Debit or credit card number : 4104891441584280
Expiration date : 02 / 15
Card Verification Number : 021
SecourCode : 4280
Bank account number: 7874100055652404

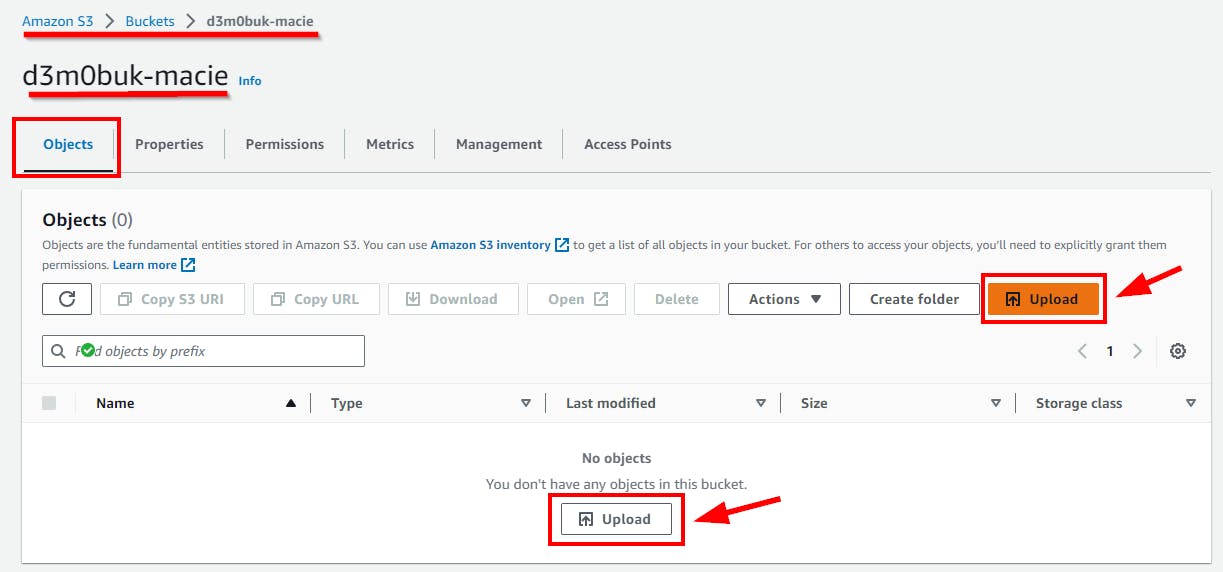
- Now, in the AWS console, click on the name of the S3 bucket (demobucket-macie) to view bucket details.

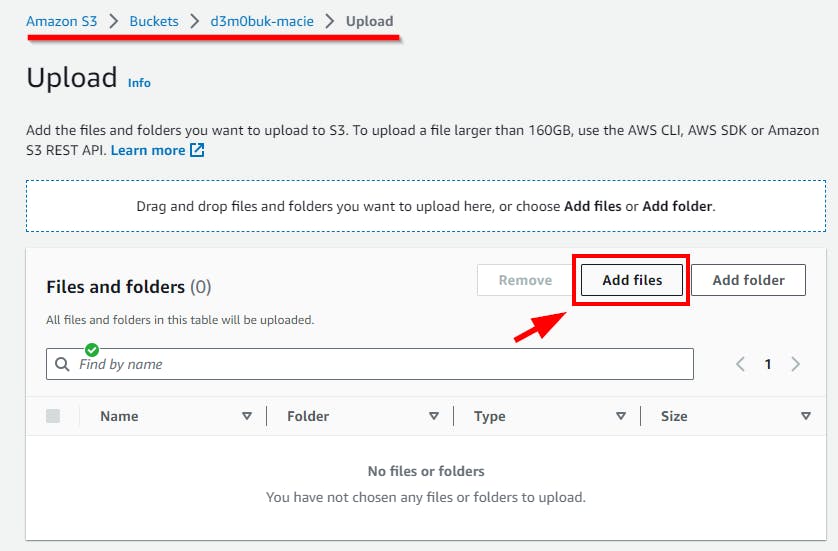
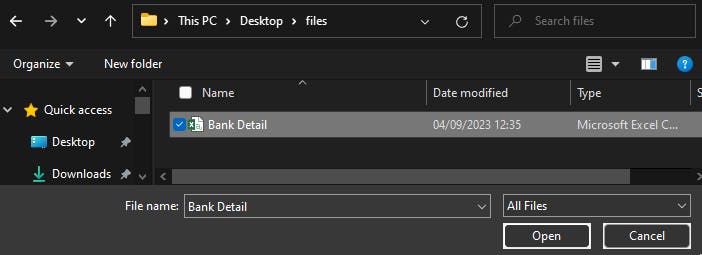
- In the Objects page of the S3 bucket, click on Upload to upload the CSV file containing sensitive data (bank details). In the Upload window, click on Add files. Next, select the CSV file (Account Details.csv) that contains bank account information and click on the Open button to upload the file.
- Now, the .csv is added to the S3 bucket. Scroll down and click on Upload to upload the CSV file.
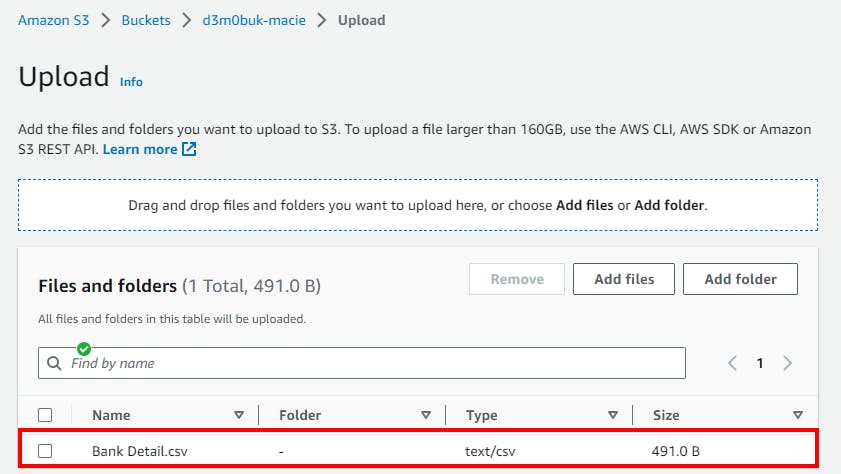
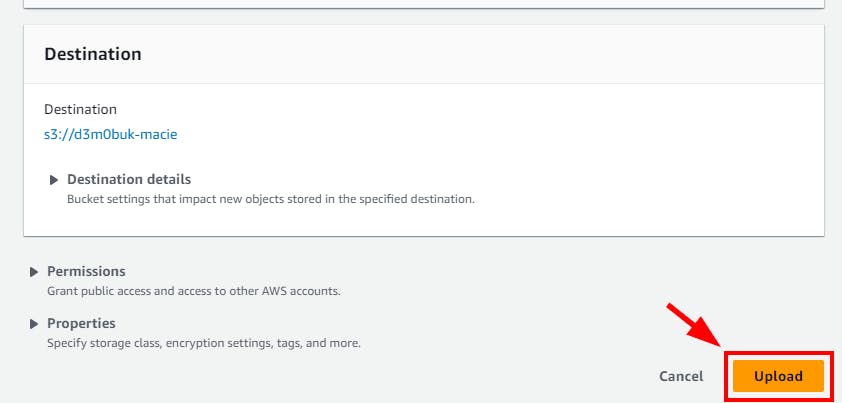
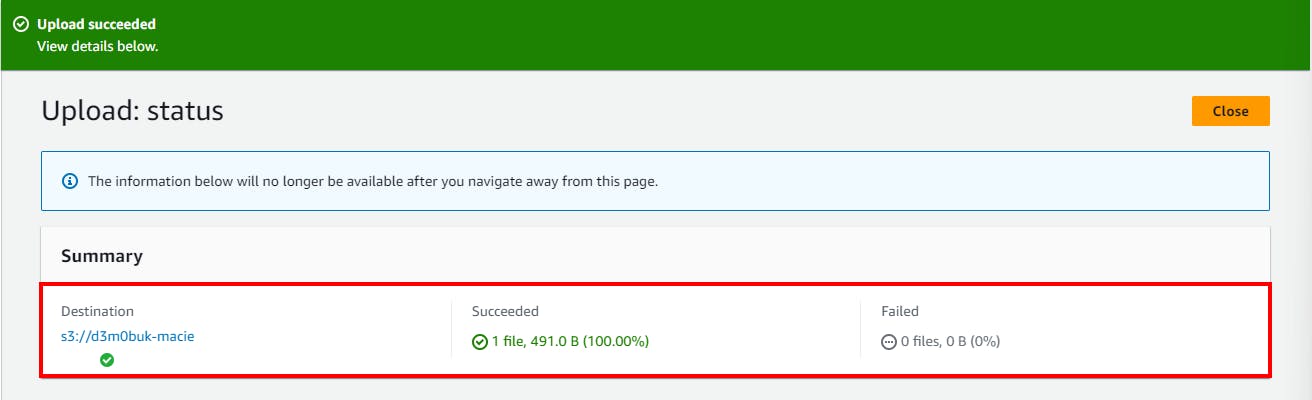
- A message is displayed at the top stating that the file has been uploaded successfully
Creating intentional public access to the S3 bucket
Now, assume a situation where a user mistakenly enables public access for this S3 bucket (d3m0buk-macie). The sensitive information (bank details) of your client will be compromised.
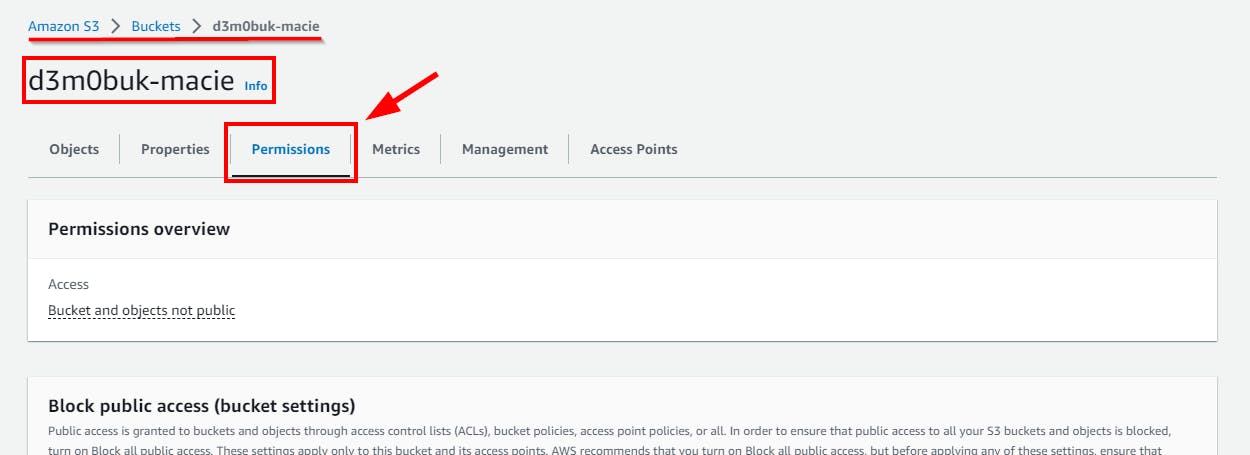
- On the S3 bucket (d3m0buk-macie) details page, click on Permissions
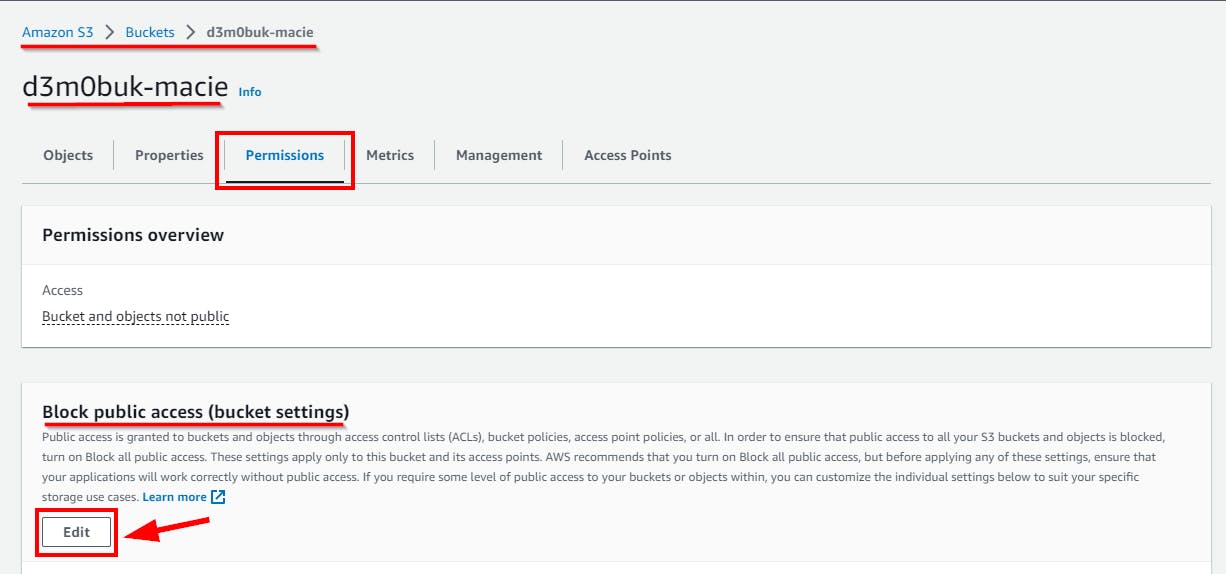
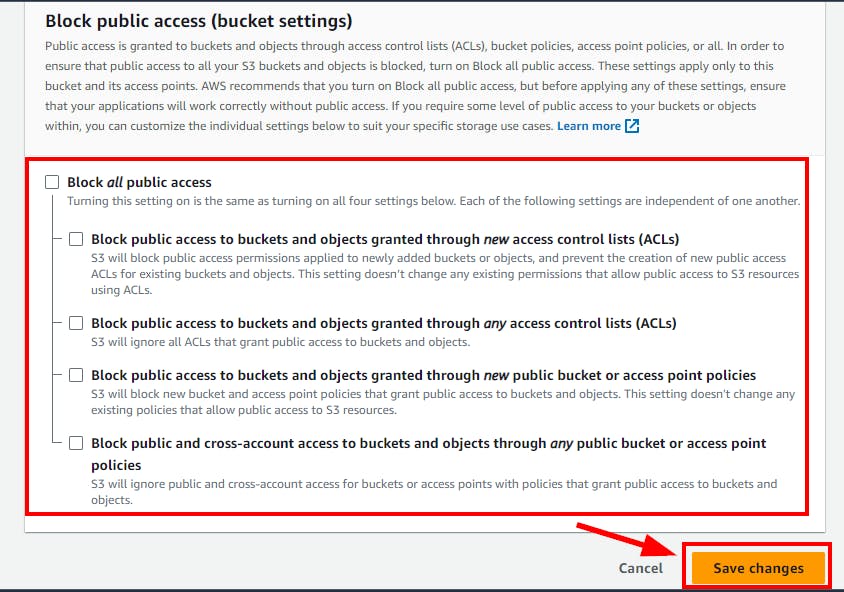
- In the Permissions tab, click on Edit under Block public access (bucket settings).
- In the Edit Block public access (bucket settings) window, uncheck Block all public access. Click on Save Changes.
- In the pop-up that appears for Edit Block public access (bucket settings), type confirm and click on Confirm.

- A message is displayed at the top stating that the Block Public Access settings for the bucket have been edited.
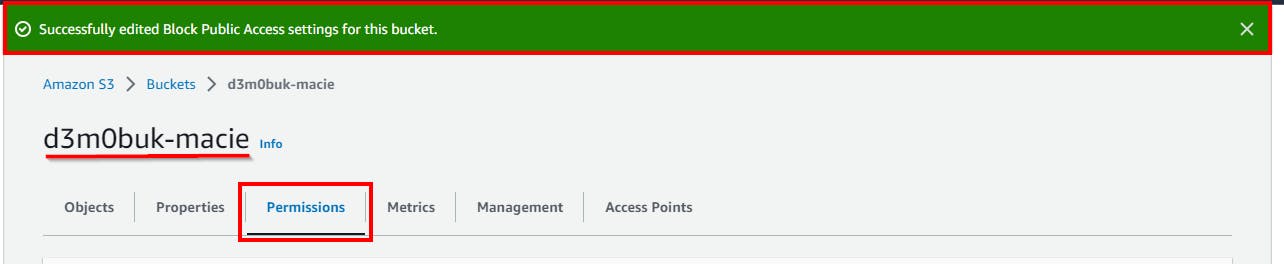
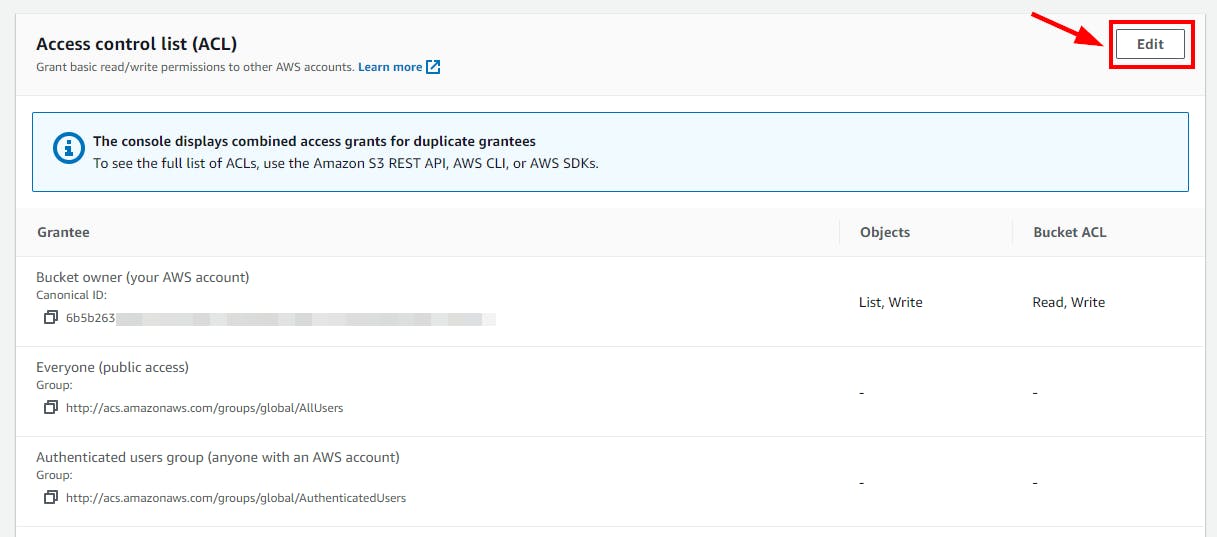
- Now, to edit the public access control settings of the bucket, scroll down to Access Control List (ACL) on the Permissions Tab. Click on Edit on the right side of the Access Control List (ACL).
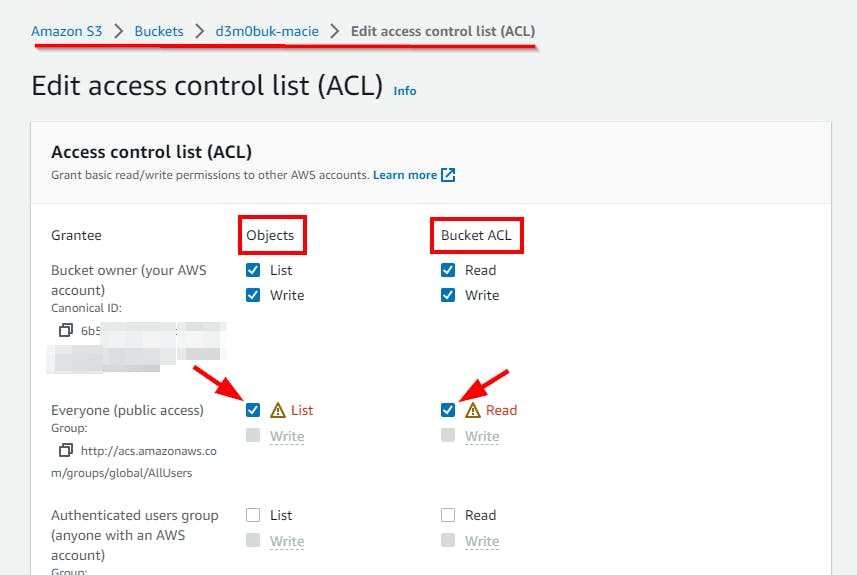
- Now, if a user grants public read/write permissions, the S3 bucket will be accessible to everyone through the Internet. For Everyone (public access), select the checkbox for List under Objects and Read under Bucket ACL. Next, Scroll down to the bottom. Select the acknowledgment checkbox. Click on Save Changes.
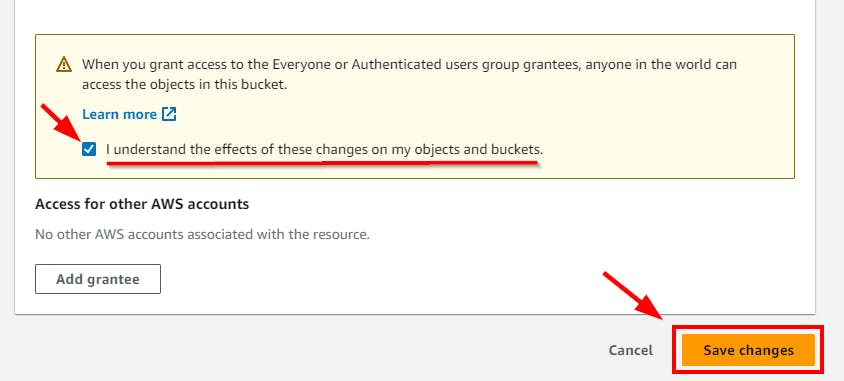
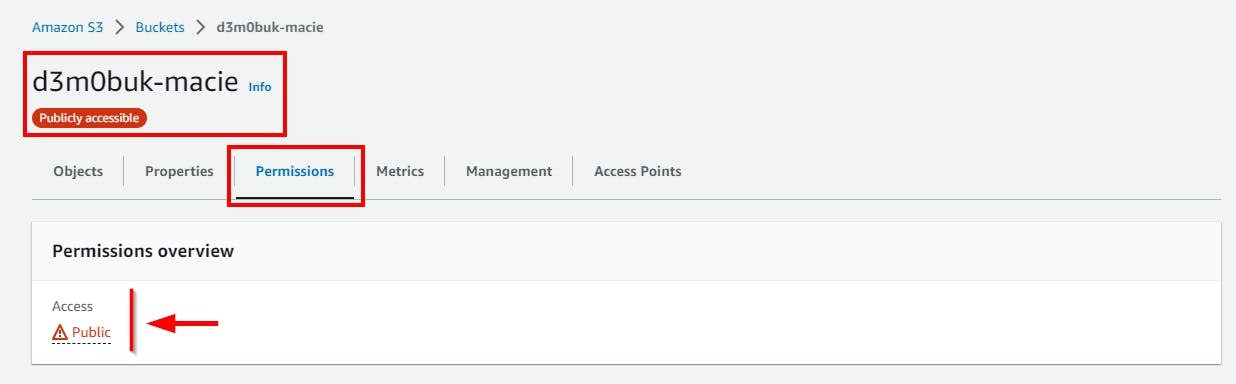
- A message is displayed at the top stating that the access control list has been successfully edited. Navigate to the Permissions tab to view the bucket Access level.

Using Amazon Macie to identify publicly accessible sensitive data on S3
Now that the S3 bucket which contains sensitive bank details is publicly accessible over the internet to anyone, enable Amazon Macie to identify the sensitive file/data.
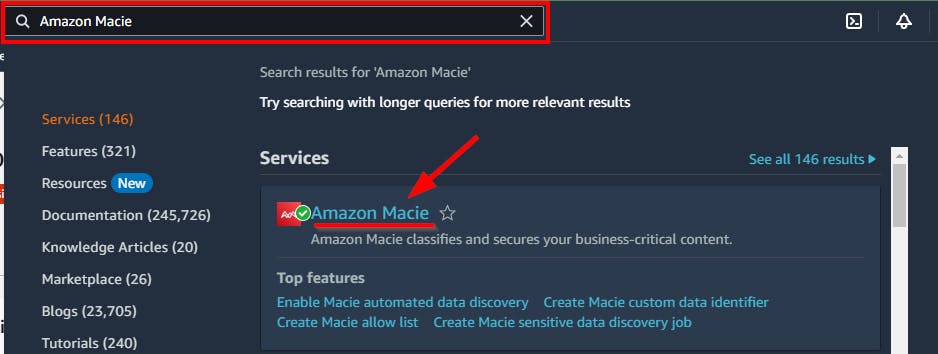
- Navigate to Amazon Macie by searching from the top search bar
- Click on the Get Started button If you are using Amazon Macie for the first time.
NB: Make sure you are on region us-east-2 (Ohio) where the S3 bucket was initially created.

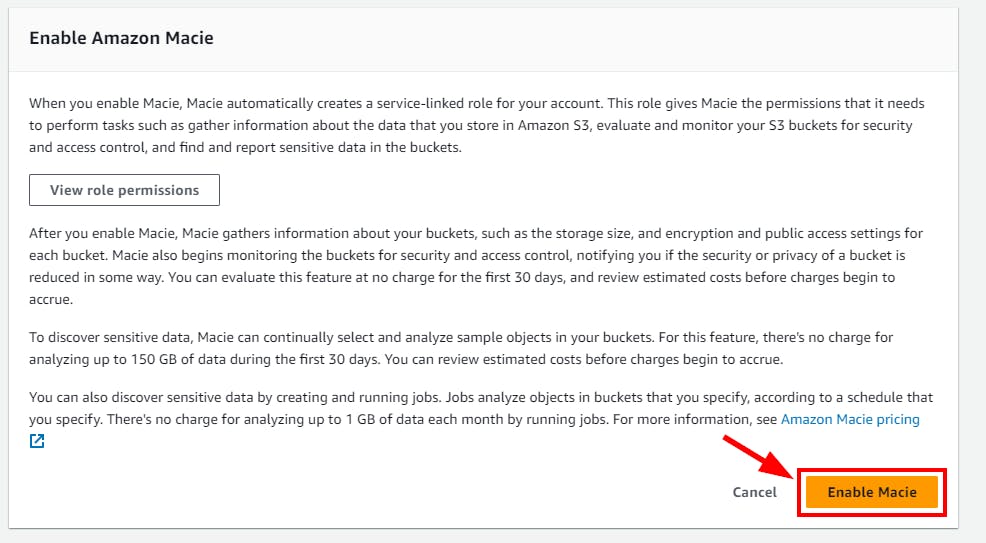
- On Amazon, Macie Get Started page, scroll down to the bottom and click on Enable Macie button to enable Amazon Macie.
- Once Amazon Macie is enabled, it takes a few minutes to load the Summary dashboard showing information related to S3 buckets such as Total S3 buckets, Storage (classifiable), objects (classifiable), and Publicly accessible S3 buckets.
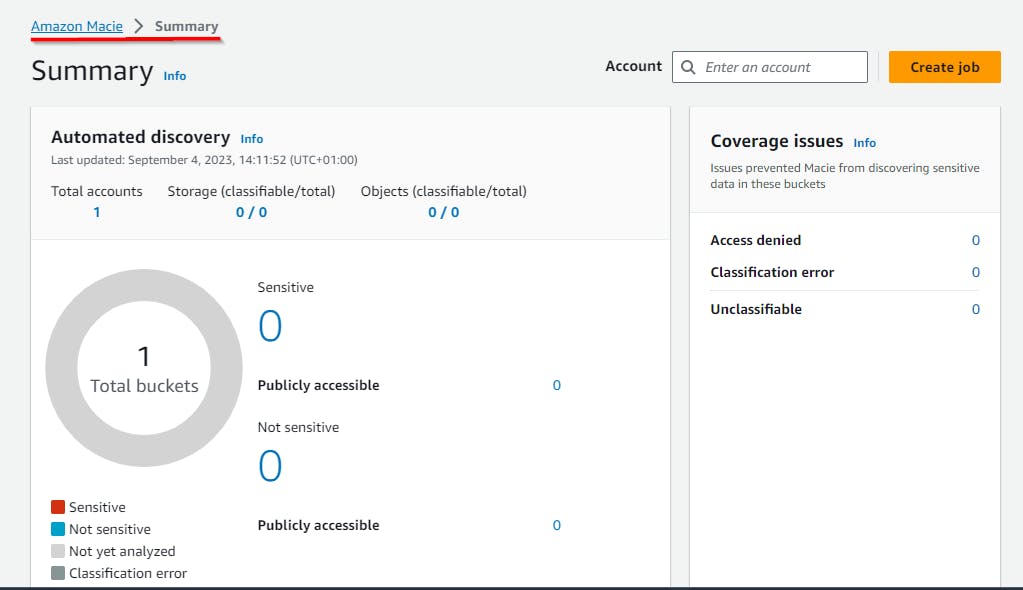
Creating Jobs to Monitor S3 for sensitive data
- On Amazon Macie page, click on Create Job at the top right

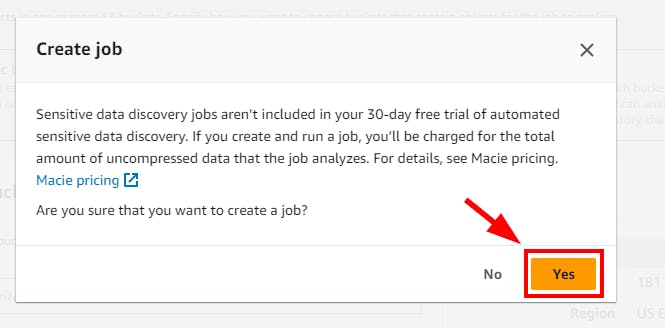
- On the pop-up window, click the YES button to confirm creating a Job.
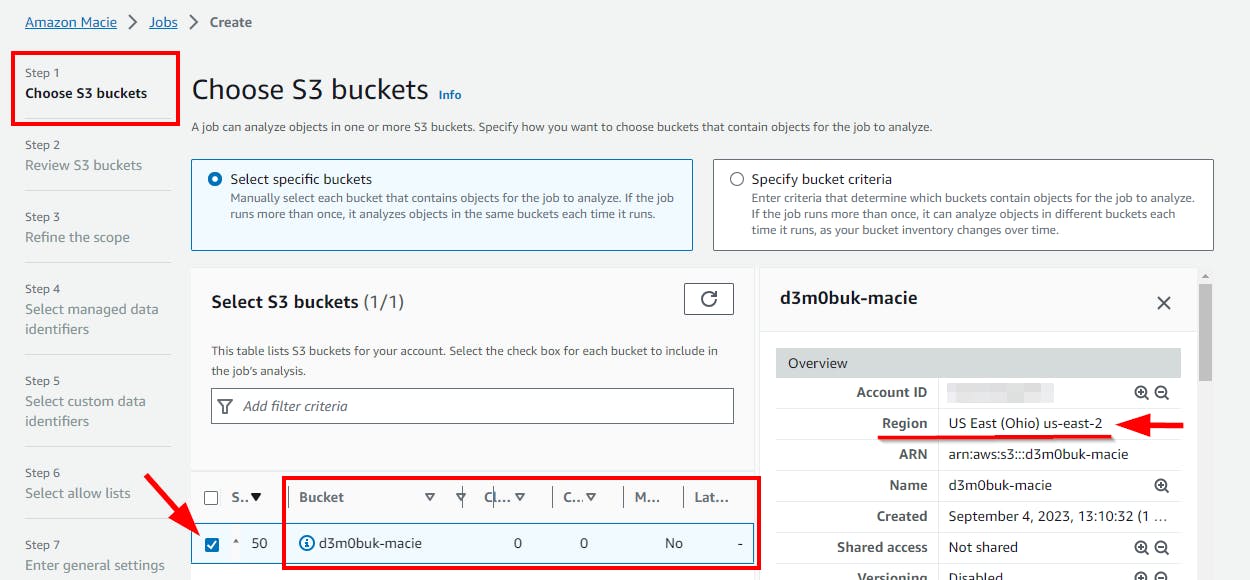
- In Step 1: Choose S3 buckets, select the checkbox for your S3 bucket (d3m0buk-macie), and click on Next.
NB: Make sure you are on region us-east-2 (Ohio) where the S3 bucket was initially created

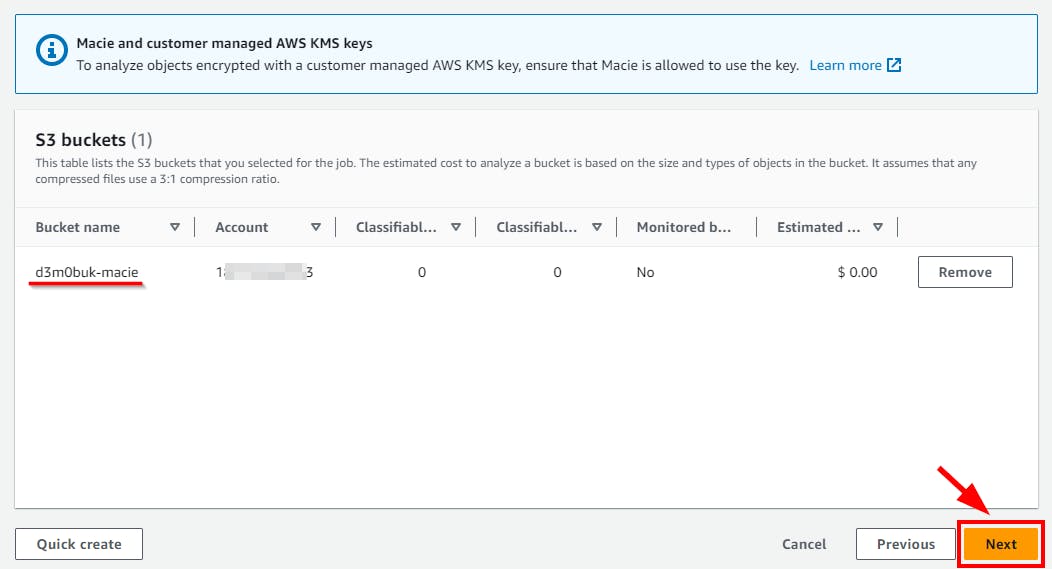
- In Step 2: Review S3 buckets, review the previous step for the S3 bucket selected. Confirm the S3 bucket (here, d3m0buk-macie) that you have selected and click on Next.
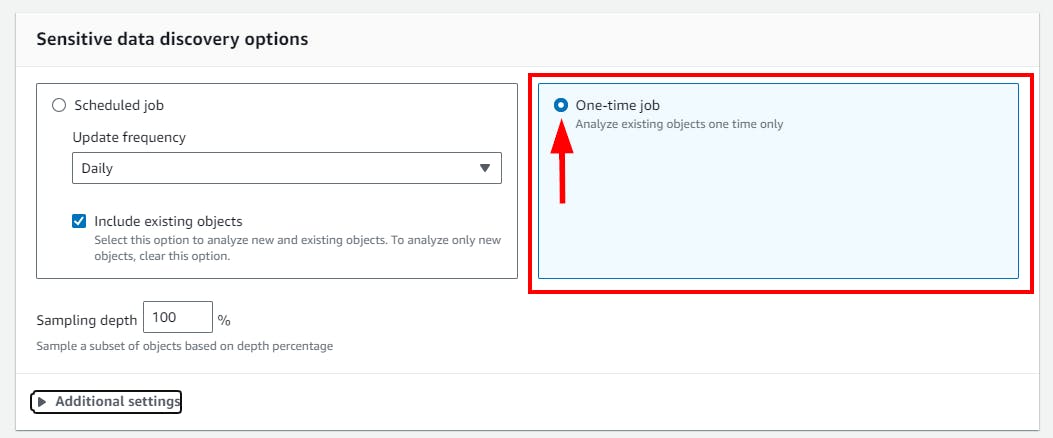
- In Step 3: Refine the scope, for this lab, select the radio button for a One-time job to finish sensitive data discovery. Next, expand Additional settings.
NB: In a production environment, it is better to select Scheduled job and set a frequency for which data discovery is to be performed.
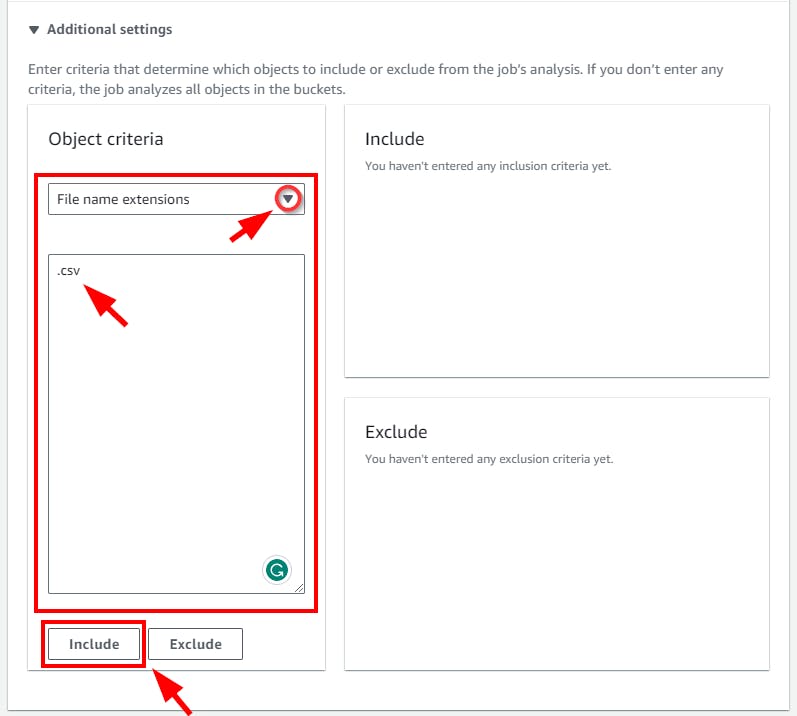
- on the Additional settings section, From the Object criteria dropdown, select File name extensions from the dropdown. Type the extension for the S3 bucket file (Bank details.csv) in the blank field. Next, Click on Include.
NB: You can include other extension such as .txt, xlsx in the production environment
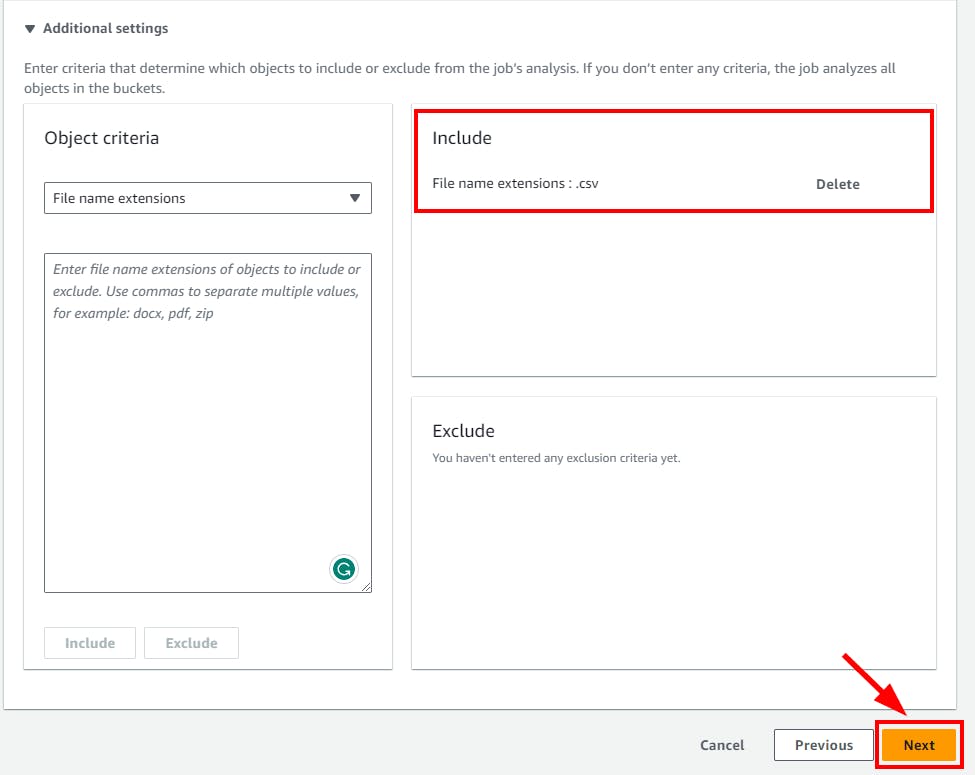
- The file extension .csv is now included under Include. Click on Next to continue.
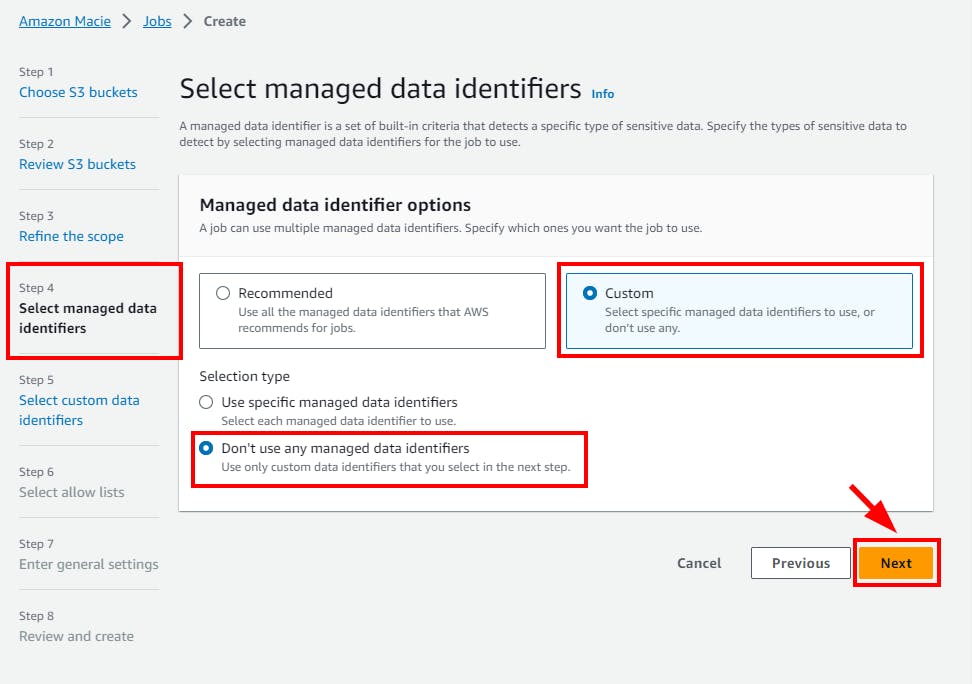
- In Step 4: Select managed data identifiers, click on the custom radio button, and select the “Don't use any managed data identifiers” option. Then click Next.
NB: With custom data identifiers, Amazon Macie detects sensitive data.
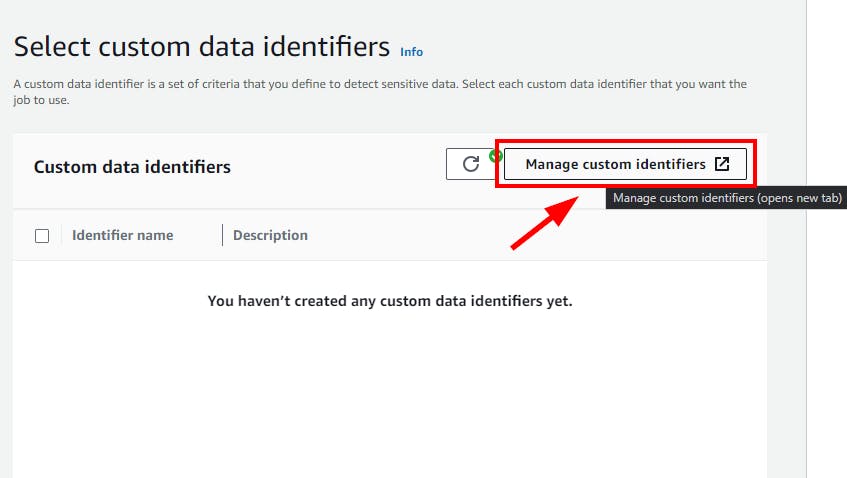
In step 5: Select custom data identifiers, and click on Manage custom identifiers at the top right.
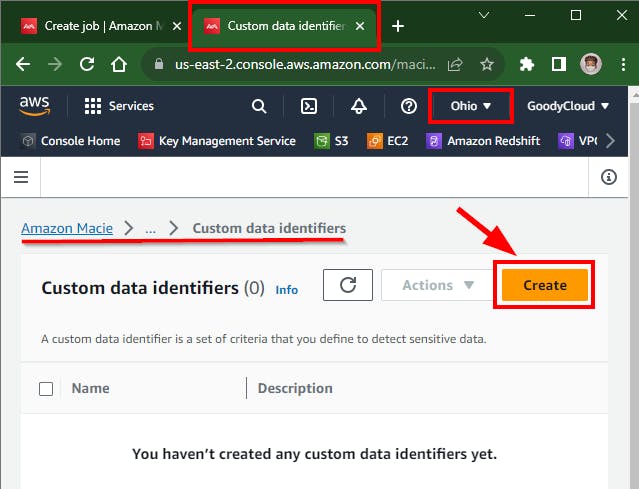
- The Custom Data Identifiers window will open in a new tab. To create a custom data identifier to detect sensitive information (bank details), click on Create.
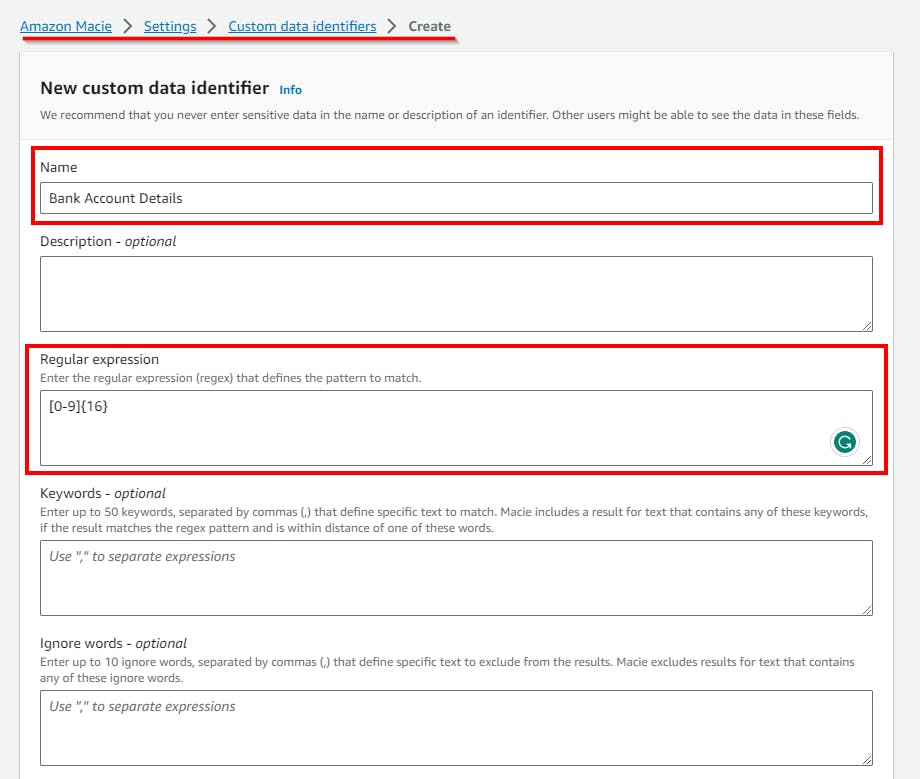
- In the New custom data identifier form page, In the Name field, give it any name (here, Bank Account Details). Description - optional. Next, In the Regular expression field, enter the pattern of sensitive data that is to be matched with the data identifier. (In this lab, the uploaded file contains account details such as name, date-of-birth, zip code, account number, Debit or credit card number, etc). Thus, to detect bank account details, type the Regular expression as [0-9]{16}.
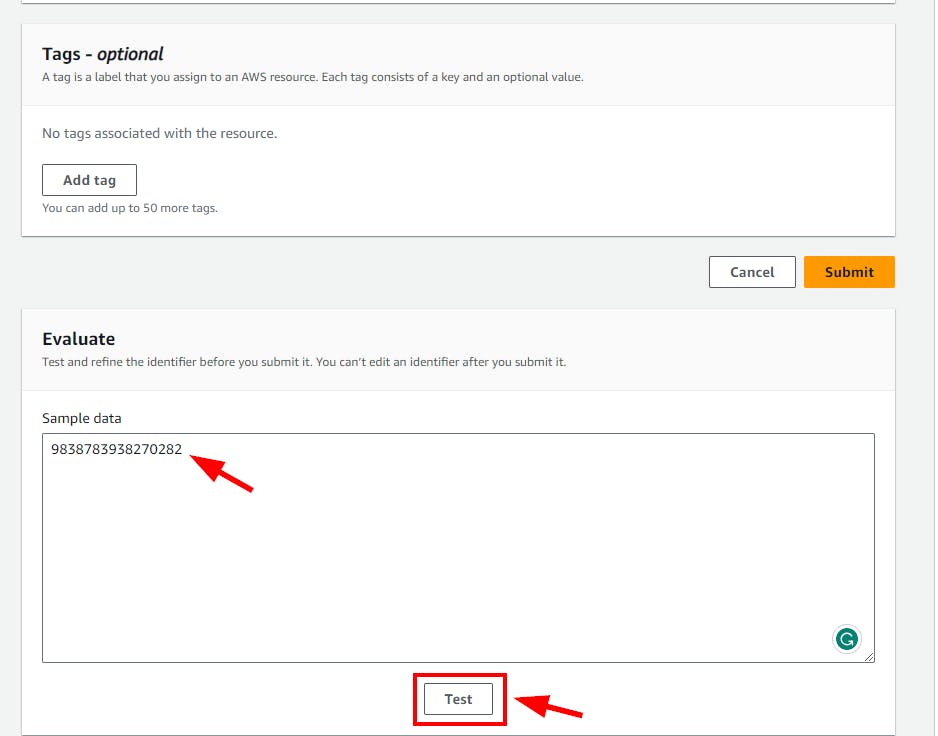
- Scroll down to Evaluate section and enter a Sample data to detect based on the entered Regular expression (e.g 9838783938270282 ) 16-digit number then click on the Test button to see if there is any match with the sample. Once done, click on Submit.
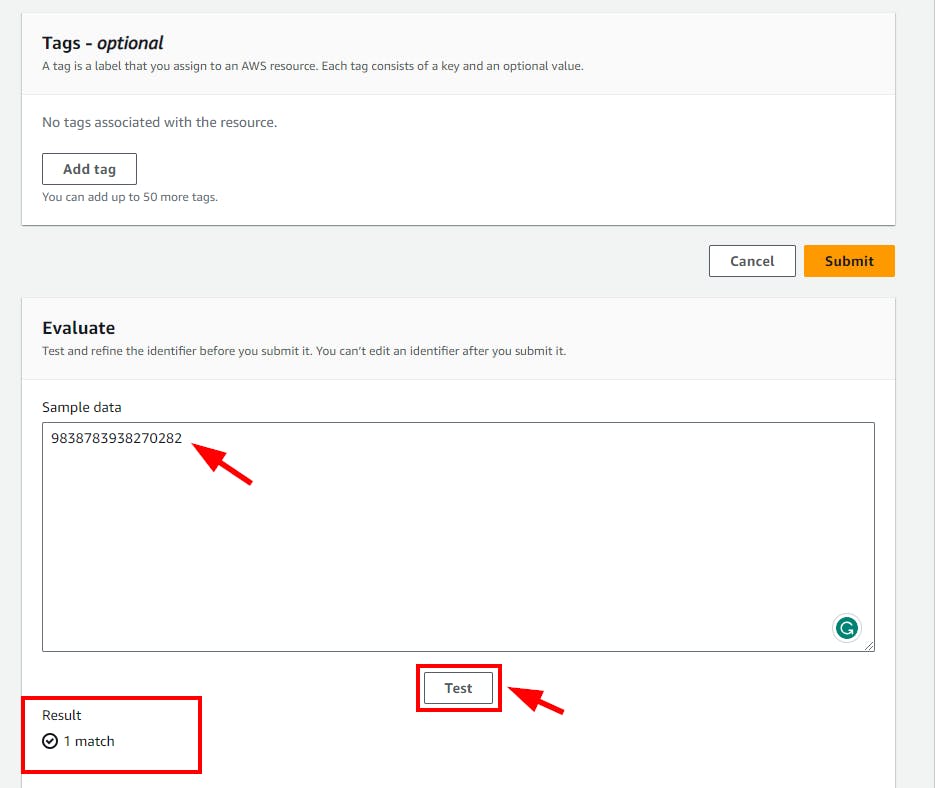
- You will get a message displaying Success with the Custom data identifiers created.
- Navigate back to Step 5 (Select custom data identifiers page) of the previous tab and refresh the icon to view the created Custom data identifiers.
- Select the Custom data identifier created (Back Account Details) and click Next
- In Step 6: Select allow lists, click on Manage allow lists which opens in a new tab.
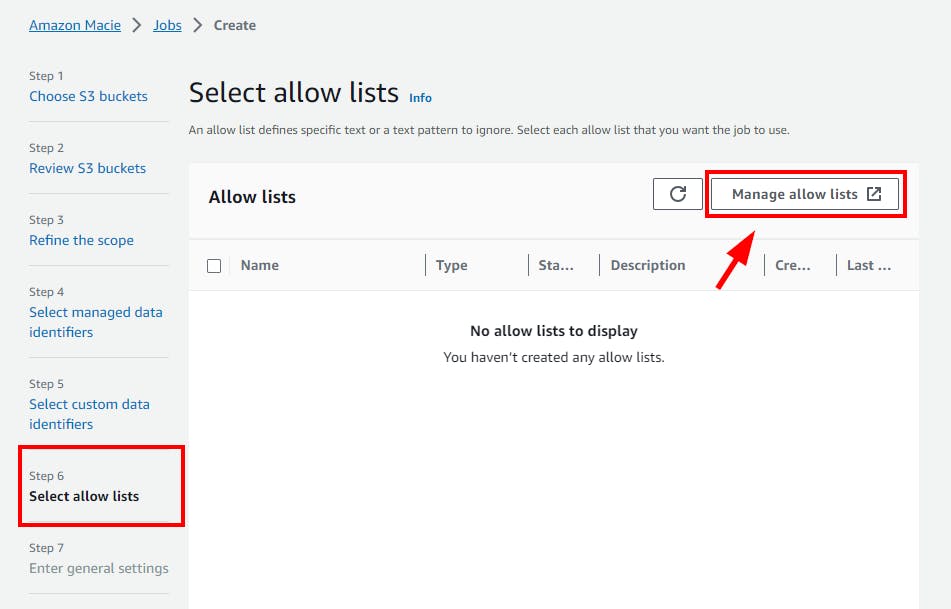
- On the New tab for “Manage allow lists”, click on Create Button.
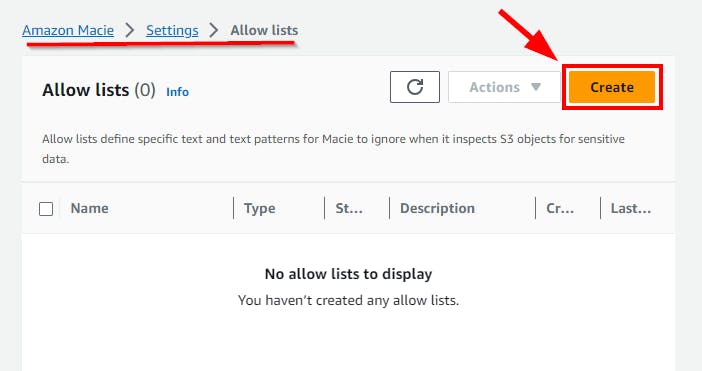
An allow list defines specific text or a text pattern for Macie to ignore when it inspects S3 objects for sensitive data.
- On Create allow list page, enter name as (e.g Ignore details) and Regular expression as [0-9]{4}, [0-9]{3}. This is because from the sensitive details of the file, there are some text/content that should be ignored such as SecoureCode , Zip Code

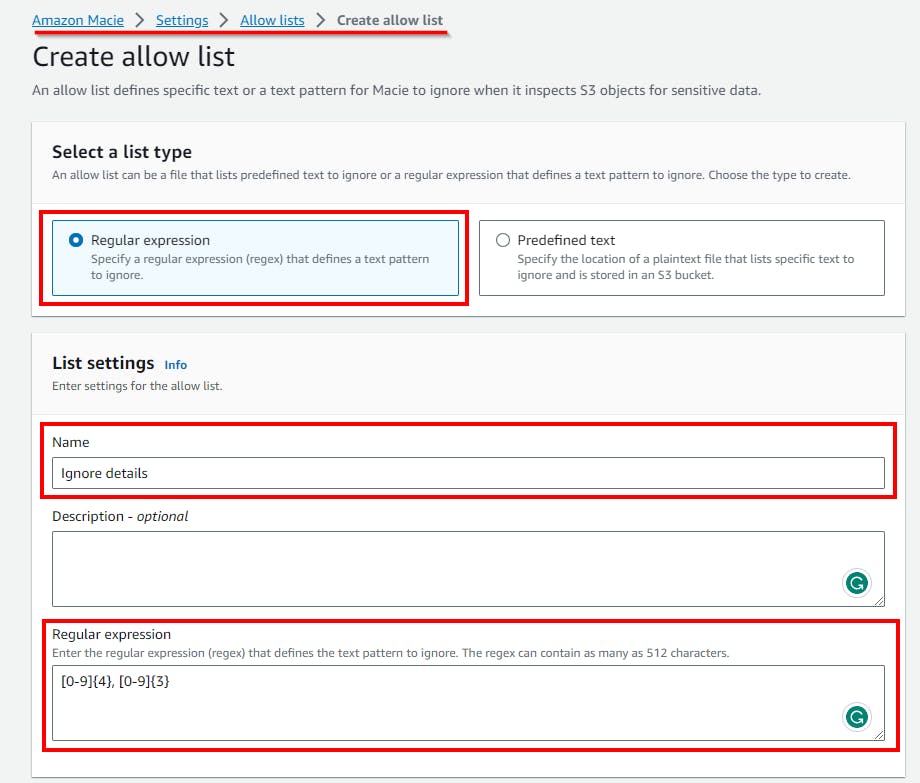
- scroll down and add some evaluation sample data, and click on the Test button if there is any match. Once done, click on the Create button.

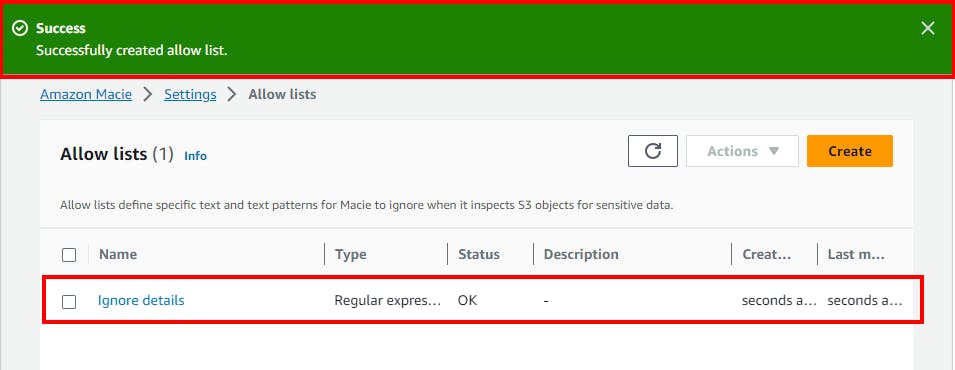
- You will get a message stating that the allow list is successfully created.

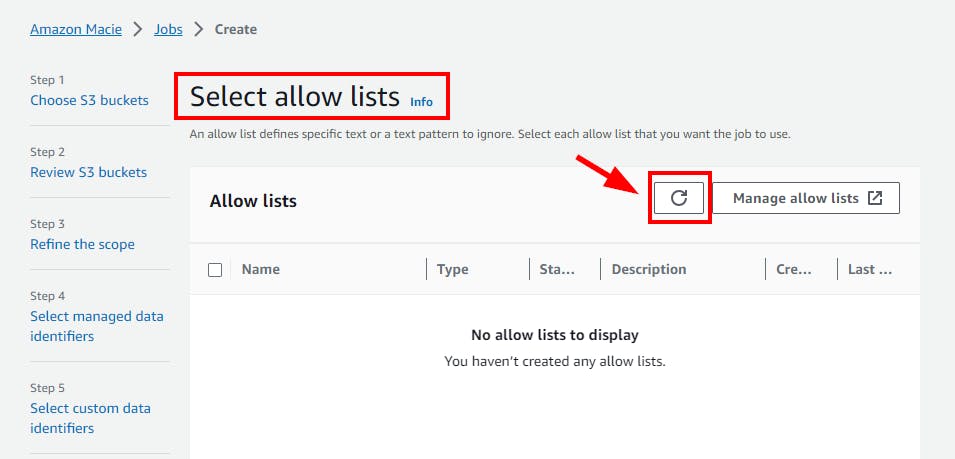
- Navigate back to Step 6: Select allow lists (previous tab) and click on the refresh icon.

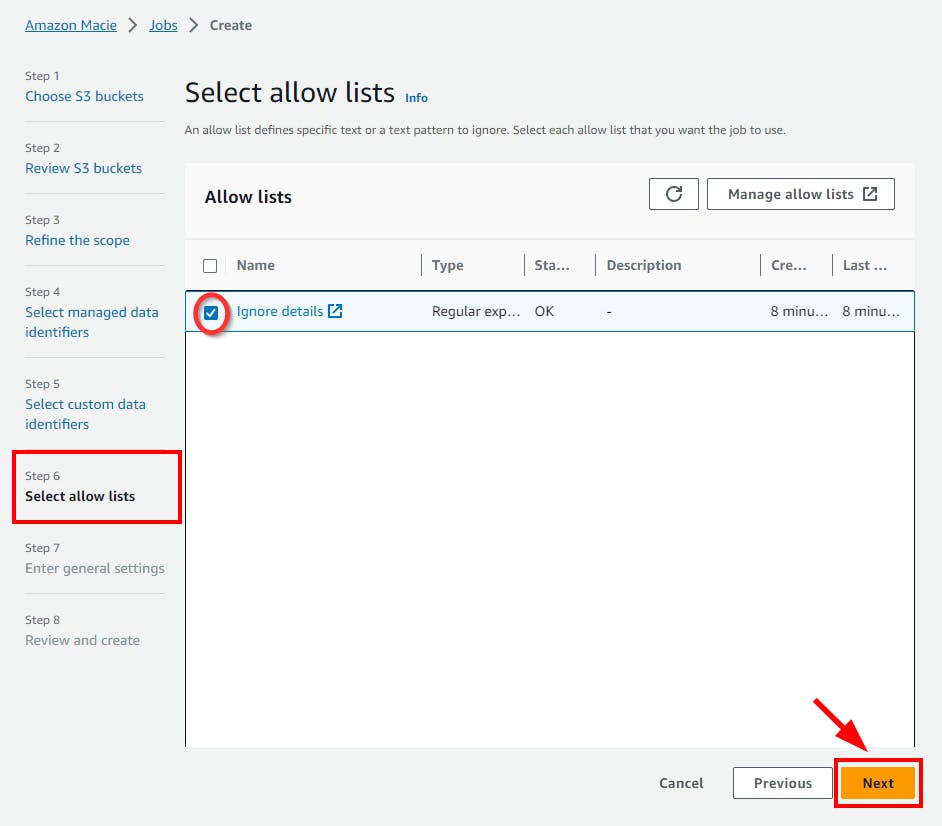
- Next select the created allow list and click the Next button.

- In Step 7: Enter general settings, and enter a name and description for the Macie job. In this lab, the name is “Bank Account Details” and the description is “Bank Account Details for a client”. Once done, click the Next button.

- Lastly, In Step 8: Review and create, review all configurations made by you for creating the Amazon Macie job.
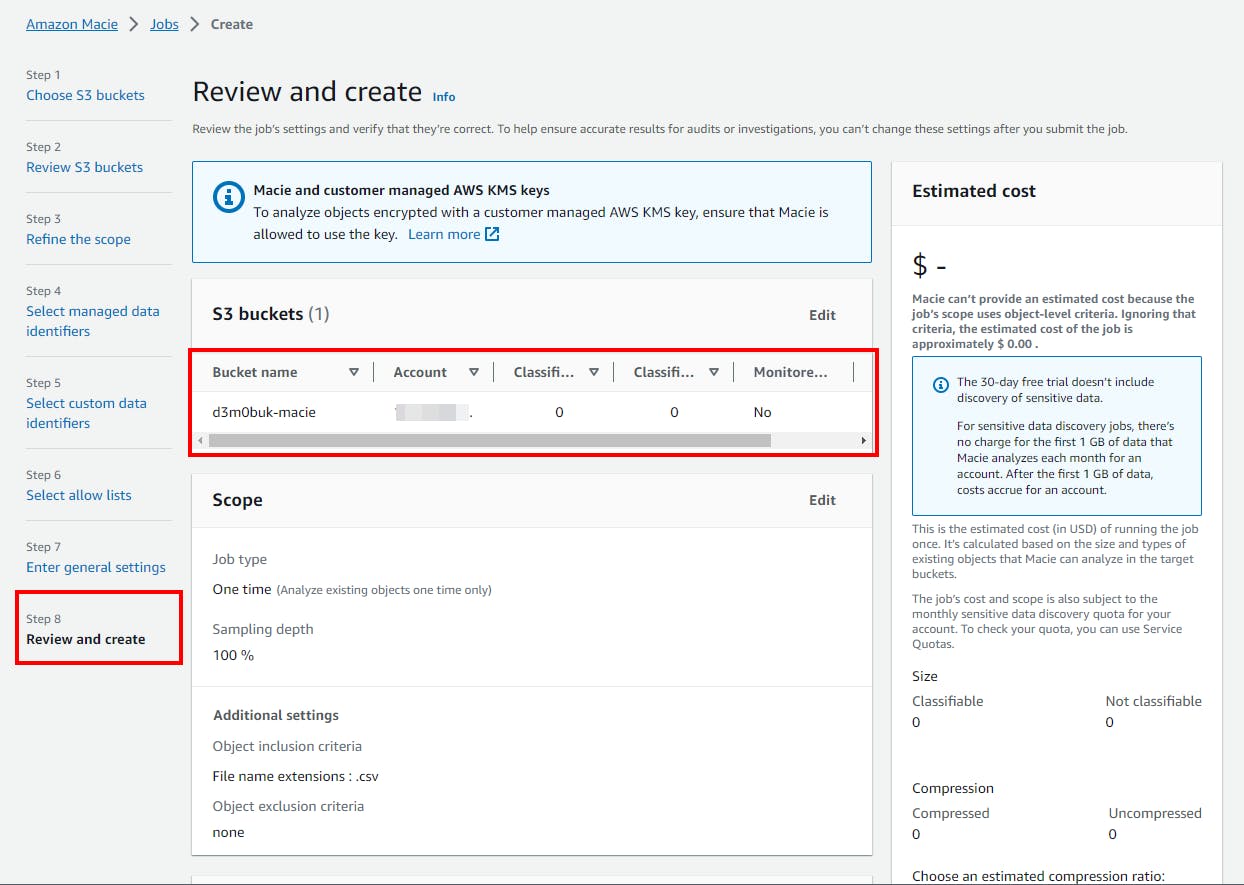
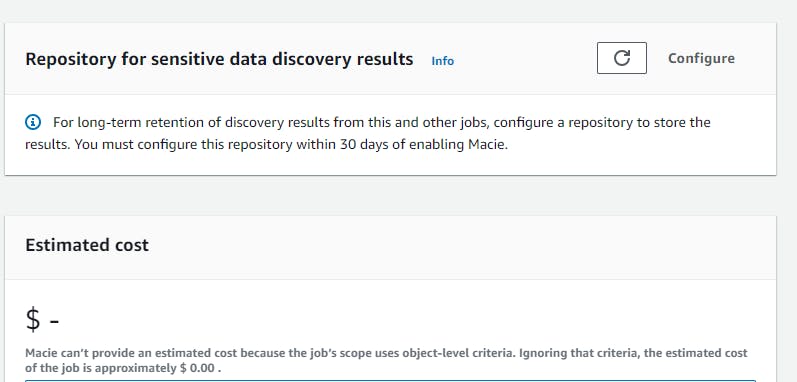
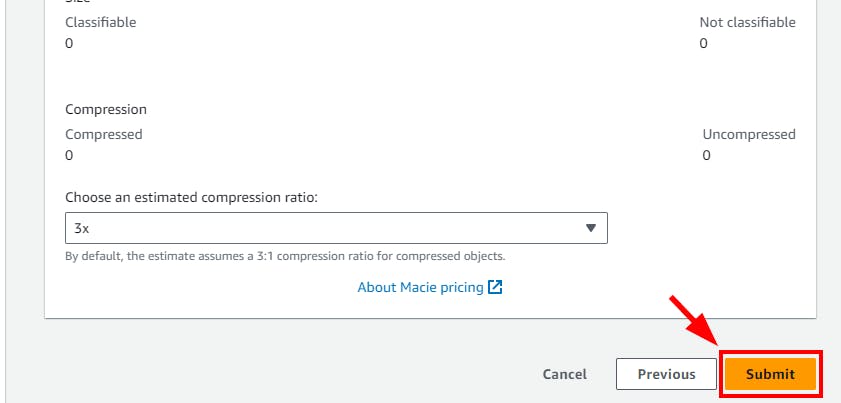
- Scroll down to the Repository for the sensitive data discovery results section, you will see a warning to configure a repository to store results for the long-term retention of results. You can ignore it because this is a lab exercise. Click on Submit to create the Amazon Macie job for detecting sensitive information.
Note: In the production environment, it is good to configure a repository to store Amazon Macie results for long-term retention.
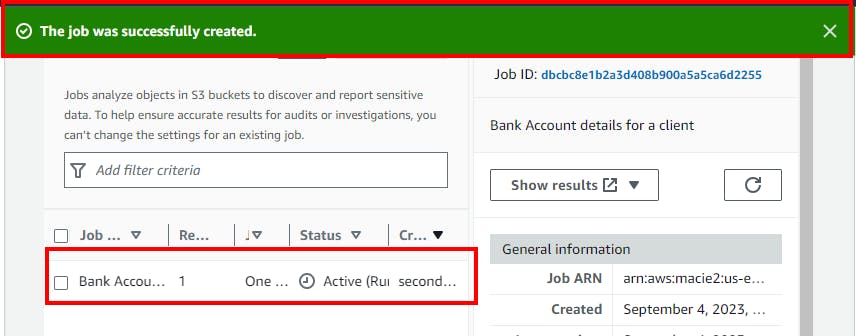
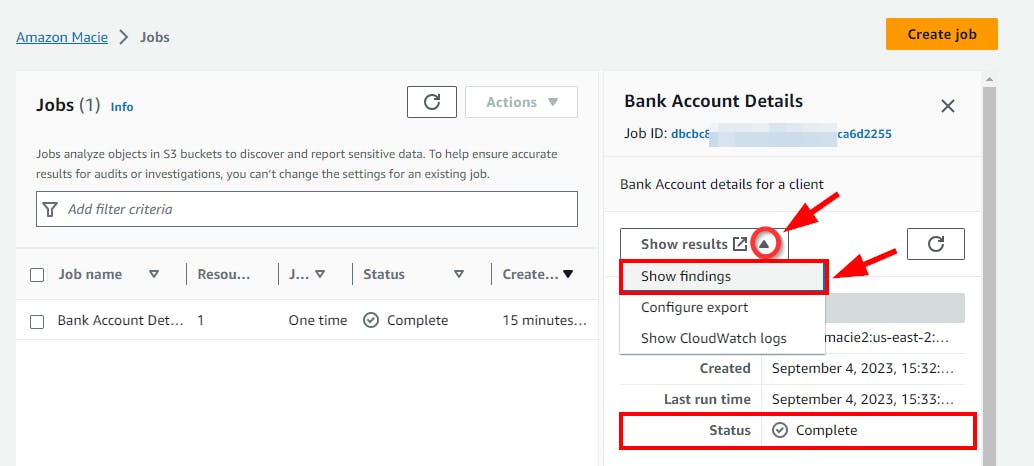
- A message is displayed at the top stating that the job has been successfully created. The Status of the job will be Active (running). Wait for a few minutes for the Status to get changed to Complete.
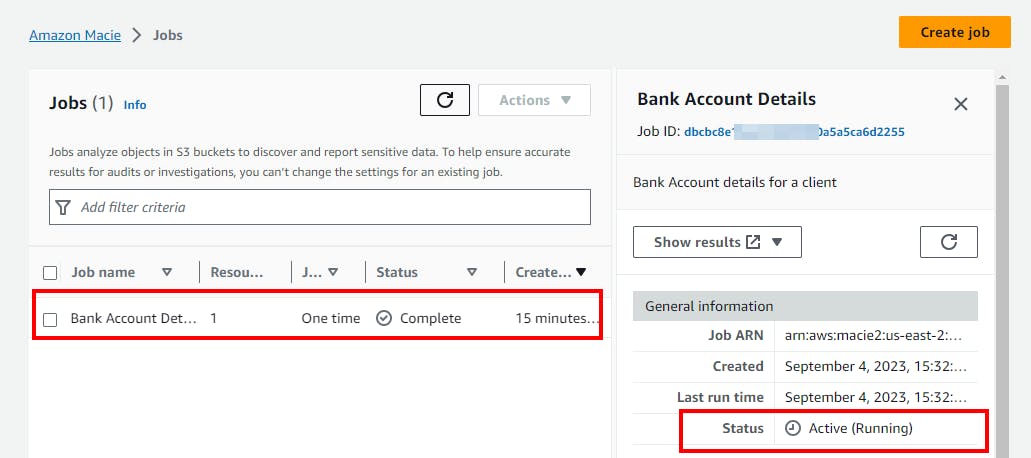
- After a few minutes, if you click on the Refresh icon, the Status of the job will get changed to Complete.
- Now, to view the findings of the Amazon Macie job, click on Show Results and select Show Findings from the dropdown.
- The Amazon Macie Findings window opens on a new tab, you will see the Resources affected and the Severity of findings. In this lab, Severity is marked medium because it is financial data. To obtain more details, click on the finding.
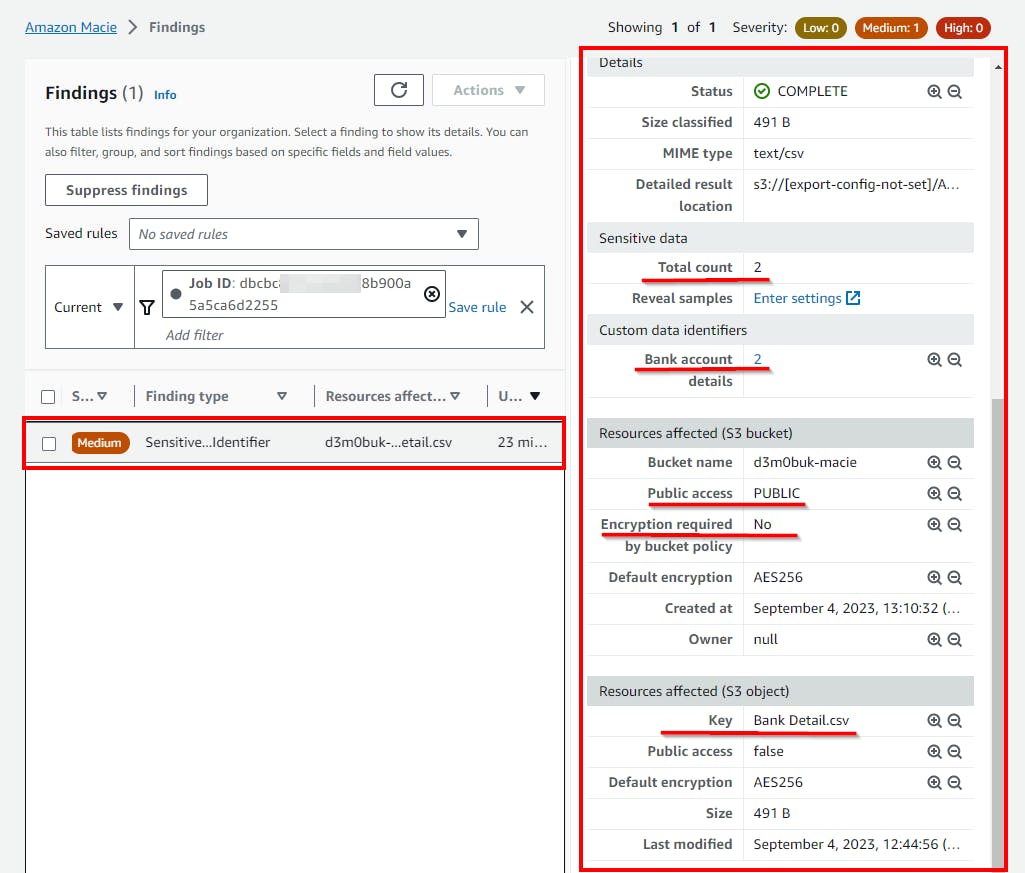
Thus, a cloud security engineer can detect the sensitive information or PII of employees uploaded into public S3 buckets, which will get compromised, by creating an Amazon Macie job and viewing the alerts.
Deleting Resources
Note: Ensure you delete, shut down, or terminate all resources created and used in this lab to prevent their billing.
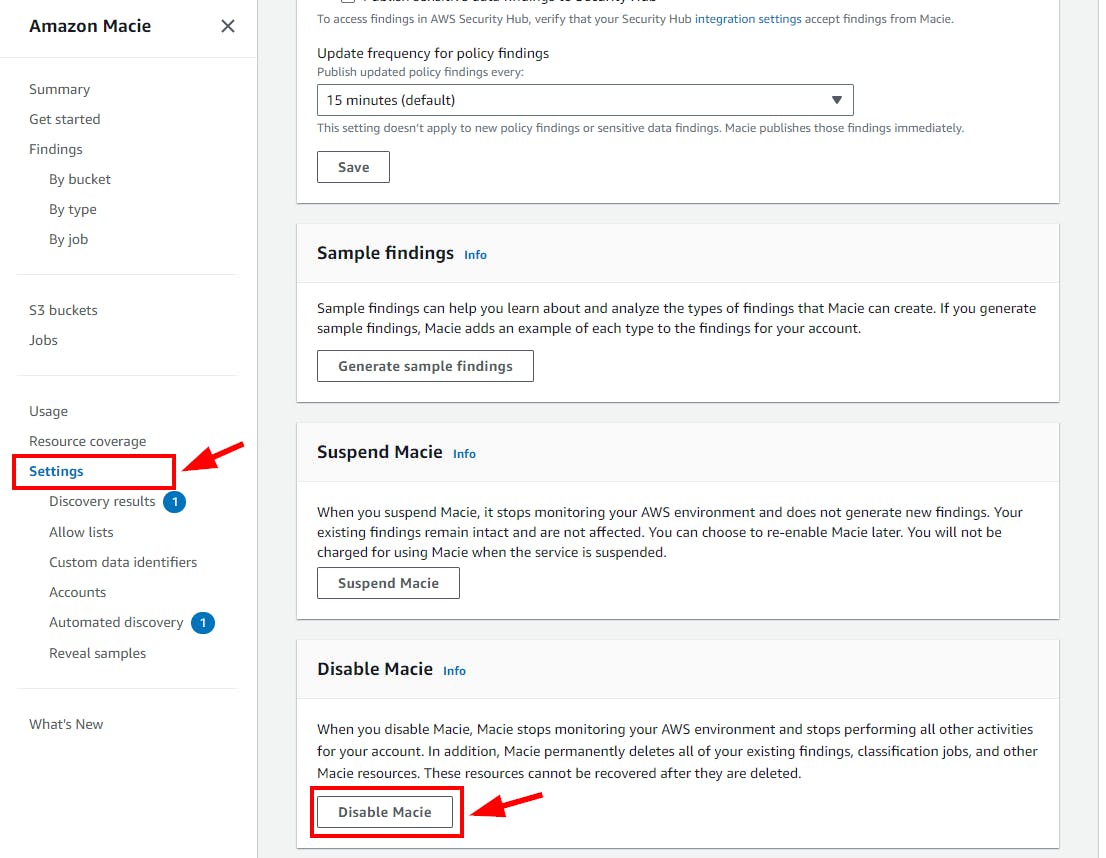
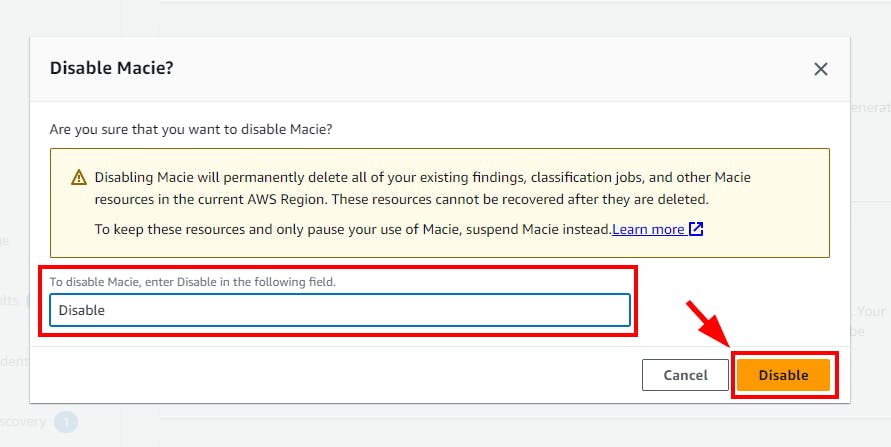
- Now delete the instances created in this lab. Navigate to Settings under Amazon Macie. Scroll down and click on Disable Macie under the Disable Macie window. In the pop-up window, enter disable and click on Disable button.
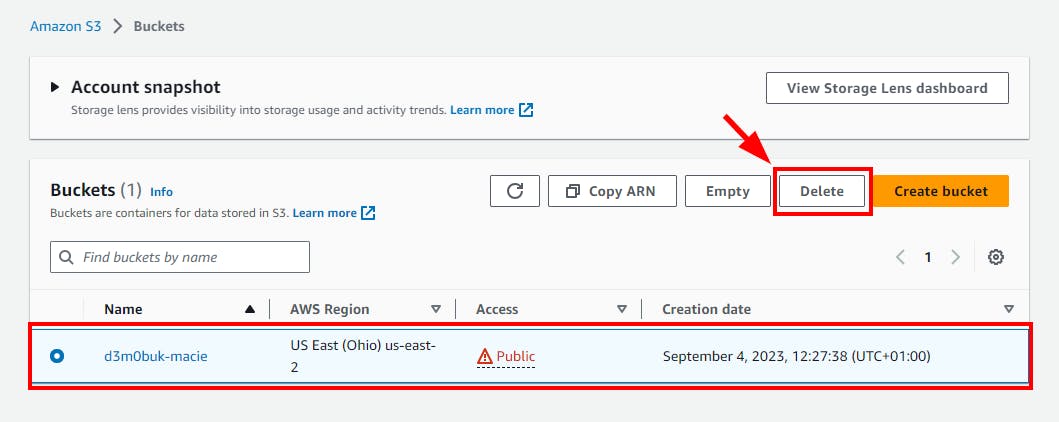
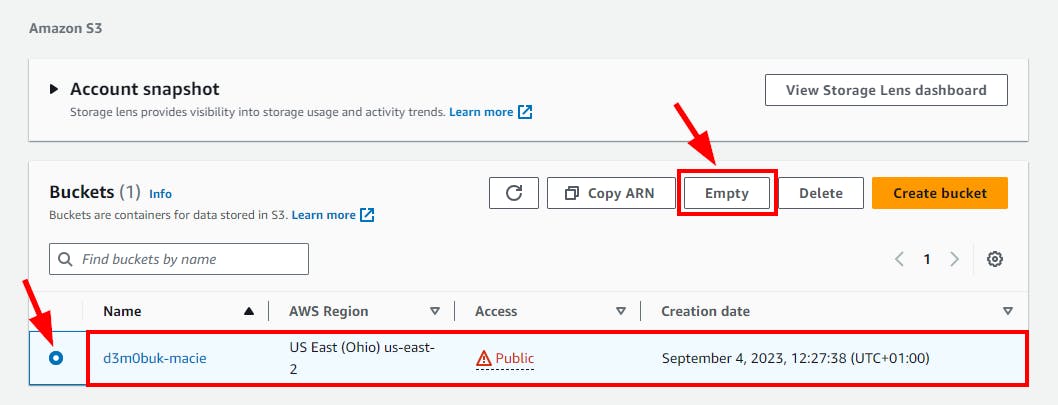
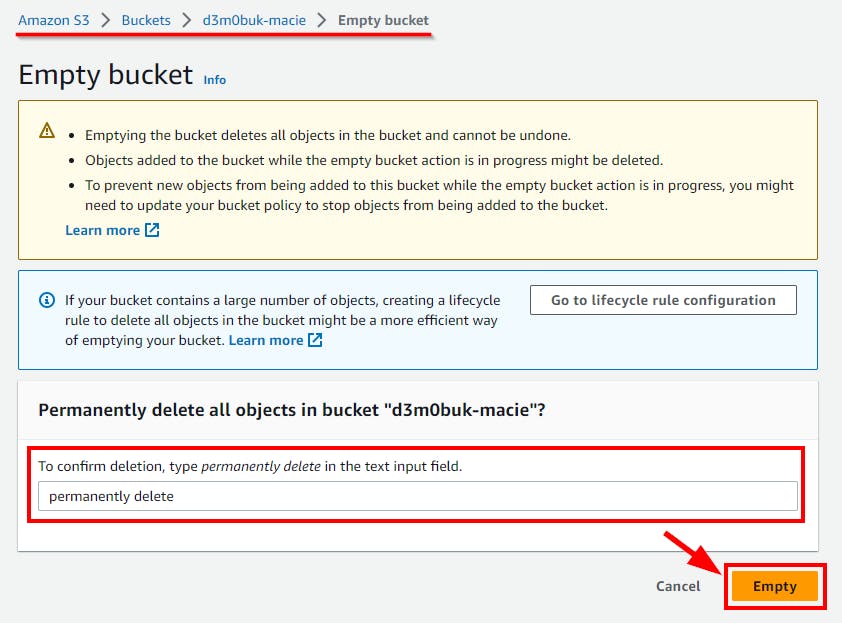
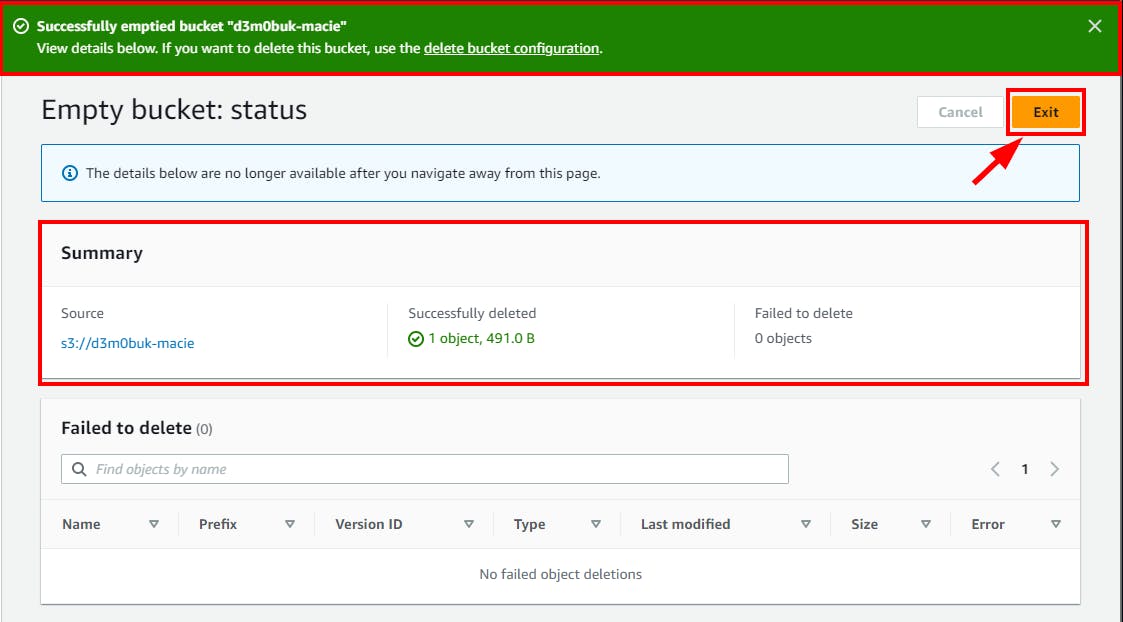
- Navigate to Buckets under Amazon S3 and select the checkbox for the bucket you want to delete. Click on the Empty button to empty the bucket before deleting it. In the pop-up window, enter permanently delete and click on the Empty button.
- Navigate to Buckets under S3 and select the checkbox of the bucket you want to delete. Click on Delete. In the pop-up window, enter the bucket's name and click on the Delete bucket button.