
Photo by Jordan Harrison on Unsplash
How To Connect Cisco Switch Using Console Cable & Putty
Ensure you have all Hardware listed before carrying out this lab


Table of contents
- Terms Used in this lab
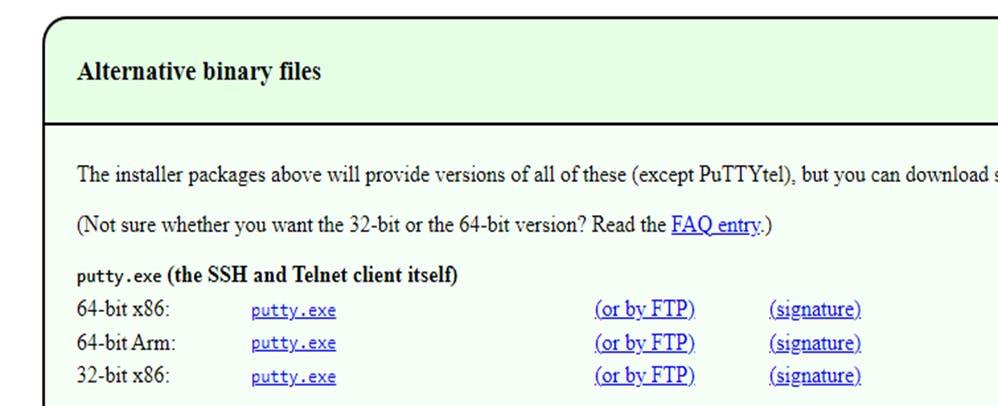
- Step-1: Download the Putty Software (base on your system bit 32/64)Here
- Step-2: Setting up the Hardware: You will need a Cisco Switch and a Console cable. You can purchase a Console cable Here]
- Step-3: Establishing Cable Configuration
- Step-4: Working with Putty CLI by changing the color interface.
- Step-5: Changing the Appearance of the Interface
- Step-6: How to permanently save Session
NOTE: Requirement ensure you have the following
- A Cisco Switch (2960 series used in this lab)
- Console Cable
- One or more PC (preferable Windows)
Terms Used in this lab
- CLI - Command line Interface.
- GUI - Graphical User Interface
Step-1: Download the Putty Software (base on your system bit 32/64)Here
For this lab, we installed 64-bit x86 as shown below
Step-2: Setting up the Hardware: You will need a Cisco Switch and a Console cable. You can purchase a Console cable Here]
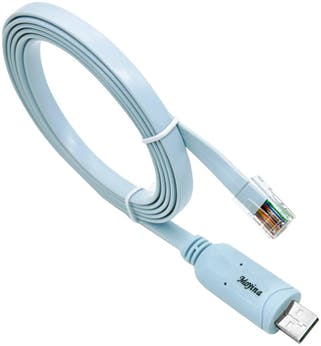
Console Cable (it has a USB and a RJ45 Port)
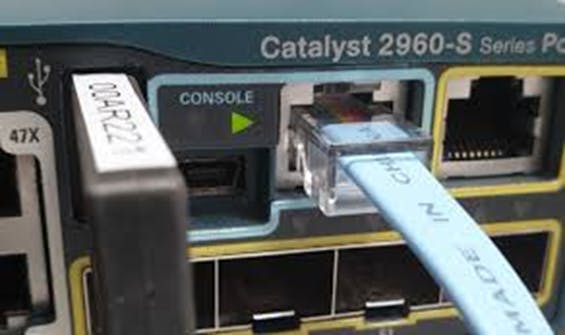
A Console Cable connected to a Cisco Switch 2960
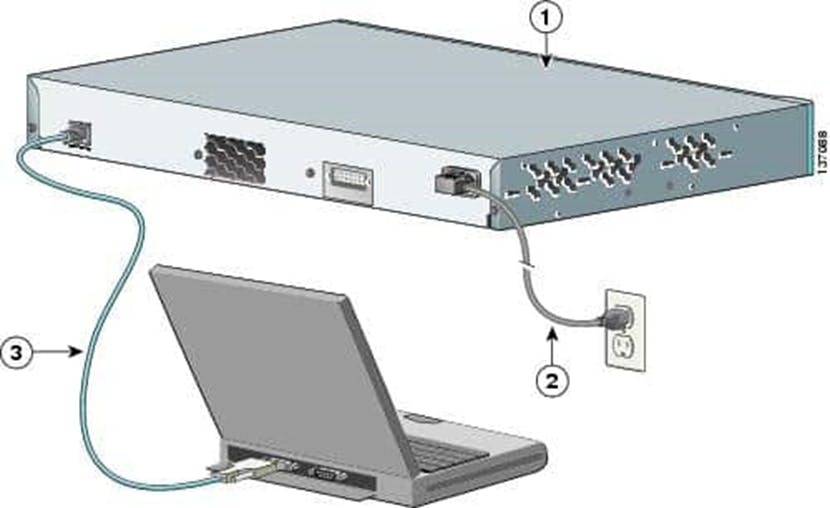
The above image shows the connection of a PC to a Cisco Switch using a Console Cable. The USB port of the console cable is connected to the PC while the RJ45 LAN cable is connected to the Switch.
NOTE: The console port on the Switch is usually at the back of the Cisco Switch (This only applies to the Switch used in this lab).
Step-3: Establishing Cable Configuration
- After Successful installation of the Putty Software, Open the software and ensure on the Connection type menu, Serial option is Checked, as shown in the GUI interface below.

- Search for Device Manager on your start menu and navigate to Port (COM & LTP).
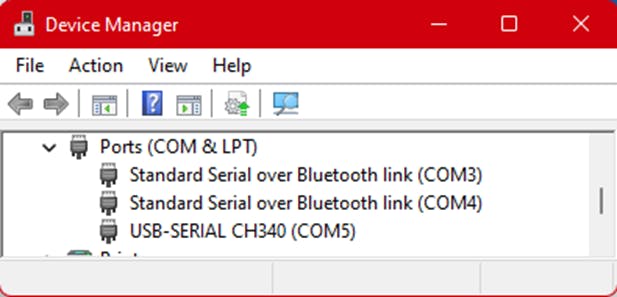
- On the Port (COM & LPT), identify USB-SERIAL CH340 Port Number. For this lab, the USB port that we plugged the Console Cable is (COM5).
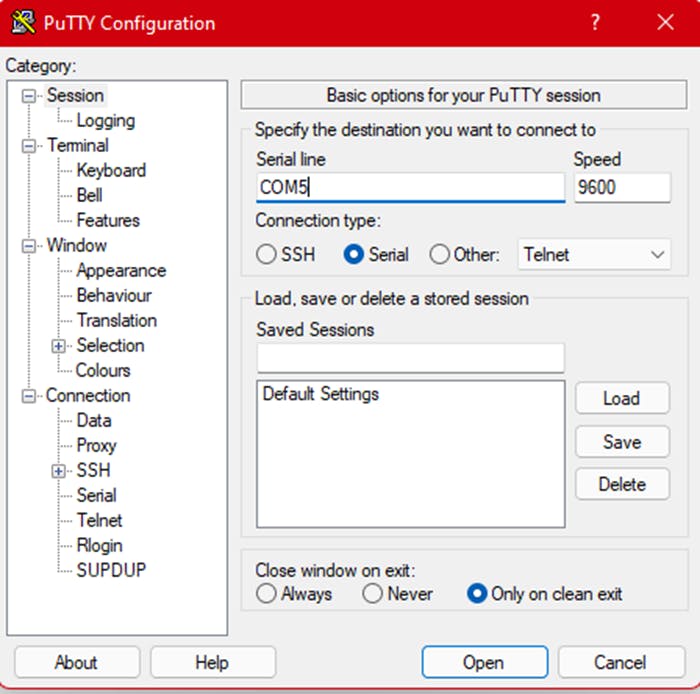
NOTE: Ensure to Select Serial Line: COM5 (Your Selected port from Device manager) and Connection type: Serial.
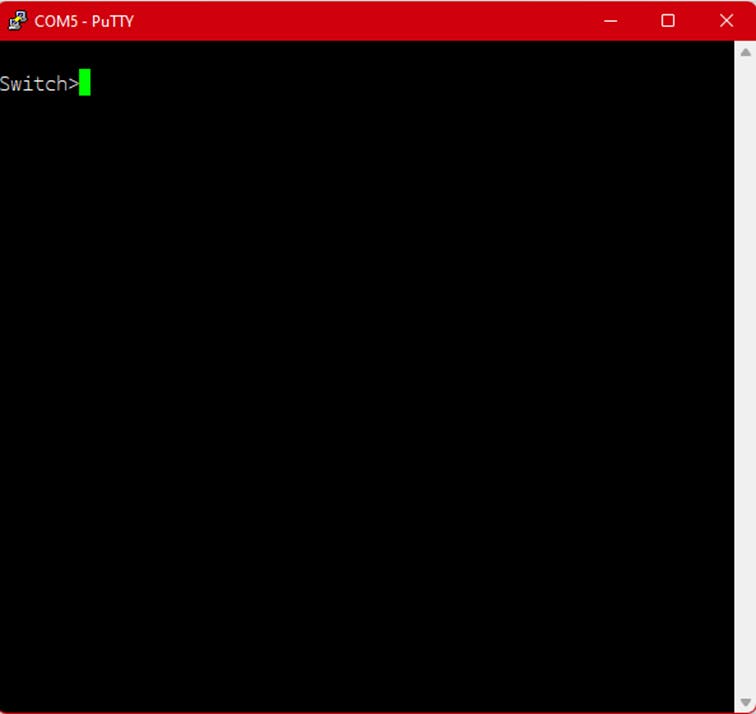
Then click on OPEN Button, which will pop up a Command line Interface (CLI).
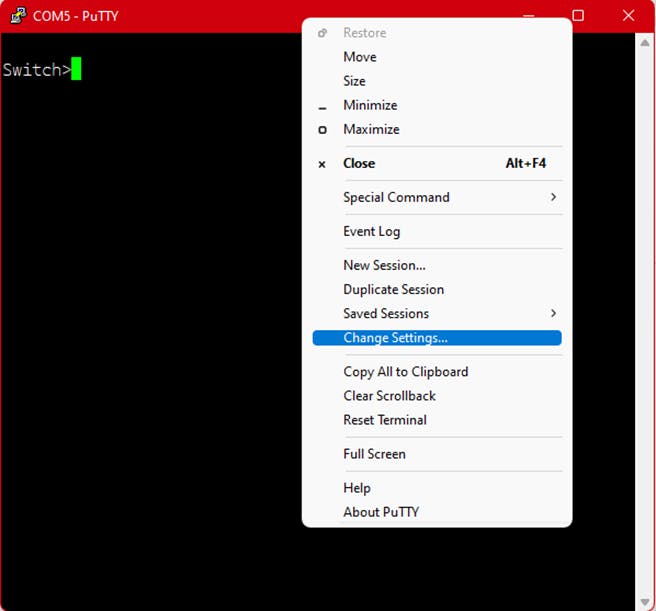
Step-4: Working with Putty CLI by changing the color interface.
I. Once the CLI is pop up to screen as shown in Step-4, Right click at the top of the terminal and select Change Setting.
 II. At the left hand side of the Category, navigate to Window section under the sub-section select colors. At the bottom, Under “Select a color to adjust”, you can decide to change any type of color style of your choice.
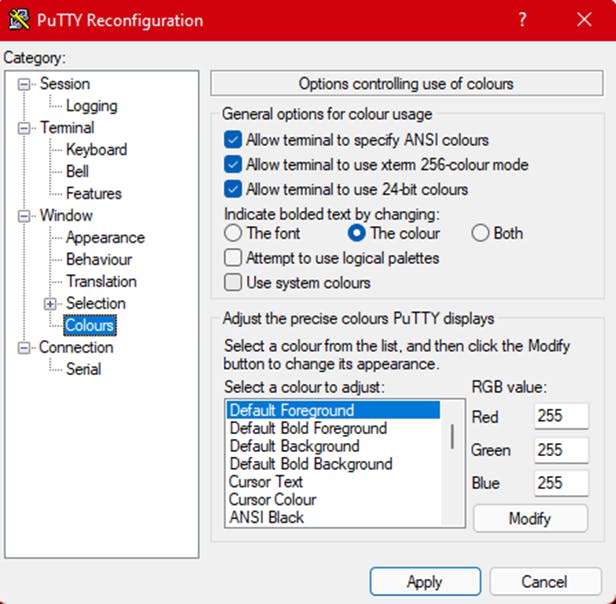
In this lab, we selected the “Default Foreground” and click on “Modify”.
Ill. A Color palette box will pop and you can choose any color of your choice (we Choose Green). Then click on ‘OK’ and ‘Apply’.
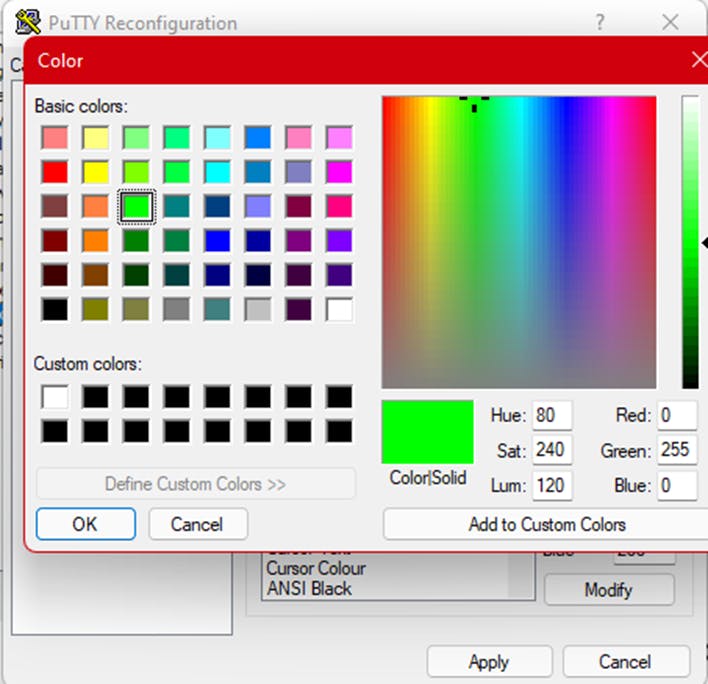
Notice the color changed from White to Green
Step-5: Changing the Appearance of the Interface
l. The Appearance include the Font type, size and style. From Step-5 (l), under “Window” click on 'Appearance’ and then ‘Change’
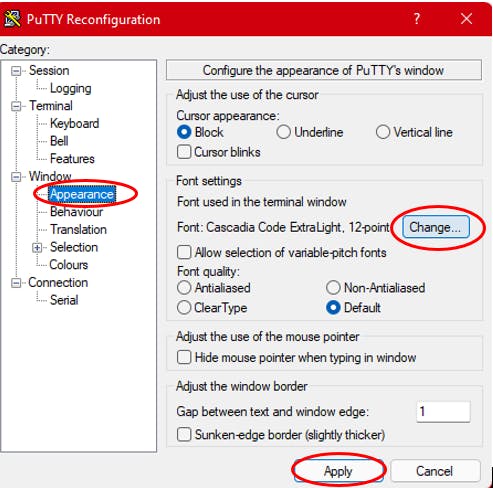 ll. Once ‘Change’ button has being clicked, a formatting box pops up which allows us to select font of our choice.
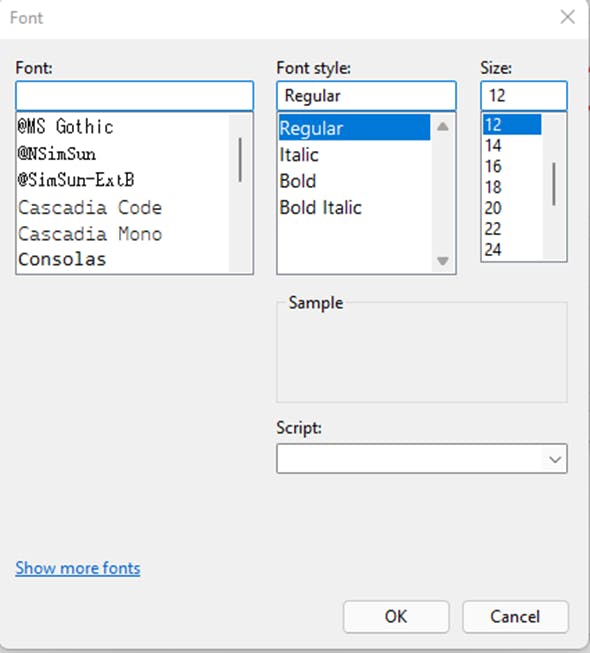
lll. Once done with selecting font, click on ‘OK’ and then “Apply” Button
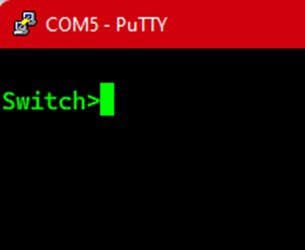
Notice the Text Format Changes
Step-6: How to permanently save Session
I. Once all configuration and setting has been done, it is required that the Session is saved to avoid loss of configured settings.
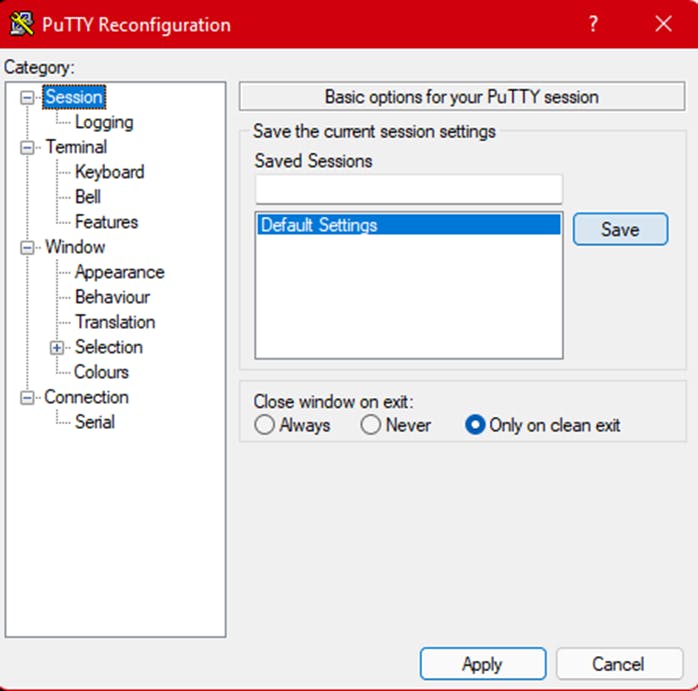
ll. As Shown above, navigate to the ‘category’ by right clicking at the top of the terminal. Click on the Session and Default Settings and then on the Save button.