Flaws2.cloud Objective 1 to 6

Lab Objective
In this lab, you will be playing the role of an incident responder with access to the 'Security' AWS account as an IAM user. This account holds a copy of the logs from the incident's period and can assume the 'Security' role within the target account. This will allow you to investigate and identify the misconfigurations that led to this attack.”
Your IAM credentials for the Security account
Login: https://flaws2-security.signin.aws.amazon.com/console
Account ID: 322079859186
Username: security
Password: password
Access Key: AKIAIUFNQ2WCOPTEITJQ
Secret Key: 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
"With the provided credentials, you have access to the Security account, which can assume the 'security' role within the Target account. Additionally, you can access an S3 bucket named 'flaws2_logs' in the Security account. This bucket contains the CloudTrail logs that were recorded during a successful compromise from the Attacker track.”
Prerequisite Setup on CLI
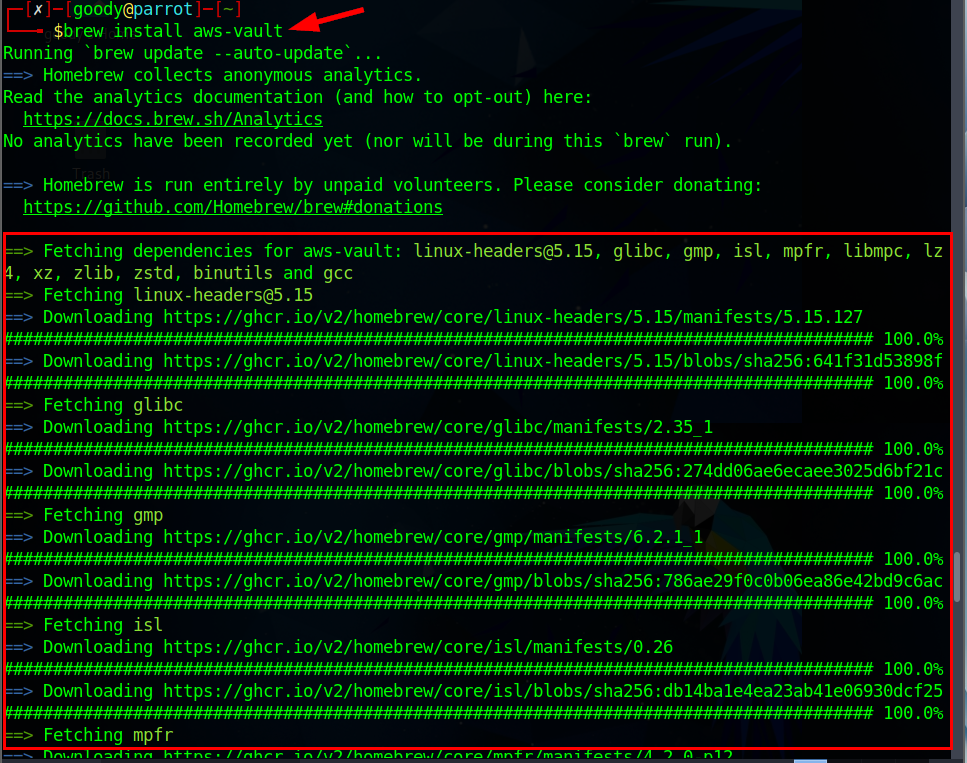
To get started in this lab, Install aws-vault via your Linux terminal to help prevent storing the credential keys in plain text in your home directory, just like the AWS CLI does (@ ~/.aws/credentials)
- To begin the process of installing aws-vault, you should first get Homebrew up and running. Homebrew is a handy tool that makes installing software packages, libraries, and command-line tools easy.
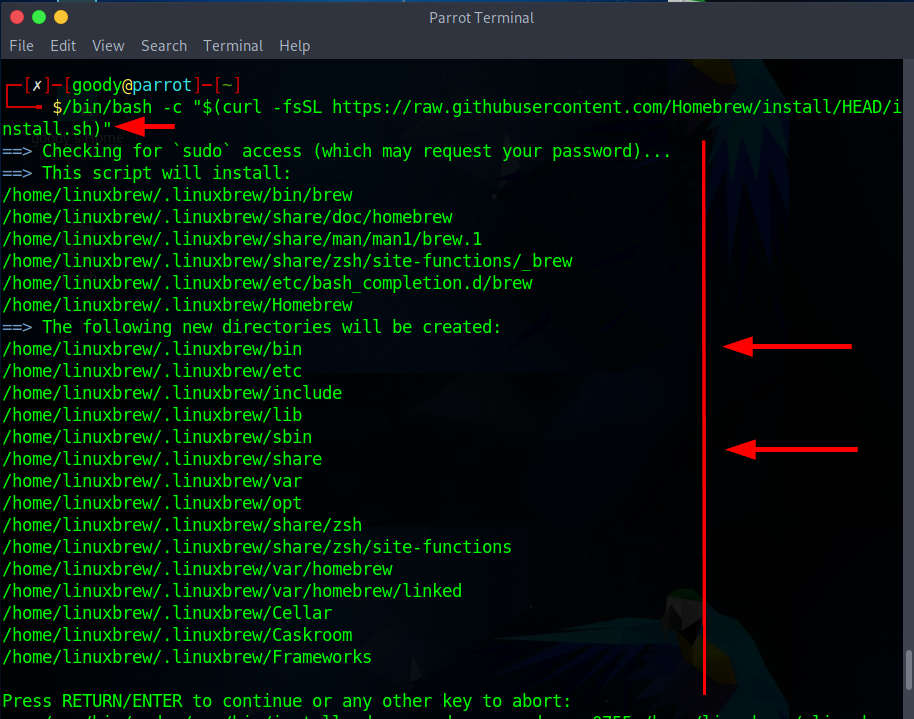
⇒ Execute the command below in your Linux terminal to install Homebrew, which will then be utilized for installing aws-vault.
Watch the installation video Here
# run the command on your terminal to install homebrew
/bin/bash -c "$(curl -fsSL https://raw.githubusercontent.com/Homebrew/install/HEAD/install.sh)"
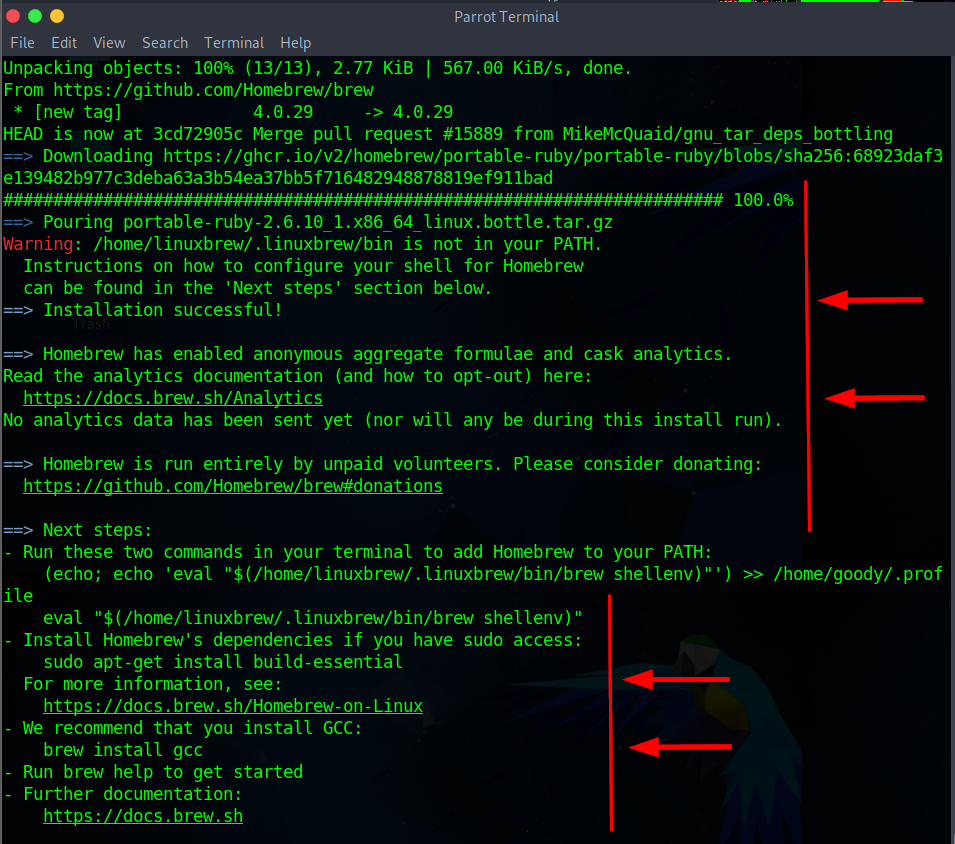
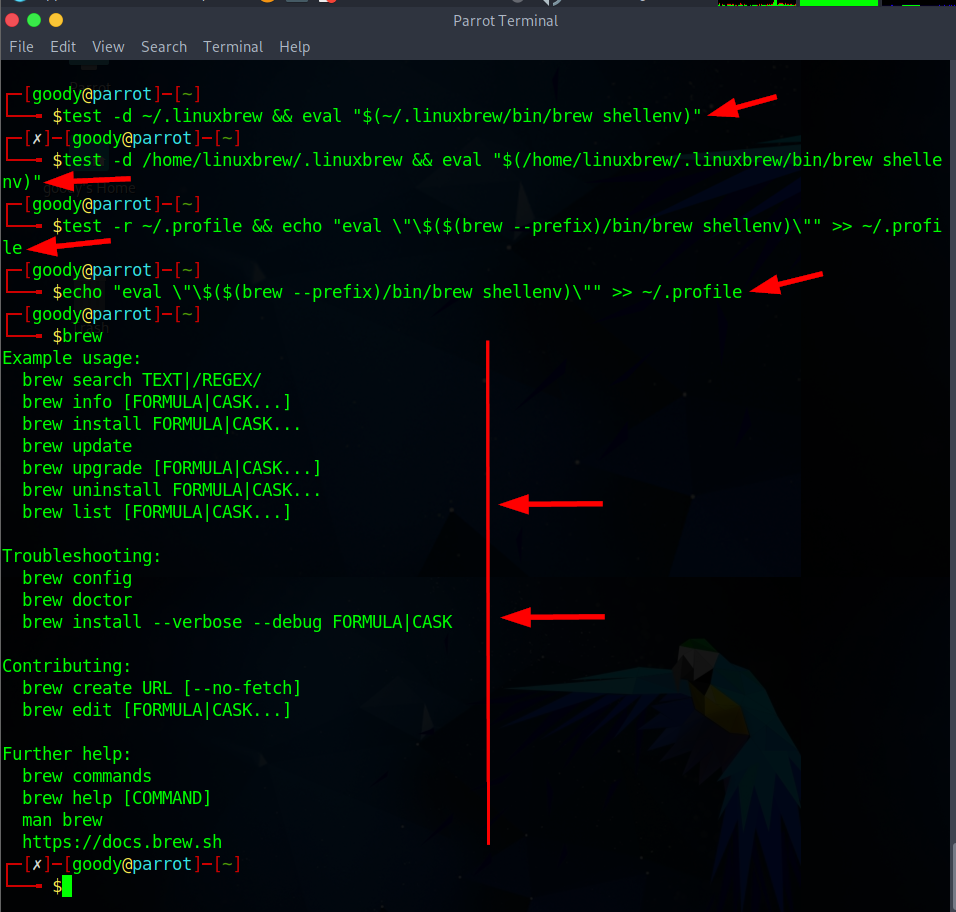
- Add Homebrew to your PATH using the commands below. Run the commands one at a time. Once done, run the command
brewto confirm the installation.
$ test -d ~/.linuxbrew && eval "$(~/.linuxbrew/bin/brew shellenv)"
$ test -d /home/linuxbrew/.linuxbrew && eval "$(/home/linuxbrew/.linuxbrew/bin/brew shellenv)"
$ test -r ~/.profile && echo "eval \"\$($(brew --prefix)/bin/brew shellenv)\"" >> ~/.profile
$ echo "eval \"\$($(brew --prefix)/bin/brew shellenv)\"" >> ~/.profile
NOTE: Use the Lab guide to follow the defender path if you encounter difficulties installing aws-vault, as Homebrew might not be installed in most cases due to network problems or other related issues.
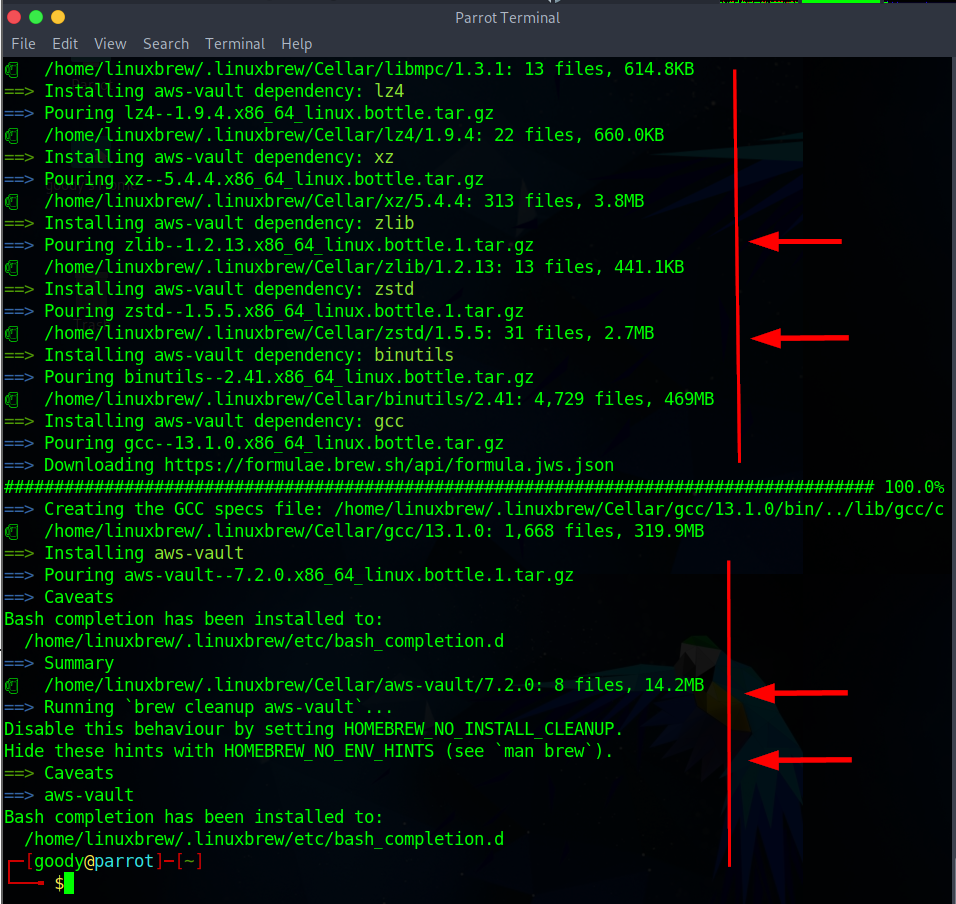
Install AWS-Vault using the command
brew install aws-vault
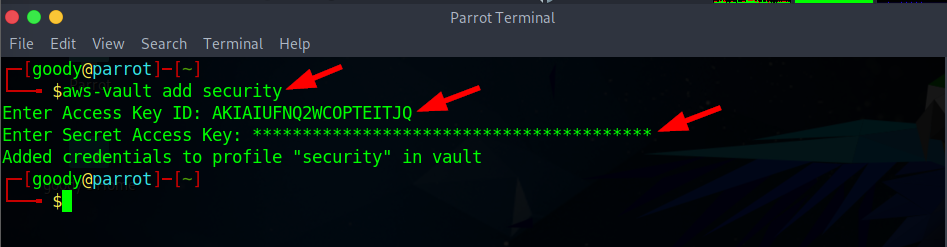
Set up AWS-vault with provided IAM credentials.
NB: Check this write-up on how to Use AWS-Vault to manage access to AWS
Access Key: AKIAIUFNQ2WCOPTEITJQSecret Key: paVI8VgTWkPI3jDNkdzUMvK4CcdXO2T7sePX0ddFUsername: securityPassword: password
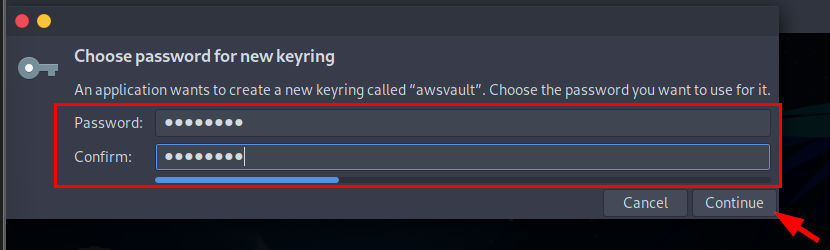
- Run the command on your terminal and add the above creds
Access Key&Secret Key. Next, when a password dialogue box pops up, enter Password aspassword
# Store AWS credentials for the "security" profile
$ aws-vault add security
- Next, edit your AWS configuration File (typically located at ~/.aws/config) and add the below configuration to the “Security” Profile
region=us-east-1
output=json


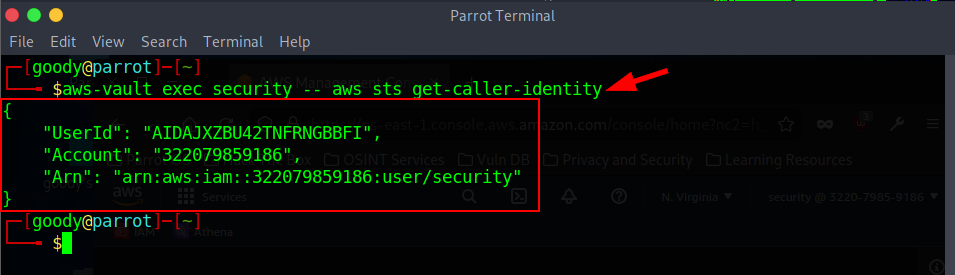
- Execute the get-caller-identity command to confirm credentials
$ aws-vault exec security -- aws sts get-caller-identity
List credentials
- Use the command to List credentials in aws-vault
aws-vault list

Objective1: Downloading CloudTrail logs
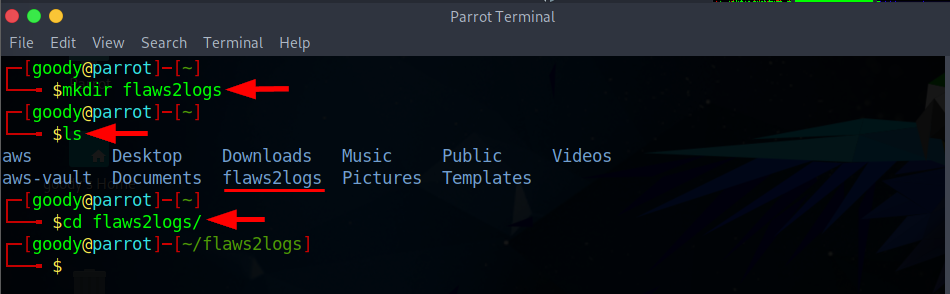
- Make a directory/folder for the CloudTrail logs
$ mkdir flaws2logs
$ ls
└──╼ $cd flaws2logs/
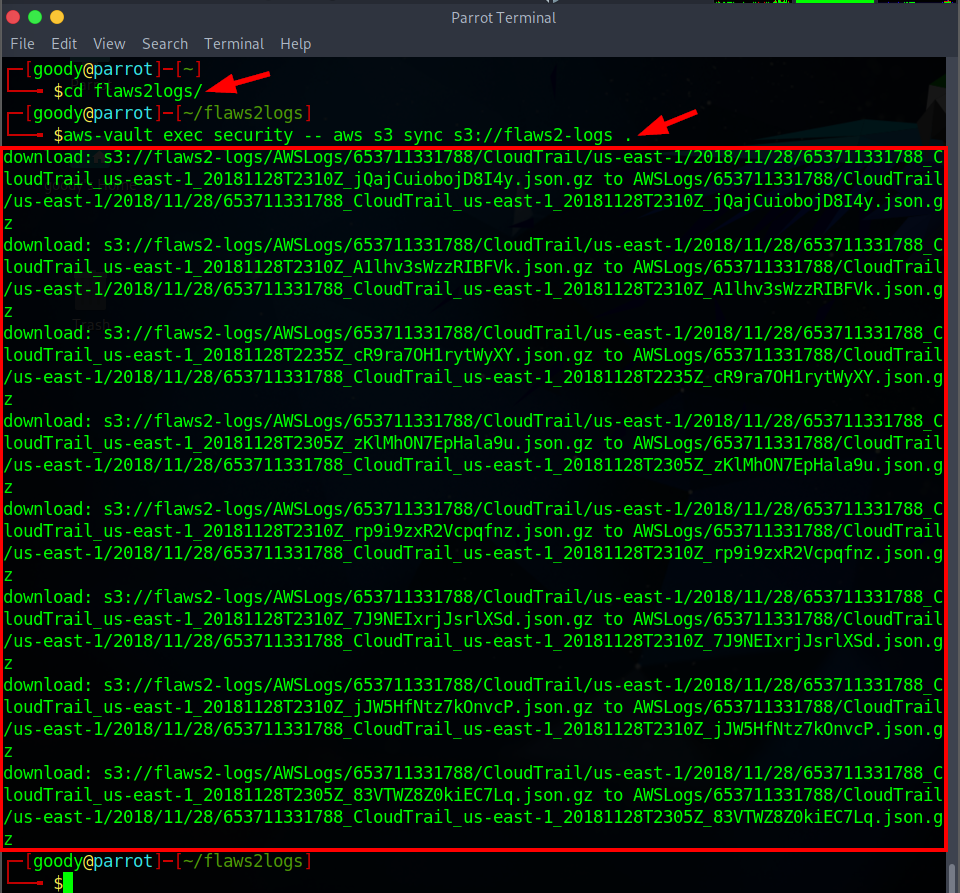
- Download the CloudTrail Logs into the new directory
Now that we've stored the IAM User credentials in aws-vault, we can use the
"aws-vault"command to access the security profile.
$ aws-vault exec security -- aws s3 sync s3://flaws2-logs .
Objective 2: Access the Target account
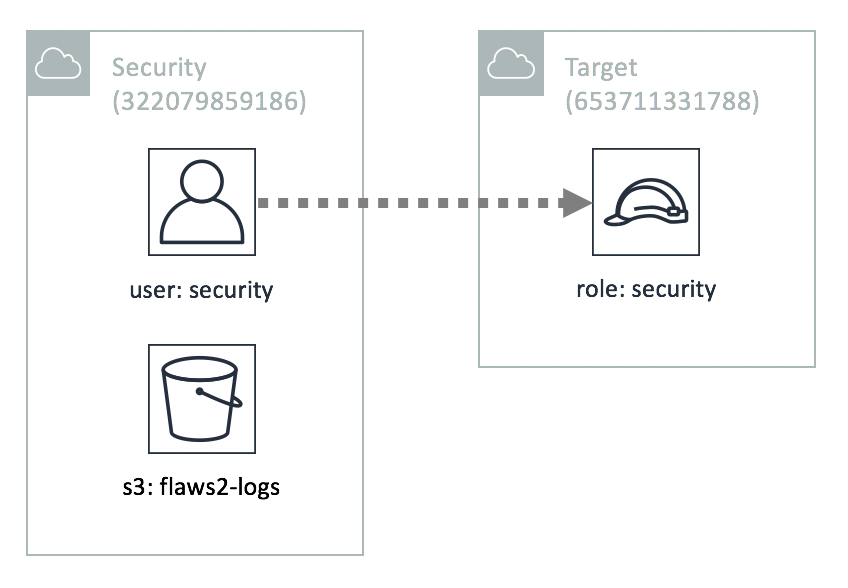
A widely followed and recommended approach within AWS is to set up a separate Security account, that holds CloudTrail logs from various other AWS accounts. From the above diagram, the Security account also possesses a form of access to the other account (Target Account), enabling oversight. To achieve this goal, you will need to establish a connection to the Target account by utilizing an IAM role that authorizes the Security account's access.
On your Security account ~/.aws/config file, you likely already have a profile as shown below.
[profile security]
region=us-east-1
output=json
Now, update the profile to assume the role of the target account.
- Run the command vim
~/.aws/configto edit and update the file
[profile target_security]
region=us-east-1
output=json
source_profile = security
role_arn = arn:aws:iam::653711331788:role/security
NOTE:
source_profile = security: This line establishes that the credentials used by this profile will be sourced from another profile namedsecurity. This implies that the credentials needed to access thetarget_securityprofile is managed by thesecurityprofile.


Press the Esc key and enter:
wq!to save and quit. Check here on how to use Vim
- Let’s confirm that we have access to this “target” account.
$ aws-vault exec target_security -- aws sts get-caller-identity
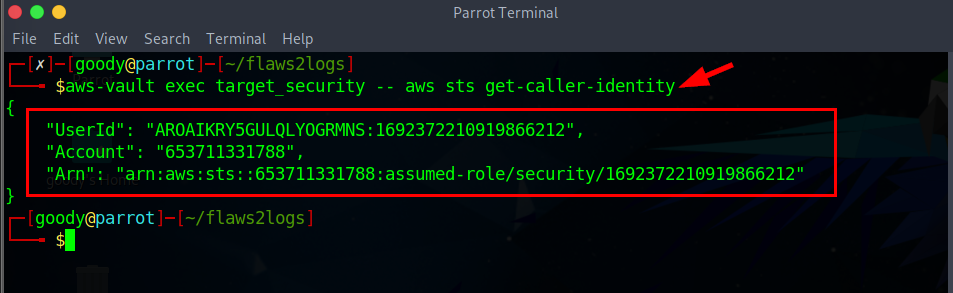
One thing to note is that the account ID has changed to 653711331788, which is not the same as the original account ID of 322079859186 for the "security" account.
- Use the command below to list the content on the S3 bucket
$ aws-vault exec target_security -- aws s3 ls
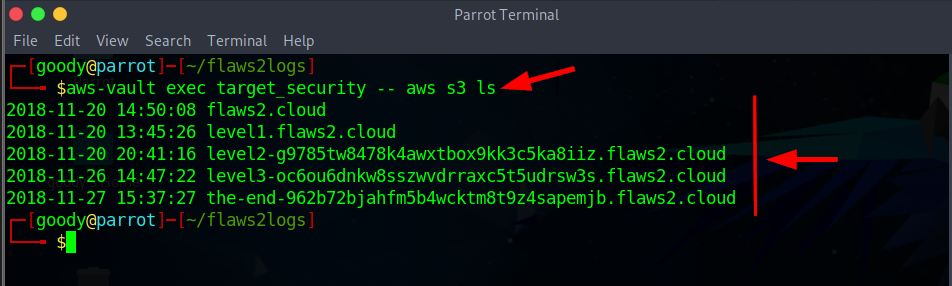
The Above image shows the list of S3 content for Attacker paths
Objective 3: Use jq for investigation
Jq, short for JSON Query, is a highly valuable tool for working with JSON data, allowing you to efficiently manipulate and manage it.”
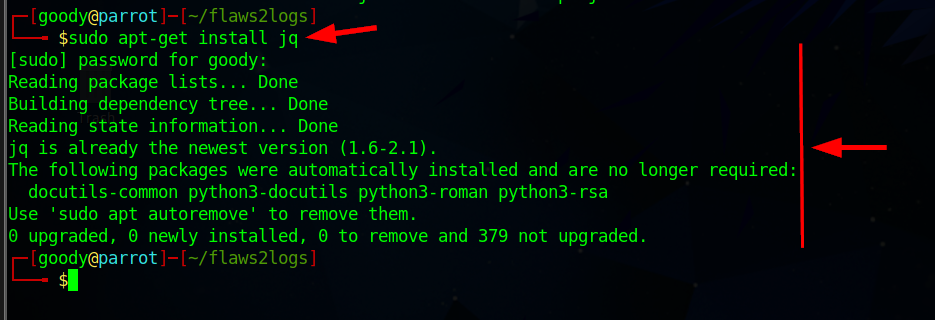
- To install the Jq tool on your Linux CLI, run the command
sudo apt-get install jq
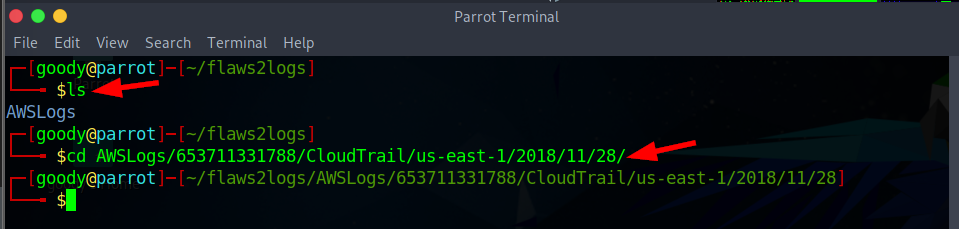
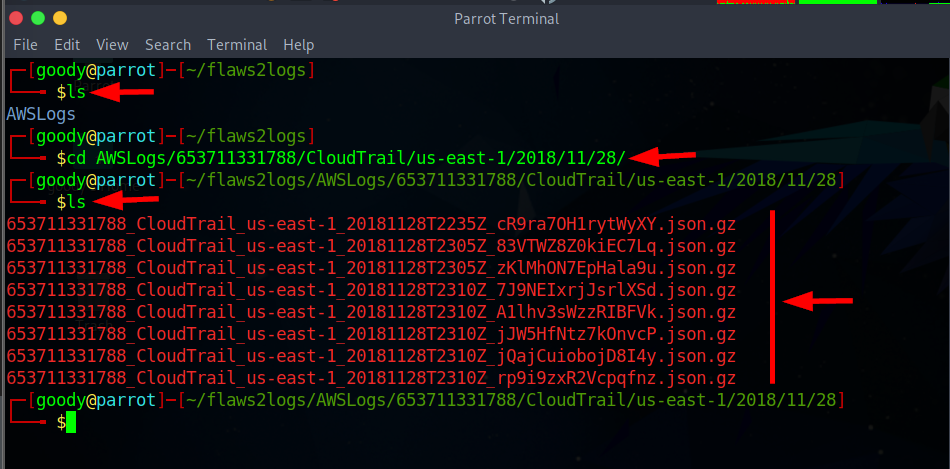
- Navigate into the logs file directory using the following command:
Important Note: Ensure that you are currently inside the folder you created in Objective 1, the one where the logs were downloaded. In this lab, the folder/directory is called "flaws2logs".
─[goody@parrot]─[~/flaws2logs]
└──╼ $ls
└──╼ $cd AWSLogs/653711331788/CloudTrail/us-east-1/2018/11/28/
NB: CloudTrail logs in the subfolder
AWSLogs/653711331788/CloudTrail/us-east-1/2018/11/28/
- List the content in the subfolder using the command
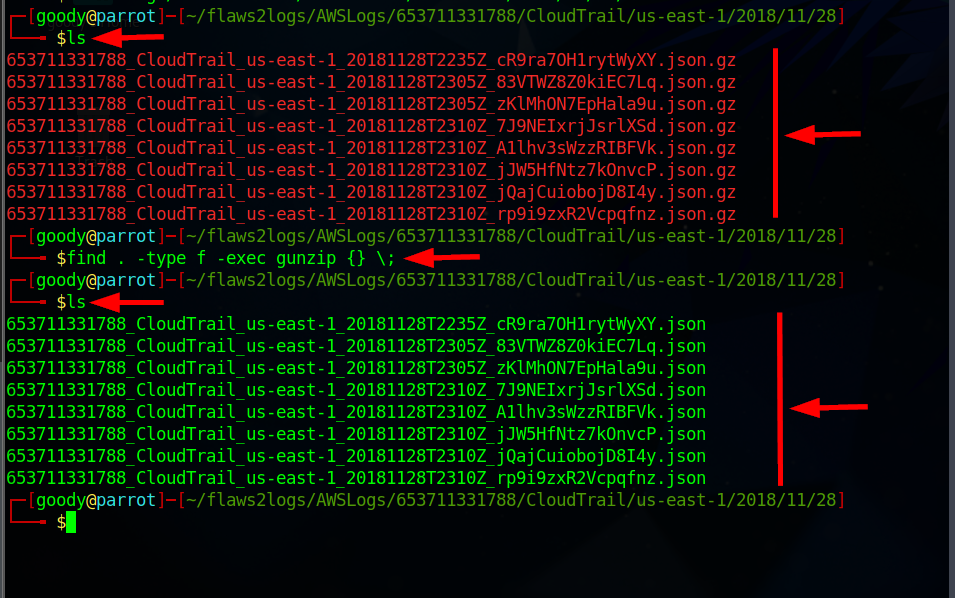
lsand you'll notice that all the JSON files have a .gz extension, indicating they are compressed files.
- Run the command to decompress (unzip) each found gzip-compressed file.
$ find . -type f -exec gunzip {} \;
$ ls
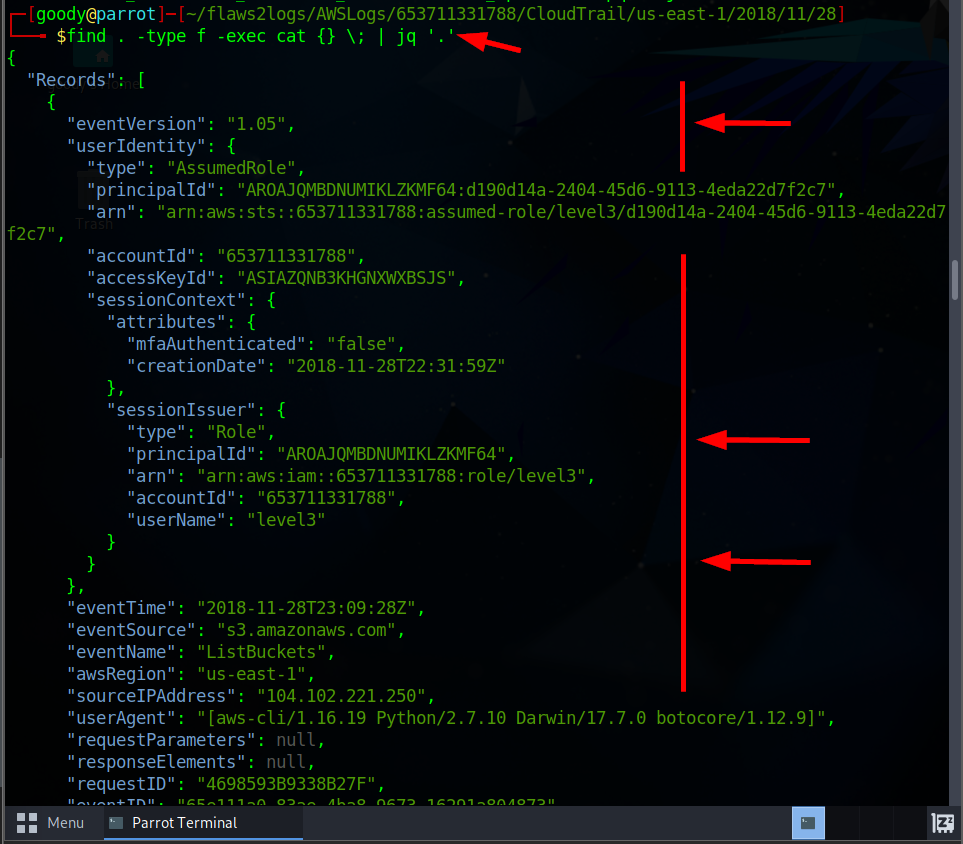
- Execute the command to view the log files in JSON format by using
jqtool
find . -type f -exec cat {} \; | jq '.'
Filtering the log files
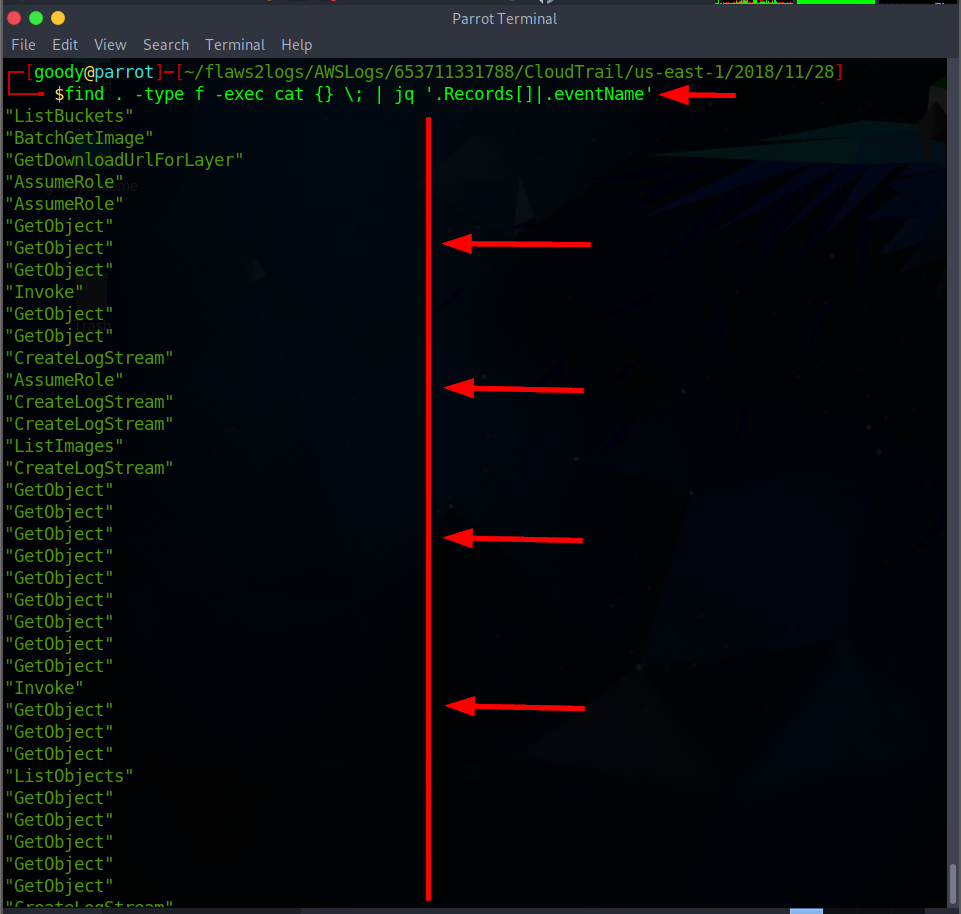
- Run the command to filter the list by eventName only
$ find . -type f -exec cat {} \; | jq '.Records[]|.eventName'
- Run the command to filter the log files by eventName and eventTime
NOTE:
⇒
crfor printing data in a row (without newlines)⇒
|@tsvfor tab separating value
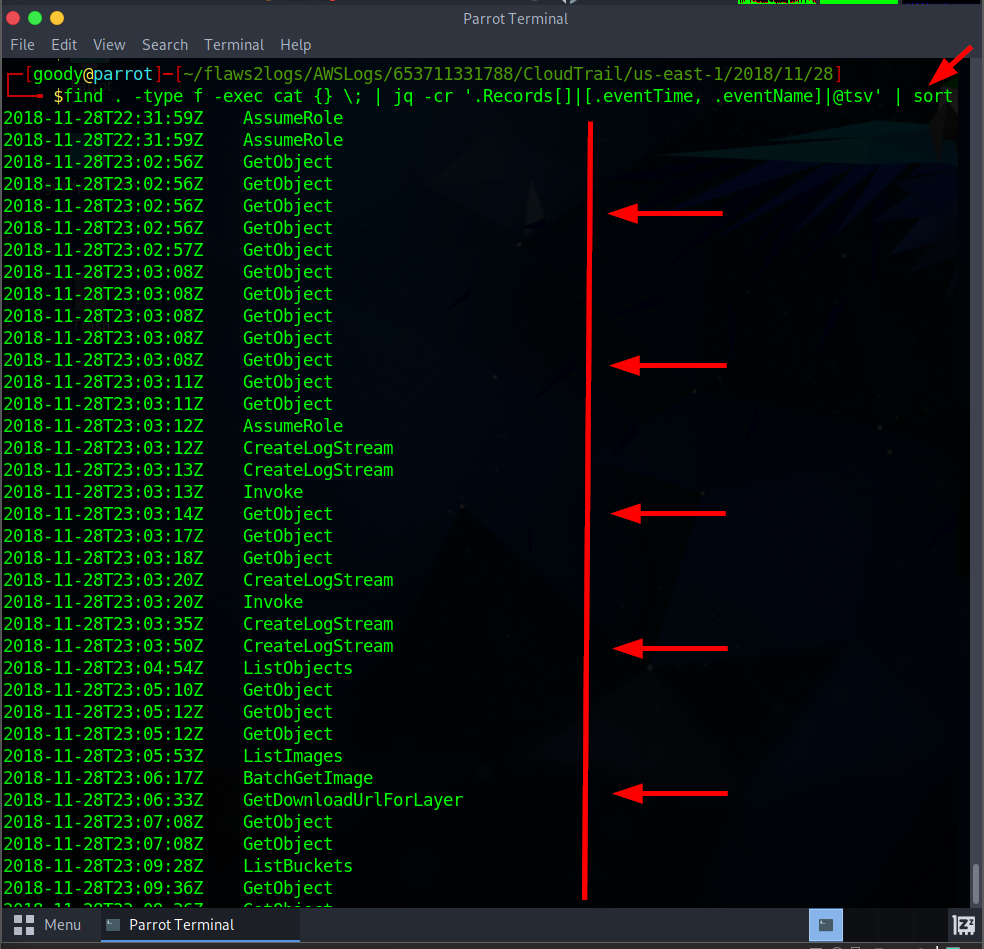
$ find . -type f -exec cat {} \; | jq -cr '.Records[]|[.eventTime, .eventName]|@tsv' | sort
- Do an in-depth Query using the command to extract
eventTime, sourceIPAddress, userIdentity.arn, userIdentity.accountId, userIdentity.type, eventNamein TSV format.
$ find . -type f -exec cat {} \; | jq -cr '.Records[]|[.eventTime, .sourceIPAddress, .userIdentity.arn, .userIdentity.accountId, .userIdentity.type, .eventName]|@tsv' | sort
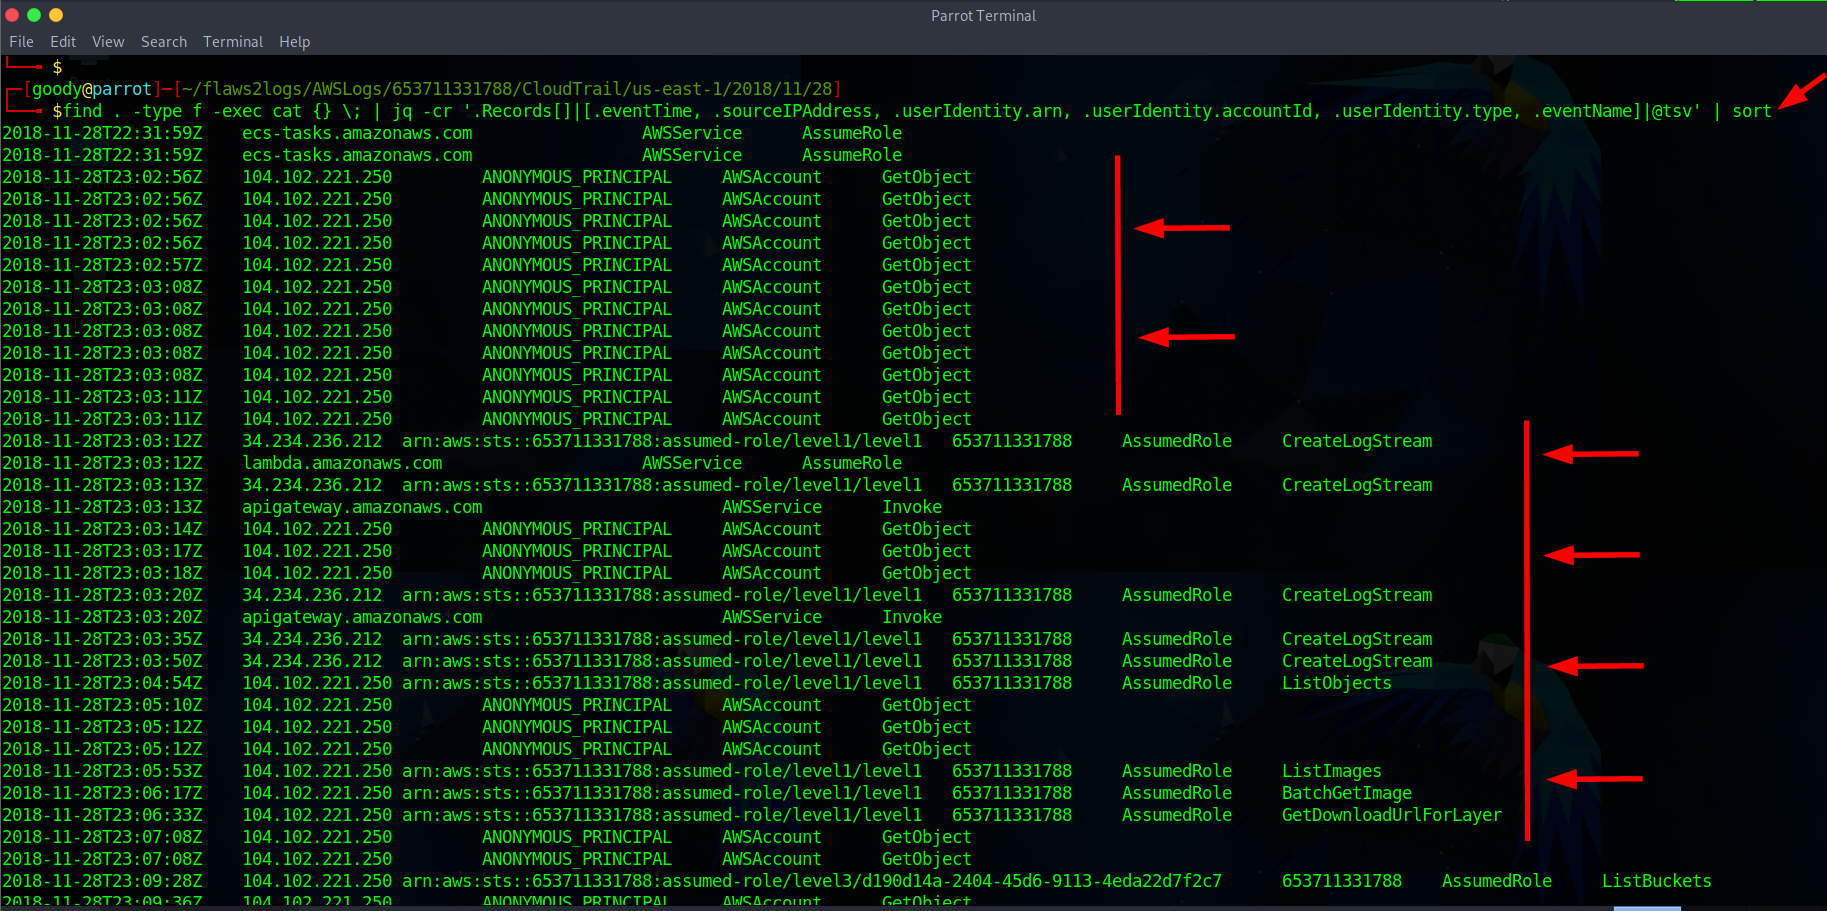
Please take a look at the image for a clearer view by clicking here. Or use the free converter tool from TSV to XLS

From the above queries, you'll find records of attacks, but there are also logs related to how AWS services operate, such as Lambda and ECS. Some logs don't involve specific actions by anyone but rather show how AWS functions. There are entries marked as ANONYMOUS_PRINCIPAL, indicating calls without a specific user. These are usually S3 requests from web browsers, visible as "Chrome" in the user-agent data, unlike AWS CLI requests.
Objective 4: Identify credential theft
Once you've analyzed particular queries to comprehend the log files, proceed with your investigation by examining the ListBuckets API call for any potential credentials or attacks.
- Use the command to query the eventName by ListBuckets.”
$ find . -type f -exec cat {} \; | jq '.Records[]|select(.eventName=="ListBuckets")'
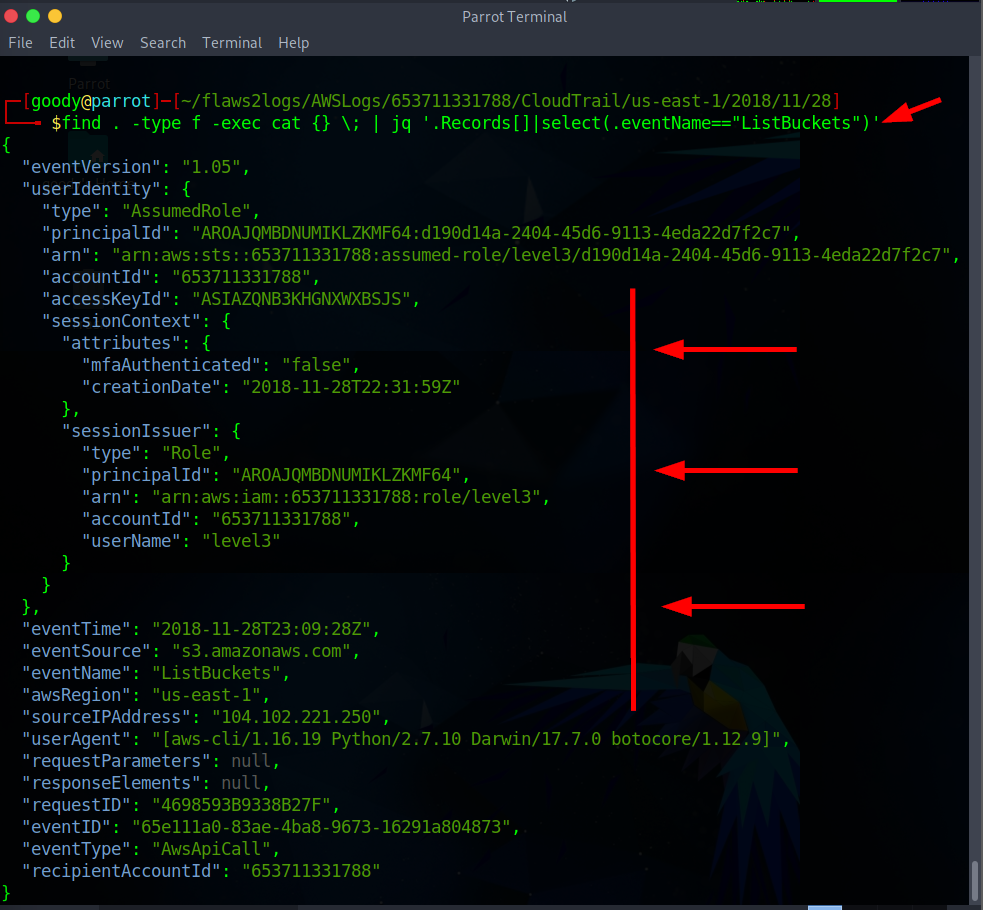
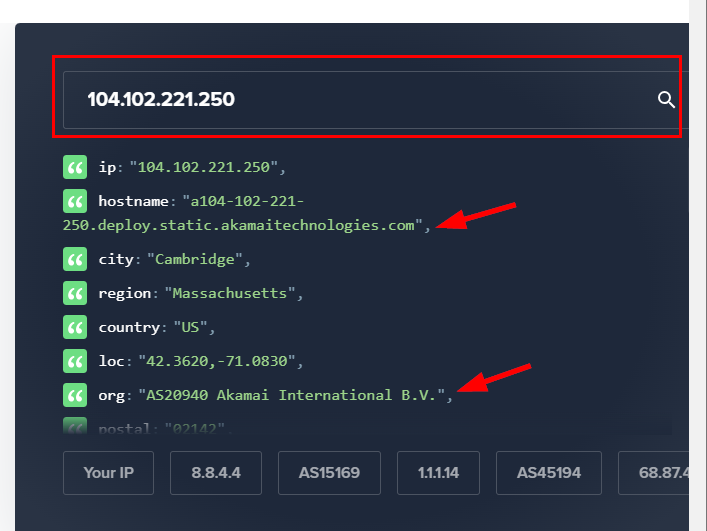
Observe the sourcesIPAddress
104.102.221.250using IpInfo . You'll notice the IP is not an Amazon owned IP and it’s viewed as the attacker’s IP.
- Now, Investigate the Role/User that performed the action
level3
$ aws-vault exec target_security -- aws iam get-role --role-name level3
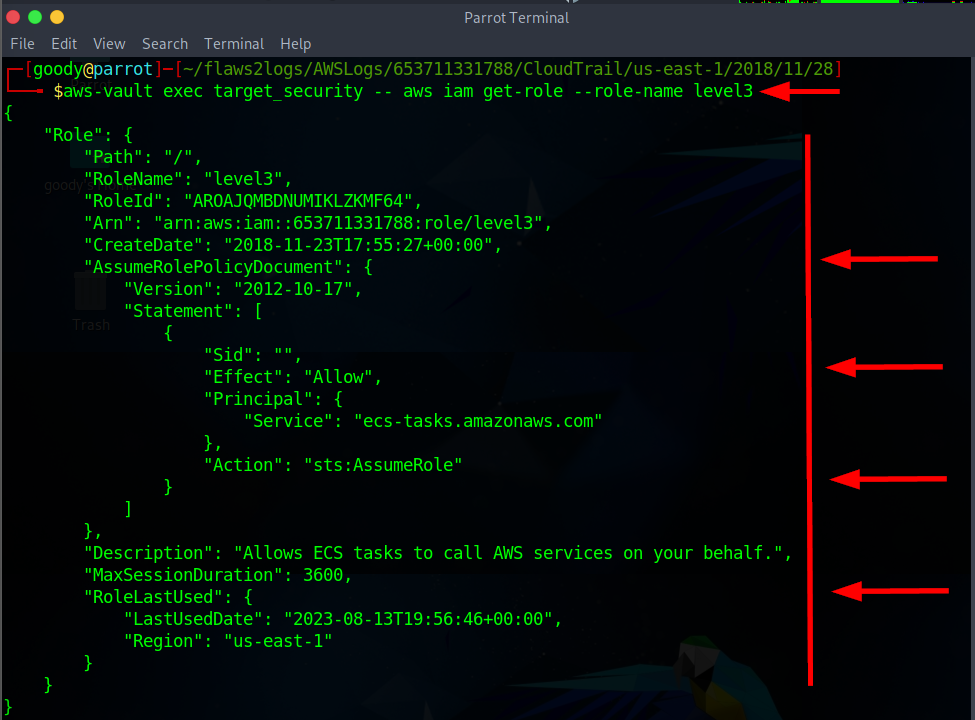
It is observed that the role with the ARN “arn:aws:iam::653711331788:role/level3," which should only be used by the Amazon ECS service ecs-tasks.amazonaws.com, was accessed from an IP address (104.102.221.250) that is not associated with AWS (list of IPs). This suggests a compromise of the role, as the ListBuckets API call came from a non-AWS IP address, whereas usual activity involves API calls from the AWS ECS service's IP address.
We don't have logs from the webserver that is running the ECS container, but we can assume from this one log event that it must have been hacked. Normally, you'd see the resource (the ECS in this case) having made AWS API calls from its own IP, which you could then compare against any new IPs it may have made. This concept is explained by Will Bengston in his talk, Detecting Credential Compromise in AWS.
Objective 5: Identify the public resource
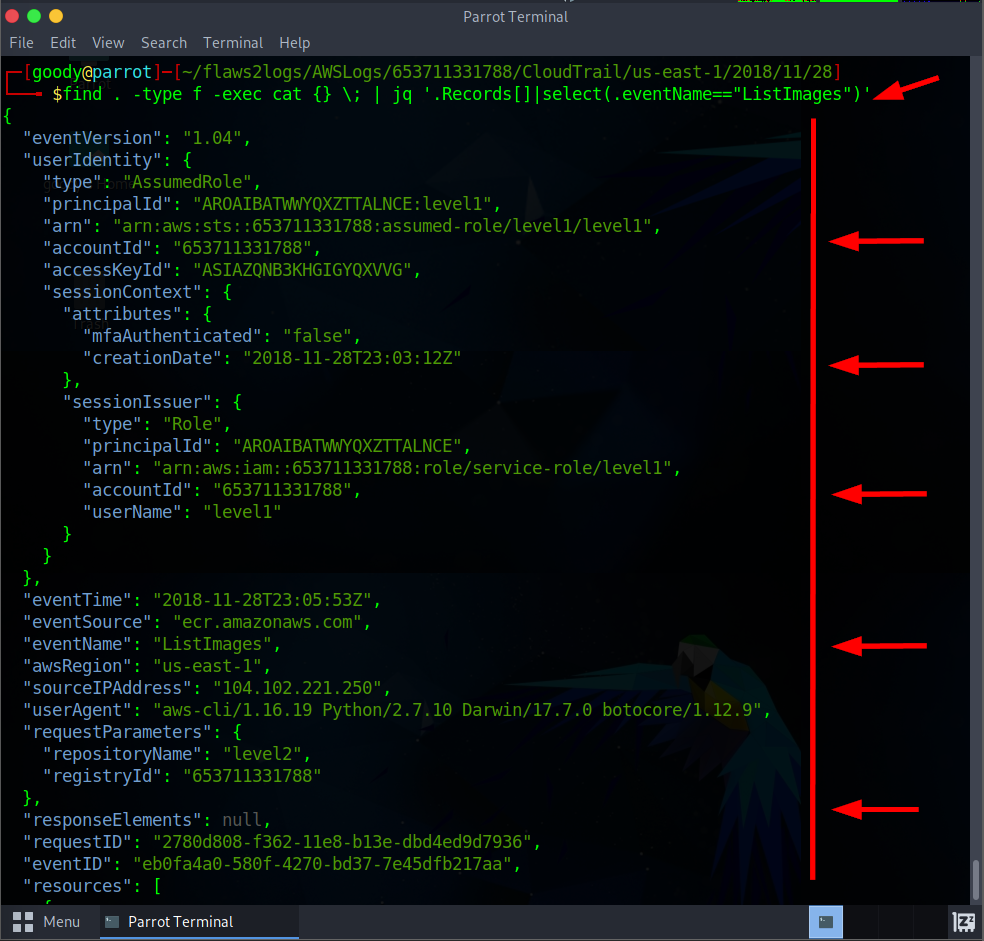
Based on the previous investigations, you'll observe that level1 invoked the following APIs: ListImages, BatchGetImage, and GetDownloadUrlForLayer. To start, examine each of these API calls and view the compromised session credential.
- Run the command to view the log file for the ListImages API call
$ find . -type f -exec cat {} \; | jq '.Records[]|select(.eventName=="ListImages")'
- You can run the following API call commands for eventName BatchGetImage and GetDownloadUrlForLayer.
# BatchGetImage API Call
find . -type f -exec cat {} \; | jq '.Records[]|select(.eventName=="BatchGetImage")'

# GetDownloadUrlForLayer
find . -type f -exec cat {} \; | jq '.Records[]|select(.eventName=="GetDownloadUrlForLayer")'
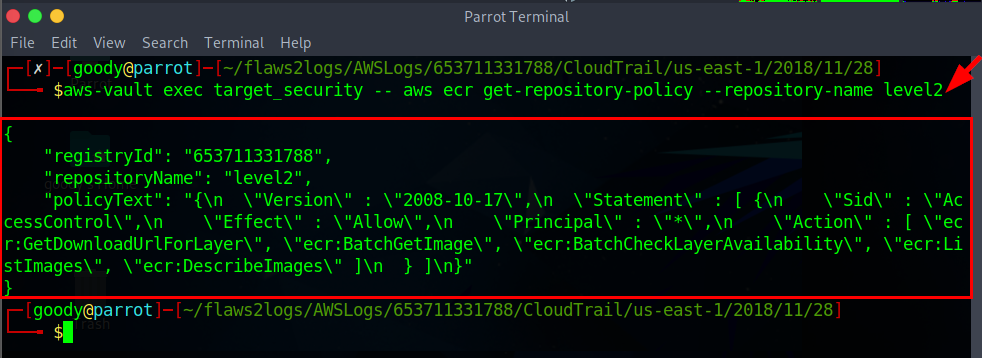
- Run the command to view the ListImages API event for
repositoryName": "level2
$ aws-vault exec target_security -- aws ecr get-repository-policy --repository-name level2
- Run the command using jq to view in a structured JSON Format
$ aws-vault exec target_security -- aws ecr get-repository-policy --repository-name level2 | jq '.policyText|fromjson'
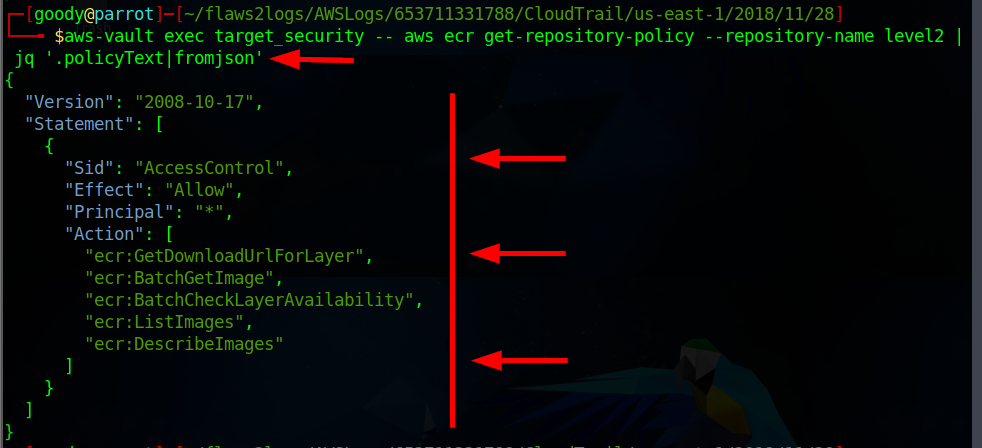
As observed, the Principal is set to “*” which means the actions can be performed by anyone over the internet. Basically, the ECR is public.
Scott mentioned, “Ideally, you can use a tool like CloudMapper to scan an account for public resources like this before you trace back an attack.”
Objective 6: Use Athena
In this objective, you will investigate the logs using AWS Service Athena, similar to the way you would with jq in the previous objectives. Ensure you possess an account with both Athena and Glue privileges. Access Athena through your personal account at https://console.aws.amazon.com/athena/home?region=us-east-1#query. Please note that you'll be dealing with a small dataset, incurring only a minimal cost to your account.
- Log in to your personal AWS account and access Athena.
Note: You need to create an S3 bucket to store the query.

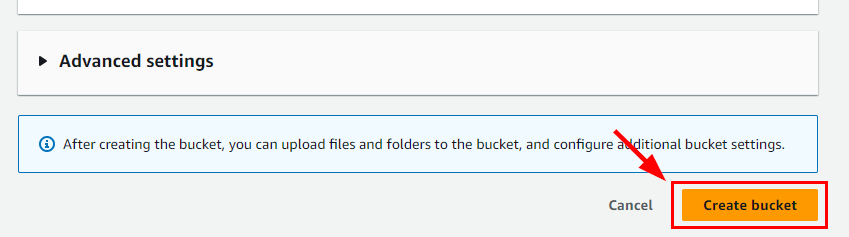
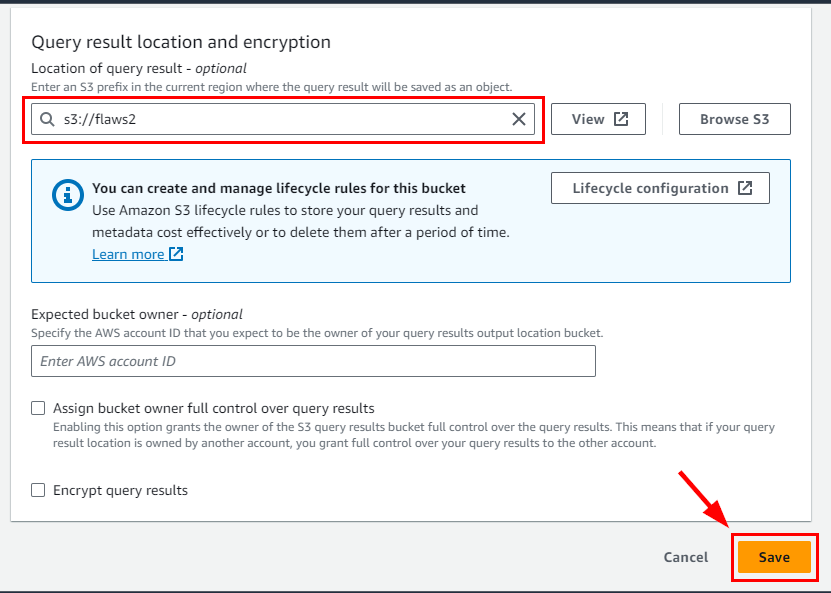
Navigate to the Amazon S3 bucket and create a bucket called flaws2
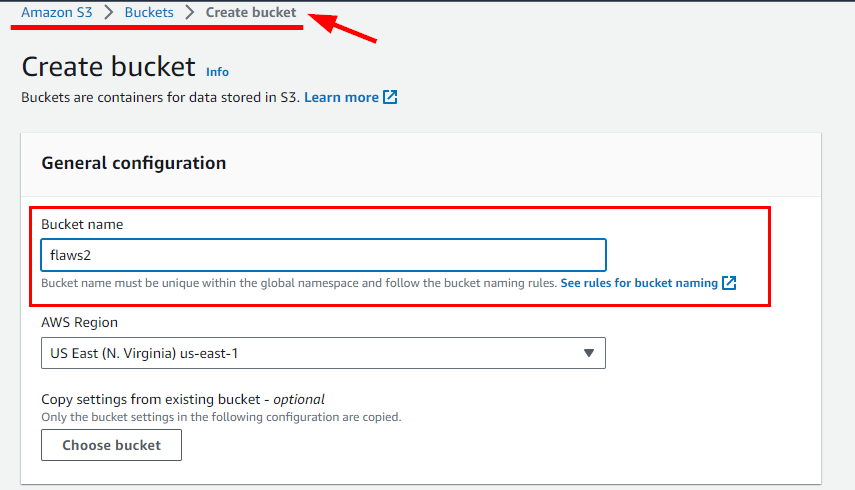
Retain all default settings, scroll down, and click Create bucket.
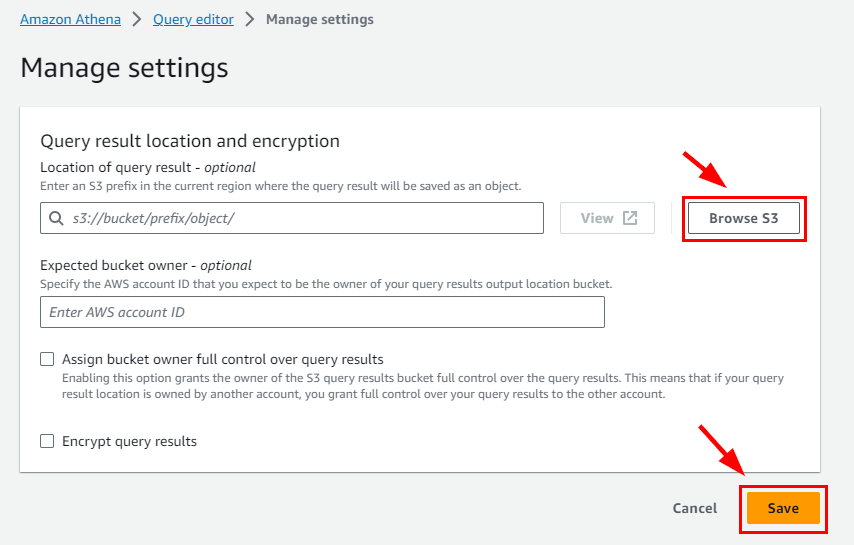
Navigate back to Amazon Athena ⇒ Query editor and click on Edit settings

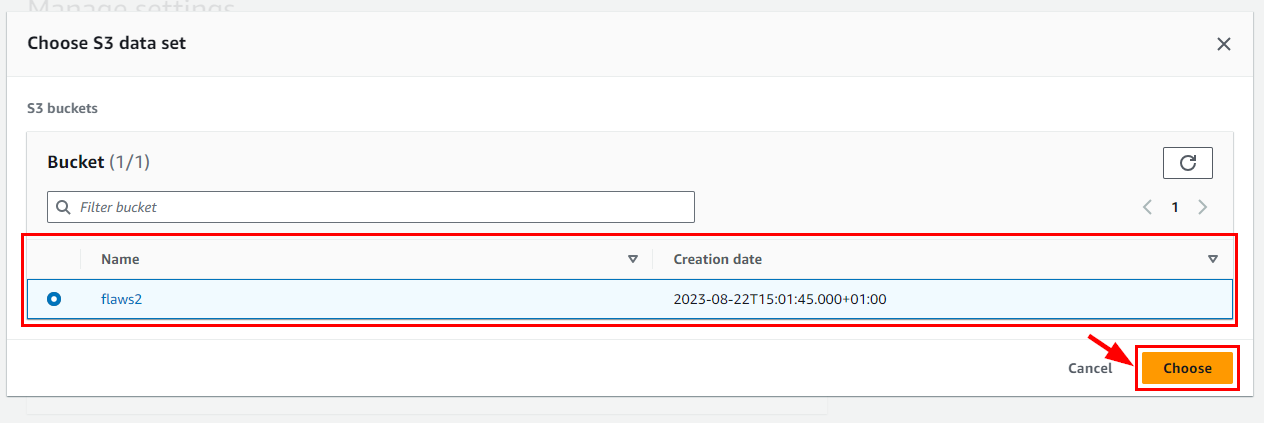
On Manage Settings, click on Browse S3 and select the Create S3 bucket (flaws2), then click on the Save button.
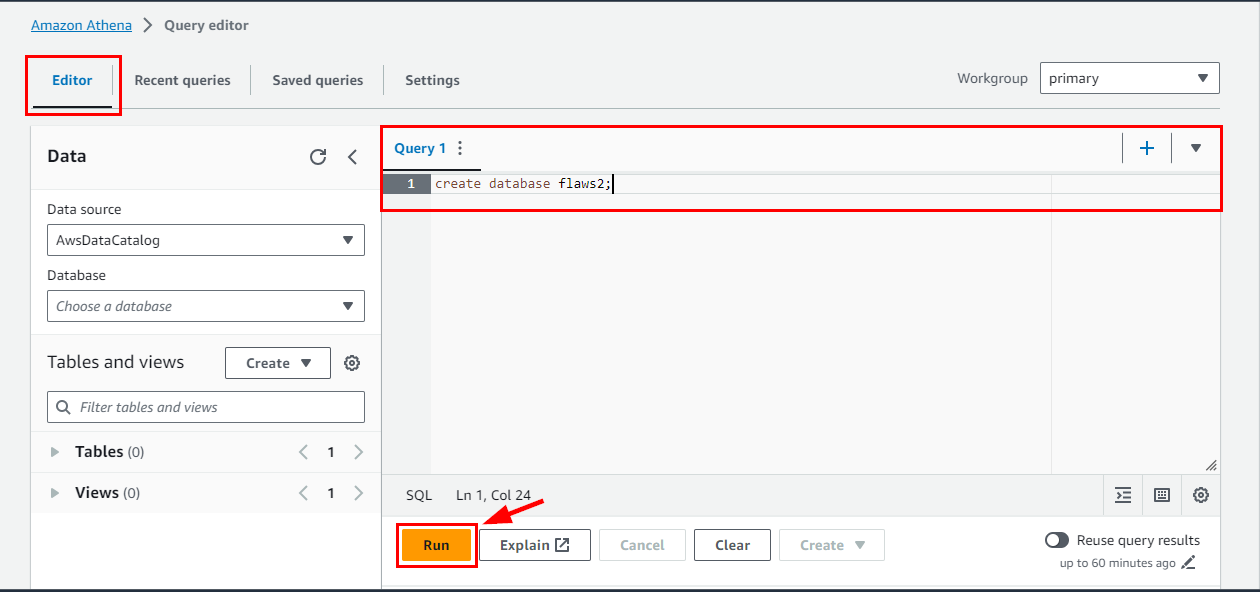
Next, create a database on the Query editor called flaws2 using the SQL command and click on the Run button
create database flaws2;
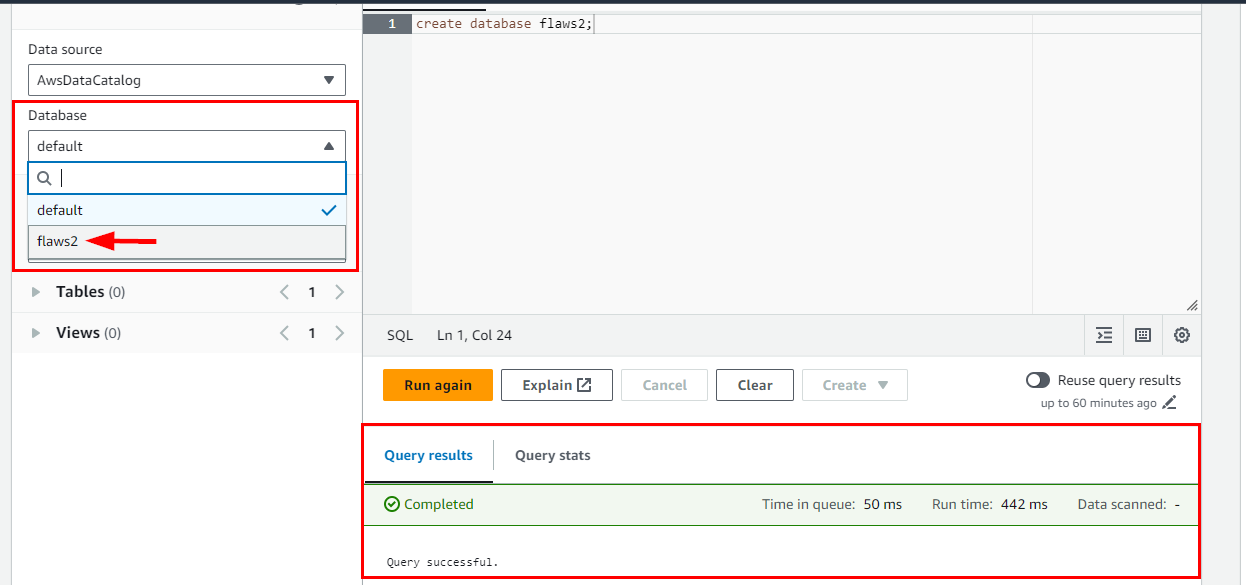
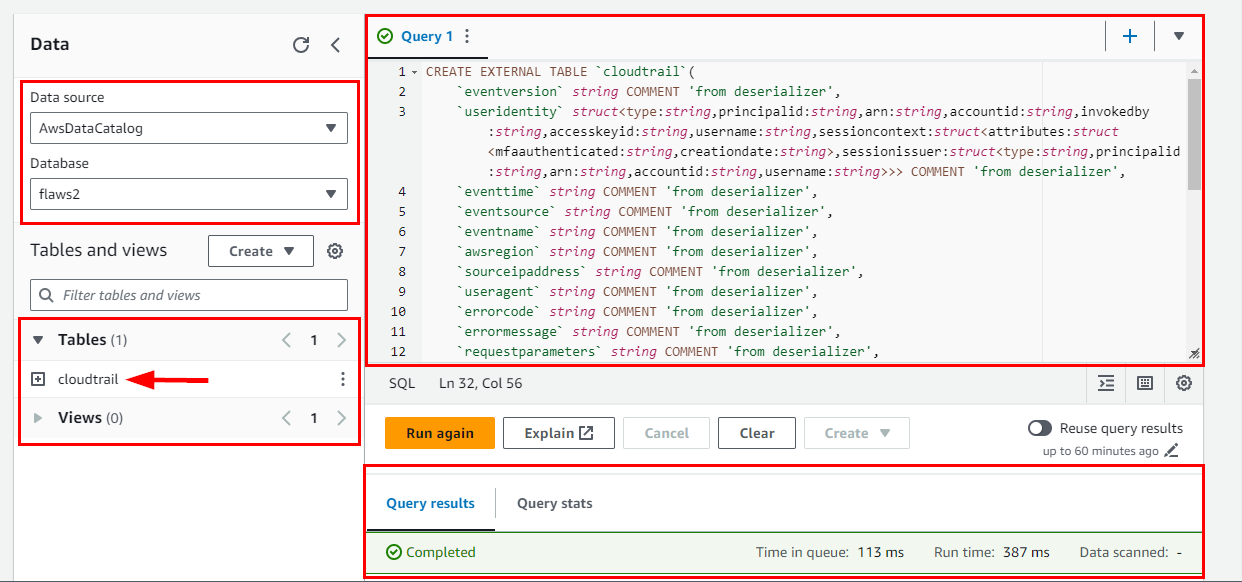
- Switch to the flaws2 database you just created here: flaws2. Then, clear the text in Query1 and run the below SQL command.
CREATE EXTERNAL TABLE `cloudtrail`(
    `eventversion` string COMMENT 'from deserializer',
    `useridentity` struct<type:string,principalid:string,arn:string,accountid:string,invokedby:string,accesskeyid:string,username:string,sessioncontext:struct<attributes:struct<mfaauthenticated:string,creationdate:string>,sessionissuer:struct<type:string,principalid:string,arn:string,accountid:string,username:string>>> COMMENT 'from deserializer',
    `eventtime` string COMMENT 'from deserializer',
    `eventsource` string COMMENT 'from deserializer',
    `eventname` string COMMENT 'from deserializer',
    `awsregion` string COMMENT 'from deserializer',
    `sourceipaddress` string COMMENT 'from deserializer',
    `useragent` string COMMENT 'from deserializer',
    `errorcode` string COMMENT 'from deserializer',
    `errormessage` string COMMENT 'from deserializer',
    `requestparameters` string COMMENT 'from deserializer',
    `responseelements` string COMMENT 'from deserializer',
    `additionaleventdata` string COMMENT 'from deserializer',
    `requestid` string COMMENT 'from deserializer',
    `eventid` string COMMENT 'from deserializer',
    `resources` array<struct<arn:string,accountid:string,type:string>> COMMENT 'from deserializer',
    `eventtype` string COMMENT 'from deserializer',
    `apiversion` string COMMENT 'from deserializer',
    `readonly` string COMMENT 'from deserializer',
    `recipientaccountid` string COMMENT 'from deserializer',
    `serviceeventdetails` string COMMENT 'from deserializer',
    `sharedeventid` string COMMENT 'from deserializer',
    `vpcendpointid` string COMMENT 'from deserializer')
ROW FORMAT SERDE
    'com.amazon.emr.hive.serde.CloudTrailSerde'
STORED AS INPUTFORMAT
    'com.amazon.emr.cloudtrail.CloudTrailInputFormat'
OUTPUTFORMAT
    'org.apache.hadoop.hive.ql.io.HiveIgnoreKeyTextOutputFormat'
LOCATION
    's3://flaws2-logs/AWSLogs/653711331788/CloudTrail';
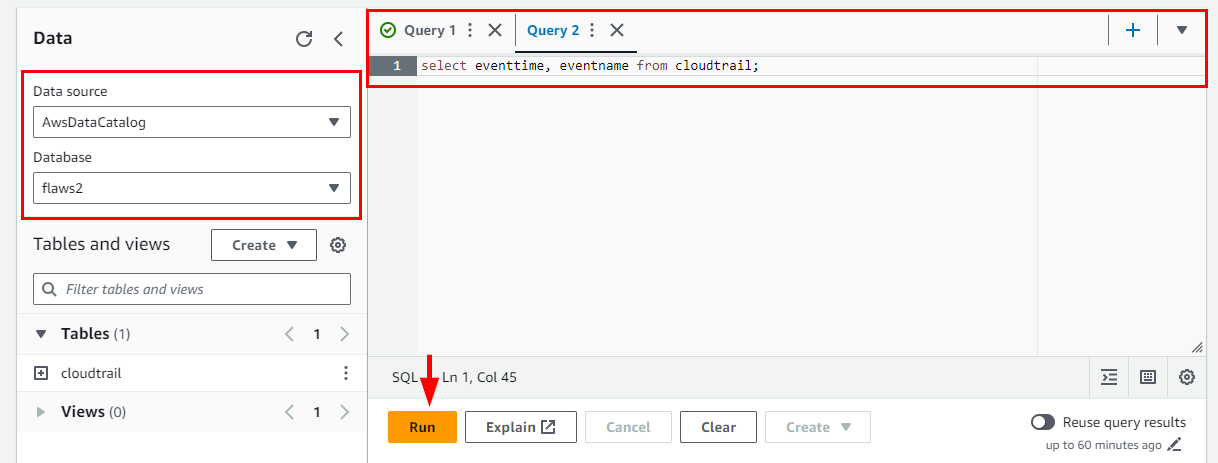
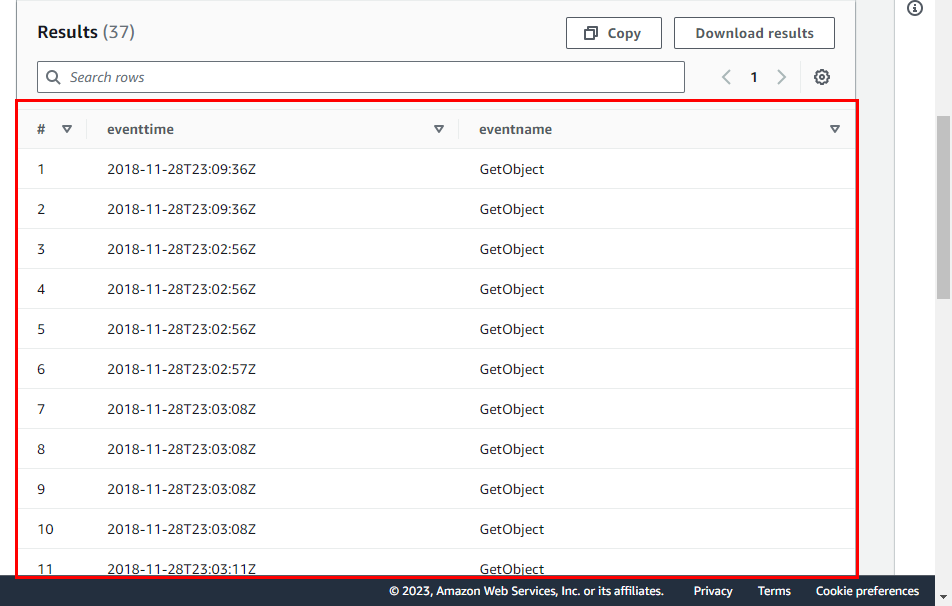
Run the SQL command to query the created cloudtrail table. Then scroll down to view the results.
NB: Click on the plus sign (+) at the top right to add a query
select eventtime, eventname from cloudtrail;
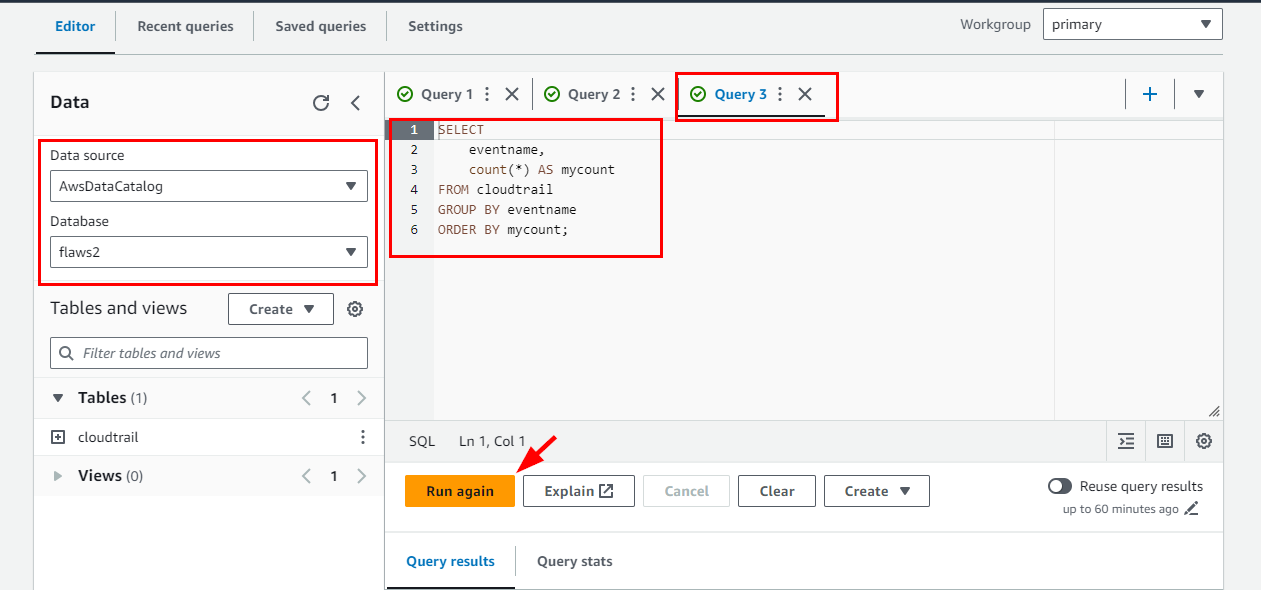
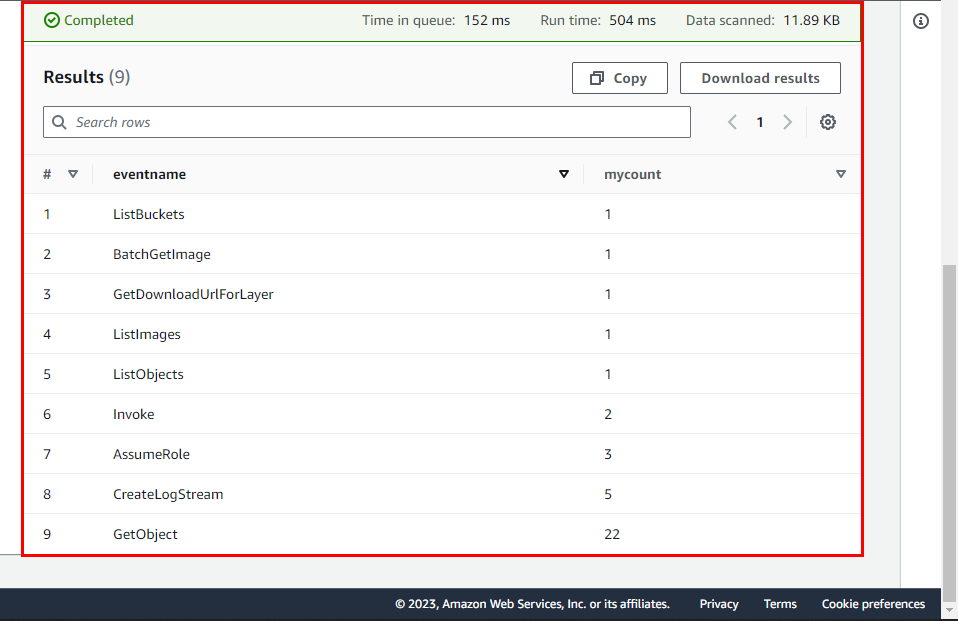
- You can try other SQL queries against the dataset
SELECT
    eventname,
    count(*) AS mycount
FROM cloudtrail
GROUP BY eventname
ORDER BY mycount;
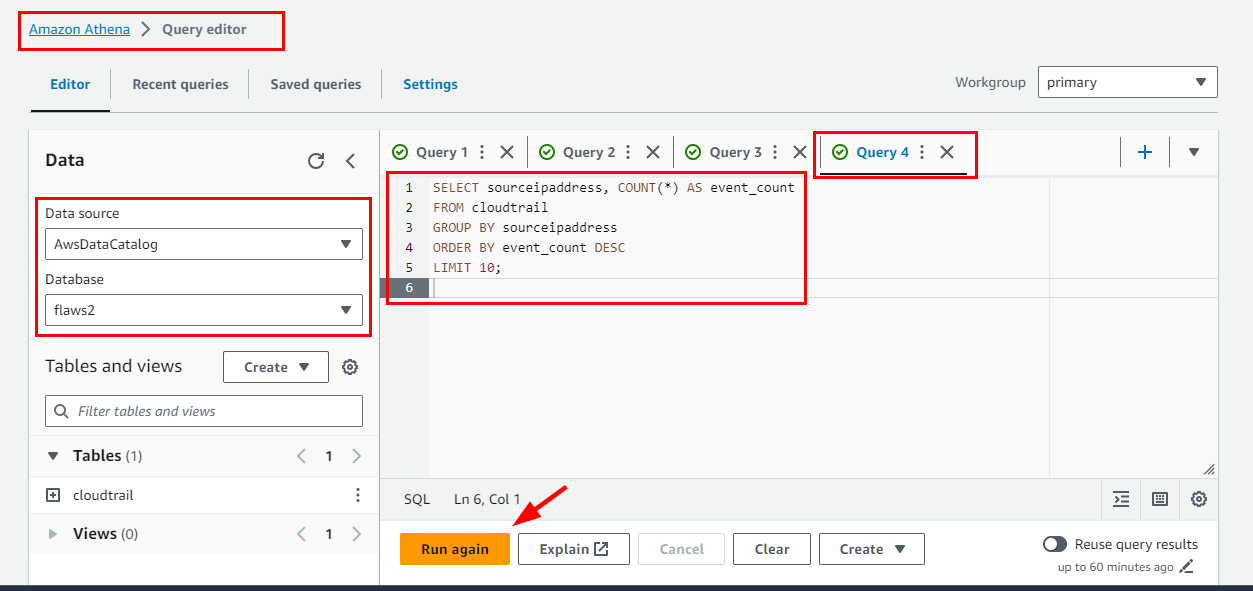
- Here are other SQL queries: Identify the top 10 IP addresses with the most events
SELECT sourceipaddress, COUNT(*) AS event_count
FROM cloudtrail
GROUP BY sourceipaddress
ORDER BY event_count DESC
LIMIT 10;

You can explore more SQL Query commands from the Cloudtrail table, but at your own cost because you will be charged by AWS.
NB: You can use Presto a Free, Open-Source SQL Query Engine for any Data.
Examples
- Find events associated with a specific user identity
SELECT eventname, eventtime, useridentity.username
FROM cloudtrail
WHERE useridentity.username = 'desired_username';
- Find events that resulted in errors
SELECT eventname, errormessage
FROM cloudtrail
WHERE errorcode IS NOT NULL;
- Retrieve events associated with specific resource ARNs
SELECT eventname, eventtime, resources
FROM cloudtrail
WHERE ARRAY_EXISTS(resources, r -> r.arn = 'desired_resource_arn');
- Find events related to a specific API version
SELECT eventname, eventtime
FROM cloudtrail
WHERE apiversion = 'desired_api_version';
- List all distinct event sources
List all distinct event sources:
Deleting Created Resources
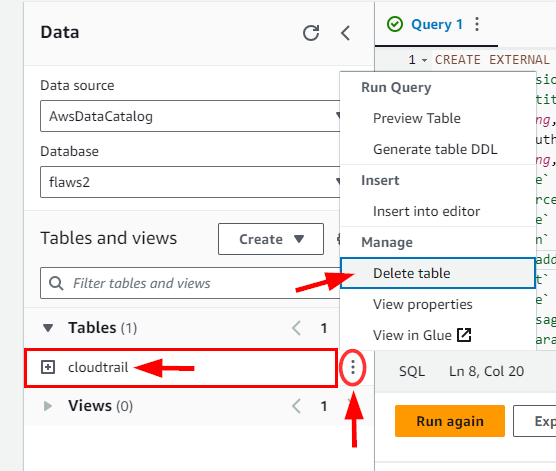
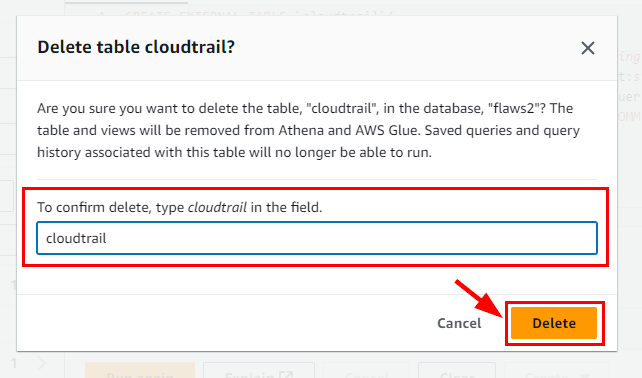
- Click the 3 dots for cloudtrail under Tables and select “Delete table” from the menu.
- Run the SQL command below to delete the created database “flaws2”
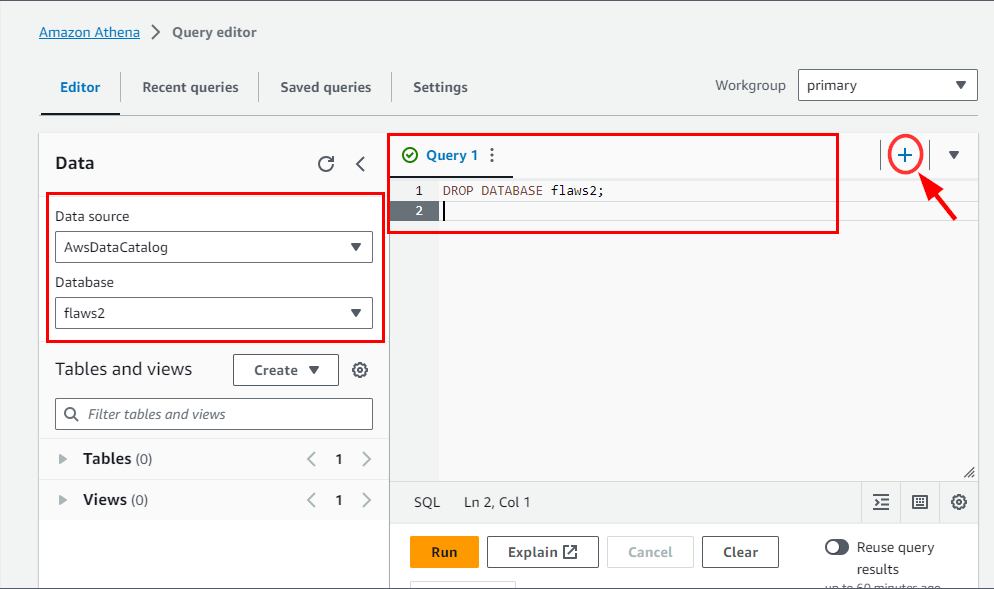
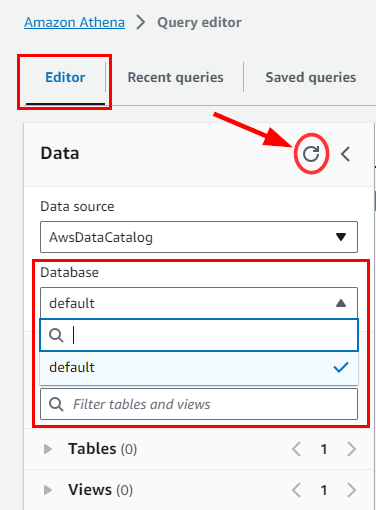
- Click the Refresh icon to ensure the database isn’t listed anymore.
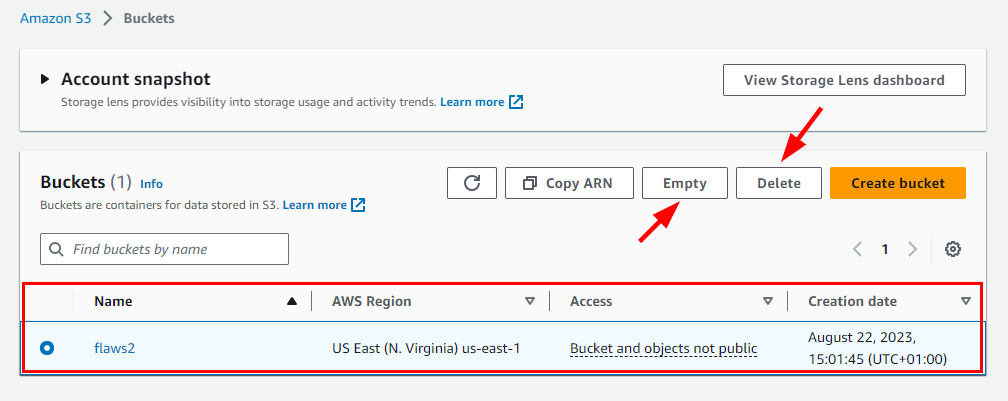
- Navigate to the Amazon S3 console page and delete the “flaws2” bucket previously created.
NB: Make sure you Empty the bucket first before deleting

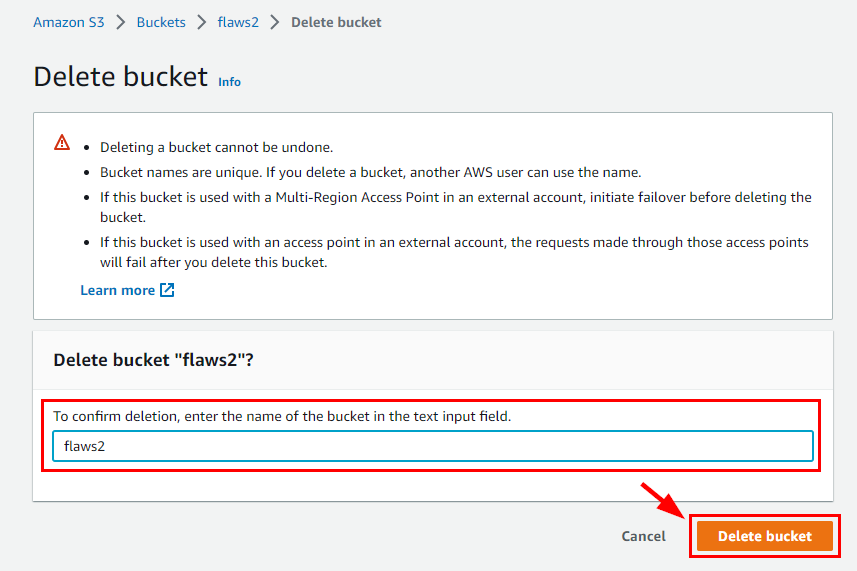
Finally, Flaws2 is successfully deleted.

Athena proves excellent for incident response due to its ability to eliminate data loading times. Simply define the table in Athena and initiate queries without any waiting. If you choose this approach, remember to establish partitions. This step will cut costs by enabling targeted querying based on a particular day. In his article titled "Partitioning CloudTrail Logs in Athena," Alex Smolen provides a comprehensive guide on implementing this process.
Participating in this series of challenges was not only enjoyable but also provided an invaluable learning opportunity. Throughout the experience, I gained understanding and skills in the following:
Assumption of roles in different AWS accounts.
Understanding and interpreting IAM and resource policies.
Mastering the art of querying JSON logs using tools like JQ and Athena.
Leveraging SQL for data manipulation and analysis.
Skillfully navigating and utilizing CloudTrail logs.
Reference
Walkthrough by craftware - https://craftware.xyz/ctf/flaws/aws/2019/06/03/flAWS-Part-2-Defender.html
Walkthrough by daycyberwox https://daycyberwox.com/exploiting-aws-3-defenders-perspective-flaws2cloud


