Aws Key Management Services Implementation 🔐~on AWS S3 || EBS

INTRODUCTION
The AWS key management service (KMS) enables the secure storage and rotation of encryption keys with strict access control. It is important for a cloud security engineer to understand AWS KMS, learn how to create and manage cryptographic keys and implement them in AWS services and applications.
LAB OVERVIEW
In this lab, I demonstrated how KMS can be integrated with AWS services, such as Amazon S3 and Amazon EBS to simplify the encryption process by enabling encryption and decryption of data within these services without the need for manual key management.
Disclaimer
The AWS Management Console is subject to updates and changes over time. The information provided in this lab write-up is based on the console's state at the time of writing and may not reflect the current user interface or functionality. It is recommended to refer to the official AWS documentation for the most up-to-date instructions when using the AWS Management Console.
Steps
- Login to your AWS Web console (root account) and create an IAM account. Check out the Lab 2 Series to create an IAM account.
Once your IAM account is created move to the next step
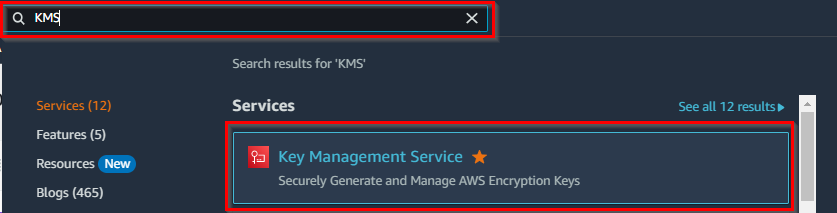
Click on Services. In the Search field, type KMS and then select Key Management Service.
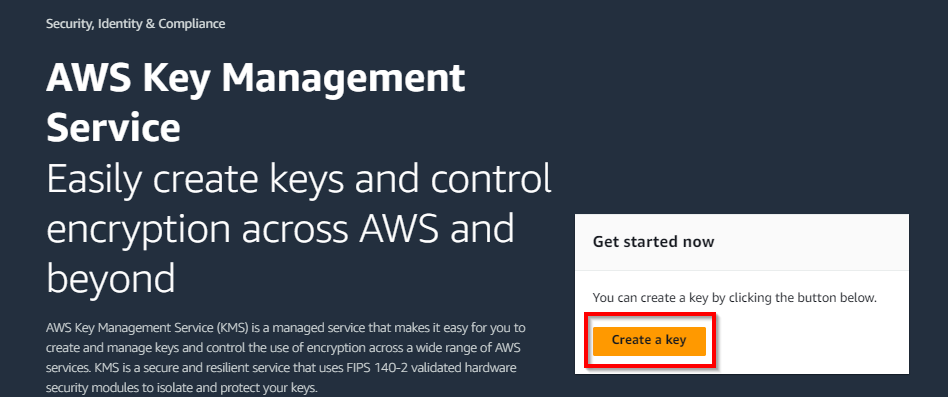
On your KMS Console page, click on Create Key.
Let's take a brief look at the two types of encryption.
Namely: Symmetric and Asymmetric encryption
Symmetric encryption: uses a single key to both encrypt and decrypt its data. The same key is used for both processes, which means that the key must be kept secret and securely shared between the communicating parties.
NB: the use of symmetric encryption with the exchanged key is efficient for bulky data encryption.
Asymmetric encryption, also known as public-key encryption, employs both a public key and a private key. Data encrypted with the public key can only be decrypted with the corresponding private key and vice versa.
NB: Asymmetric encryption is primarily used for key exchange, digital signatures, and establishing secure communication channels.
Differences from Security Approach (POV)
Symmetric encryption relies heavily on the secrecy of the shared key. If an attacker obtains the key, they can decrypt all the data encrypted with it. Therefore, securely managing and distributing the key is critical.
Asymmetric encryption provides an additional layer of security by separating the encryption and decryption keys. Even if the public key is compromised, it cannot be used to decrypt the data without the corresponding private key. However, the private key must be carefully protected, as its compromise could lead to unauthorized decryption.
NOTE: a common Security approach is to use asymmetric encryption for secure key exchange or digital signatures, and then use symmetric encryption with the exchanged key for bulk data encryption.

Continuation of The Lab 🚀
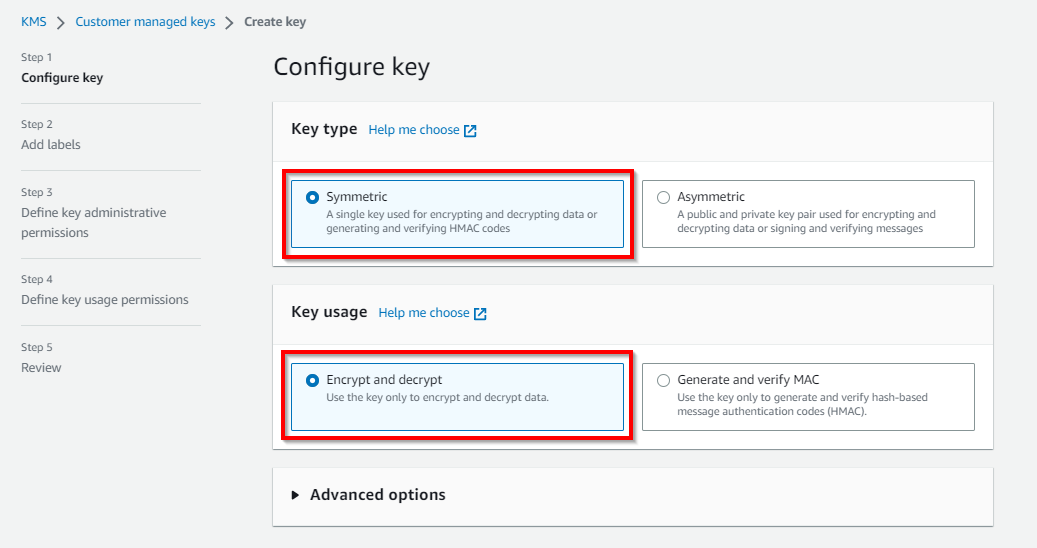
There are five steps to the creation of the KMS:
In the Configure key (Step 1), retain the default settings.
Click on Next to continue
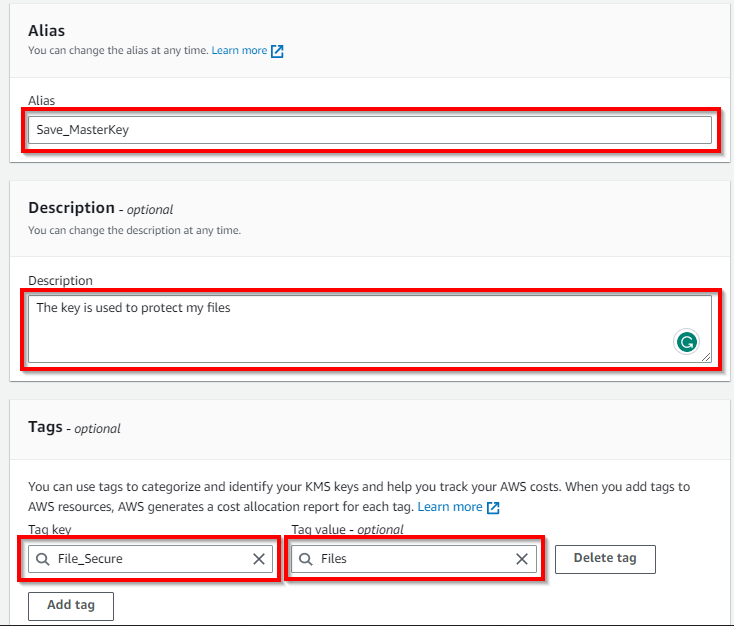
Under Add Label (Step 2):
Enter an alias of your choice as the name of your master key. The description is optional; however, entering a brief description of what the key does is recommended. Here, we have entered the following description: (The key is used to protect the files)
Under the Tags section, you can add tags to help identify the master key using the Tag key and Tag value, as shown in the screenshot below.
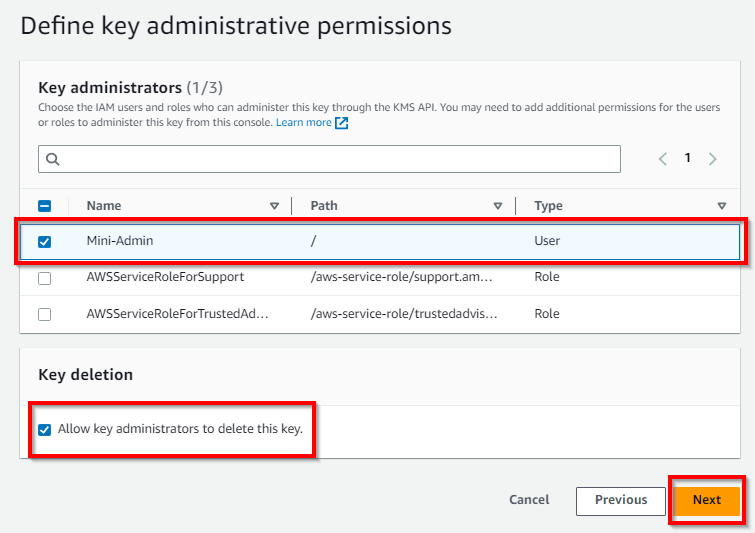
Define key administrative permissions (Step 3)
To allow users to perform encryption and decryption, you have to assign key permissions to them on the Define key administrative permissions page. Permit the user you created in the previous lab to use the master key by selecting the checkbox near the user. Here, we have selected the user Mini-Admin we created in the previous lab.
Click on Next to continue
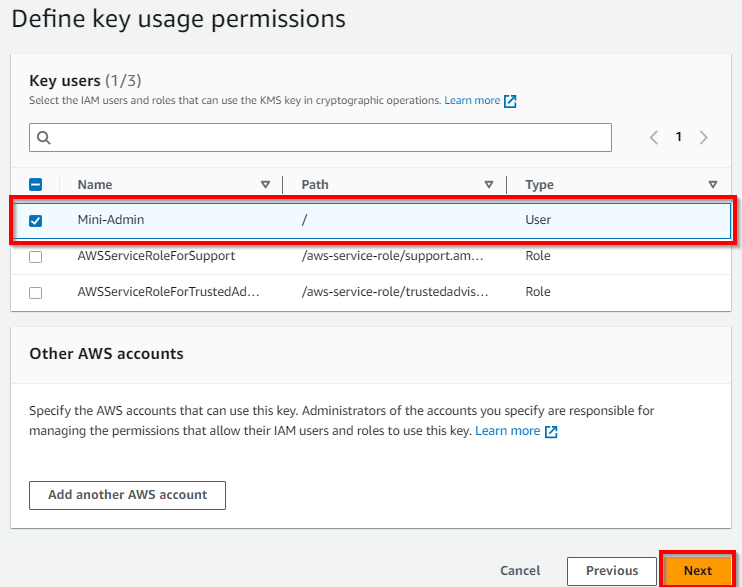
Define key usage permissions (Step 4)
Here, you are trying to give the user key permission. You have the option to add another AWS user account. Select the user (Mini-Admin) and
click on Next to continue.
Review (Step 5)
Review all settings and the key policy, which is in JSON format, and then click FINISH to create the master key.
Now we have successfully created an AWS KMS for the IAM user
(Mini-Admin)
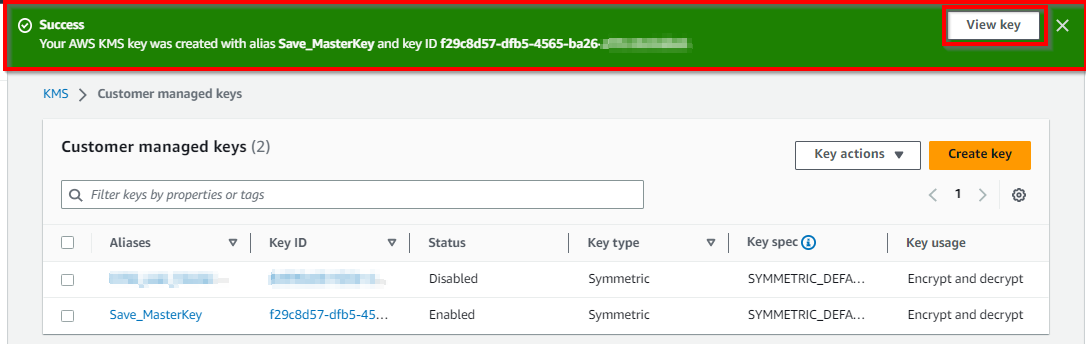
Click on the new customer-managed key (Save_MasterKey) to view the master key properties.
Integrating the Created KMS to AWS services such as Amazon S3 and Amazon EBS
Let's start with Amazon S3
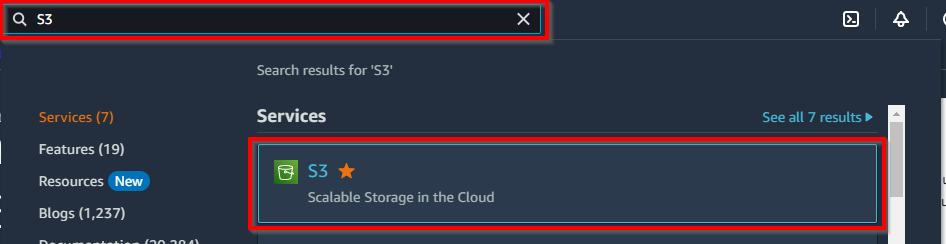
- In your AWS Management Console, type S3 in the search field to create a new bucket.
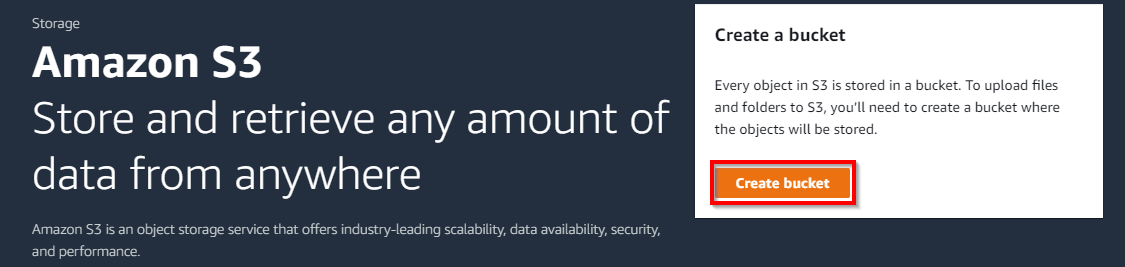
On your S3 bucket page. Click an S3 Create bucket.
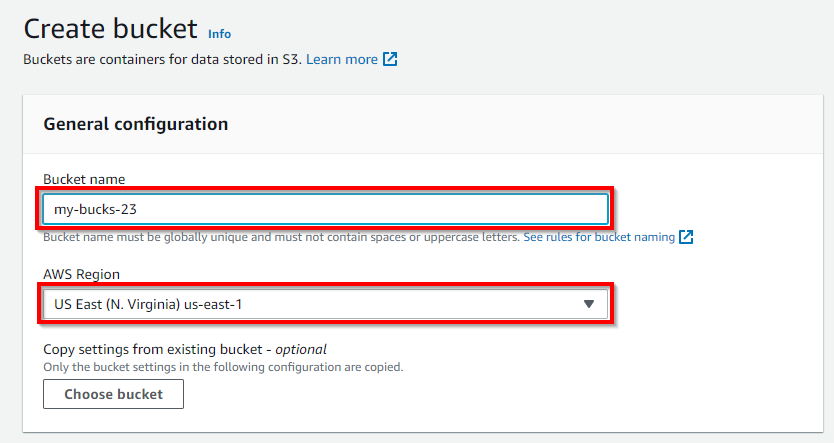
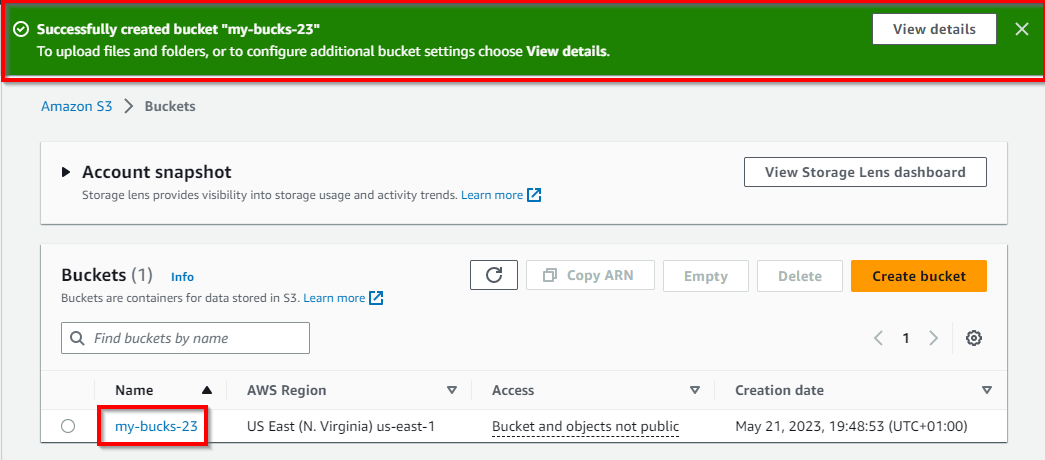
The Create bucket popup appears. Under General Configuration, type the name of the bucket in the Bucket Name field (here, the bucket name is my-bucks-23), and select a region of your choice in the AWS Region field.
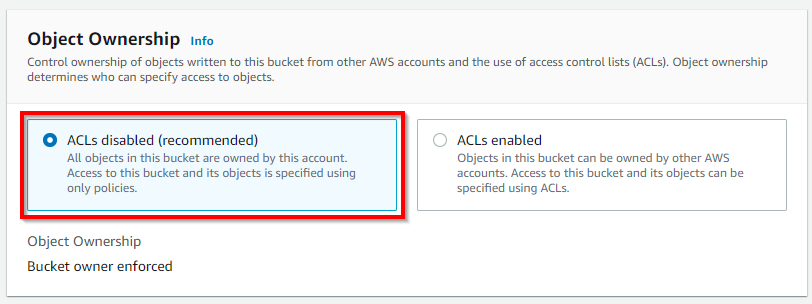
Next, retain the default setting for Object Ownership
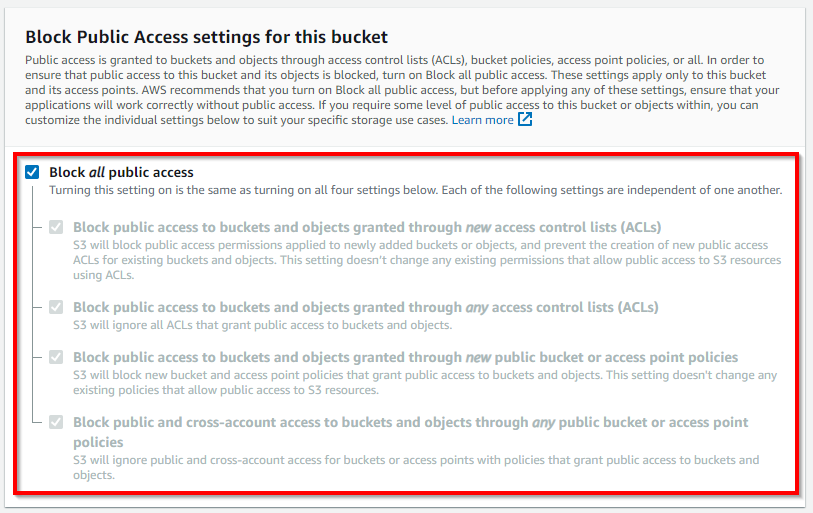
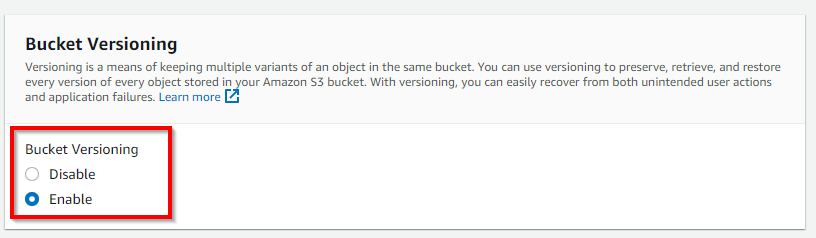
Block public access settings for this bucket. Retain the default settings, as shown in the screenshot below, and enable bucket versioning.
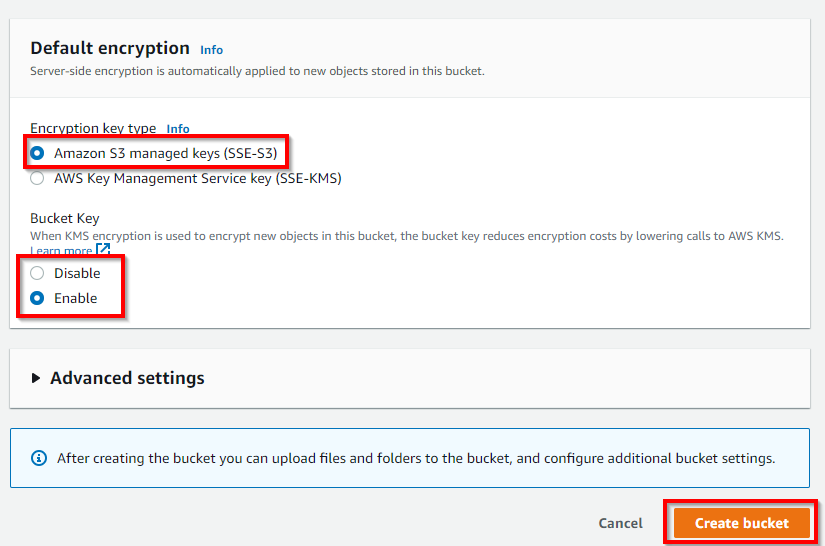
Retain the default tags and default encryption settings. Then, click on Create Bucket.
Click on the newly created bucket to configure the encryption settings
Click on the bucket name "my-bucks-23" to navigate the properties of the bucket. In the properties tab, ensure bucket versioning is enabled.
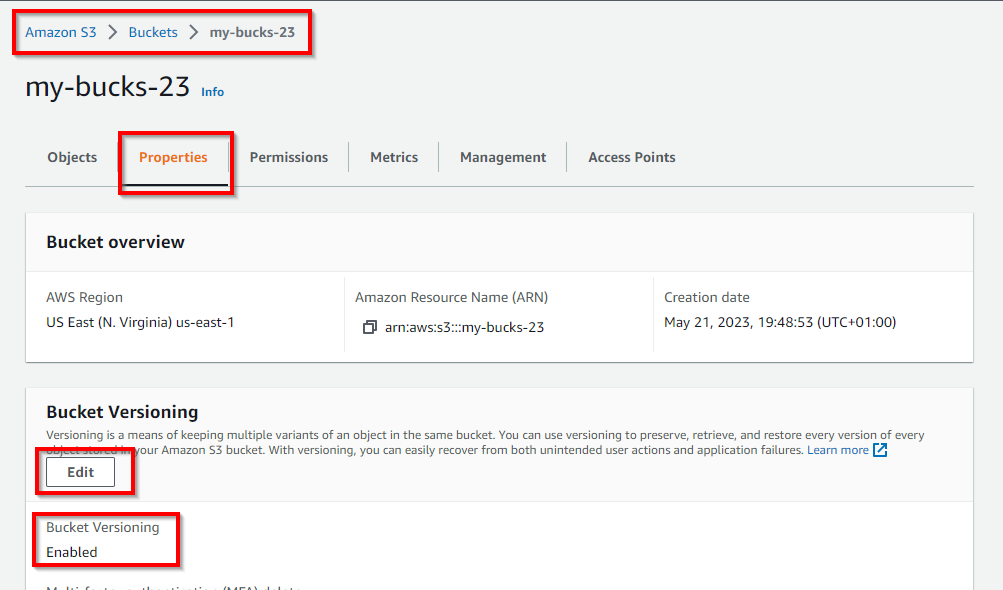
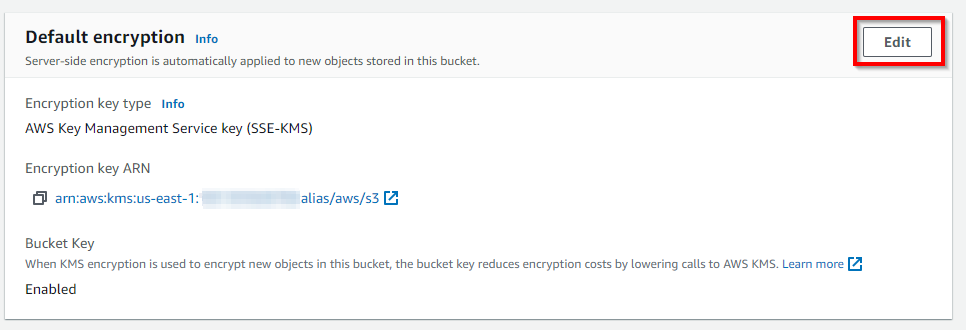
Scroll down and click on Edit in the Default Encryption section
→ select the radio button to Enable
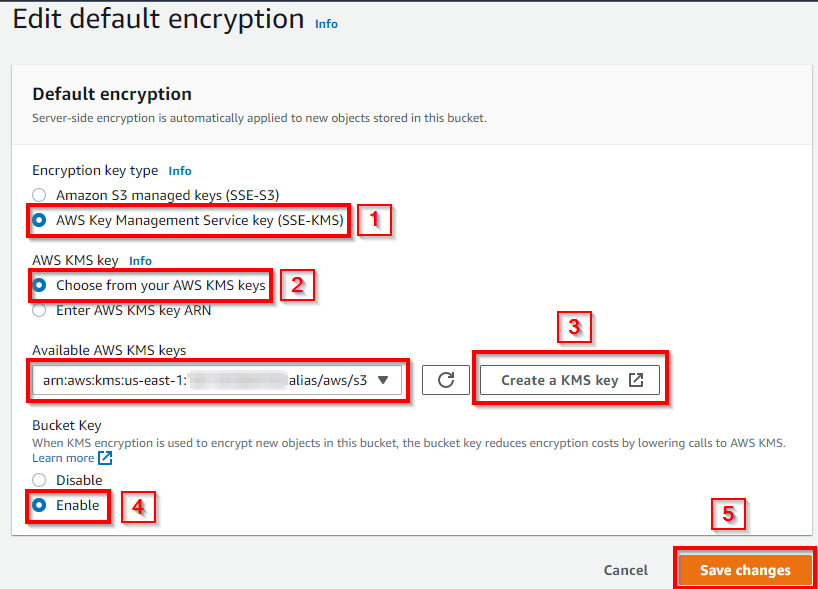
→ For server-side encryption, choose the "AWS Key Management Service key (SSE-KMS)" under the "encryption key type" to create a secured encryption by AWS KMS.
Select the AWS managed key (aws/s3) under the Available AWS KMS keys.
NB: make sure it is your created S3 ARN link that is selected.
Retain the default setting (Enable) for Bucket Key and click on Save Changes.
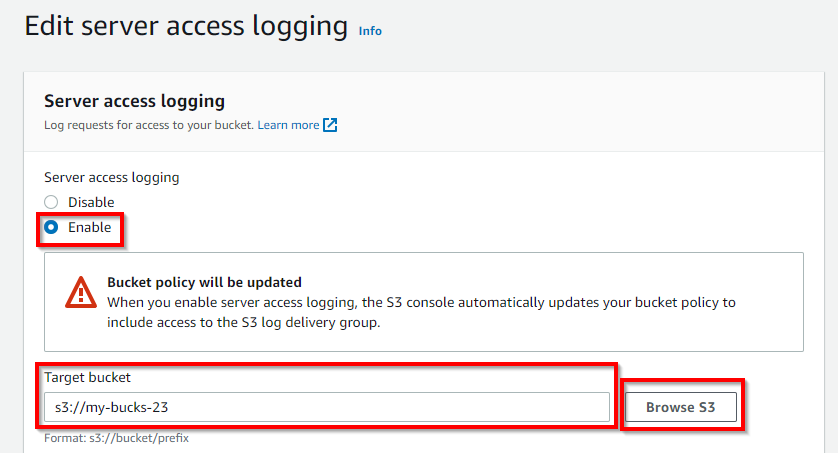
Scroll down and click on Edit under Server Access Logging. Enable Server access logging by selecting Enable, entering s3:// {YOUR-BUCKET-NAME} or you can click on “Browse S3” to add the Target bucket, and click on Save changes.
Now You have configured the ”my-bucks-23” bucket to encrypt data. The user can now add data to this bucket.
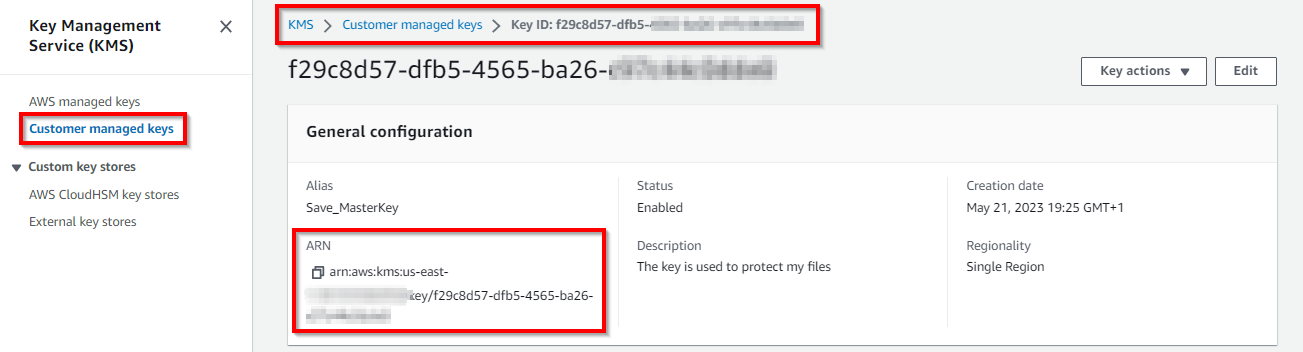
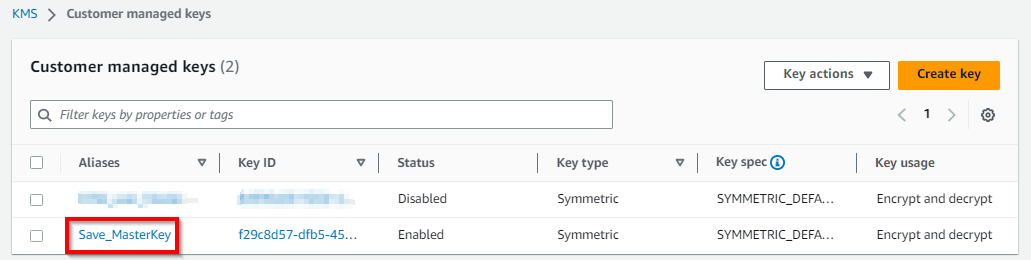
Go to Key Management Services (KMS) and select Customer managed keys. Under the Customer managed keys pane, click on the Save_MasterKey alias.
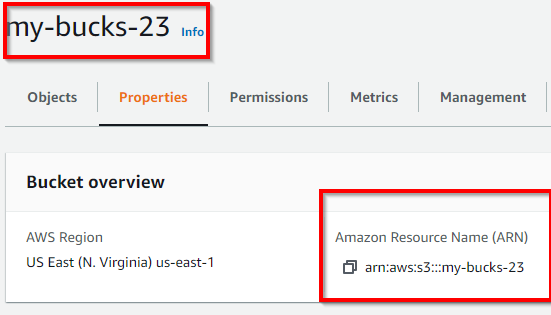
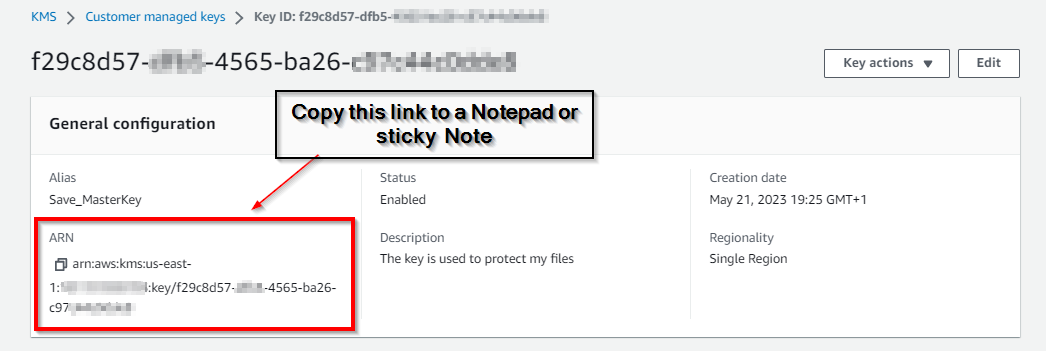
Under the Save_MasterKey general configuration, copy the "Amazon resource name (ARN)" key, which uniquely identifies the AWS resources key under the ARN field, as shown in the screenshot below, and paste it to Notepad.
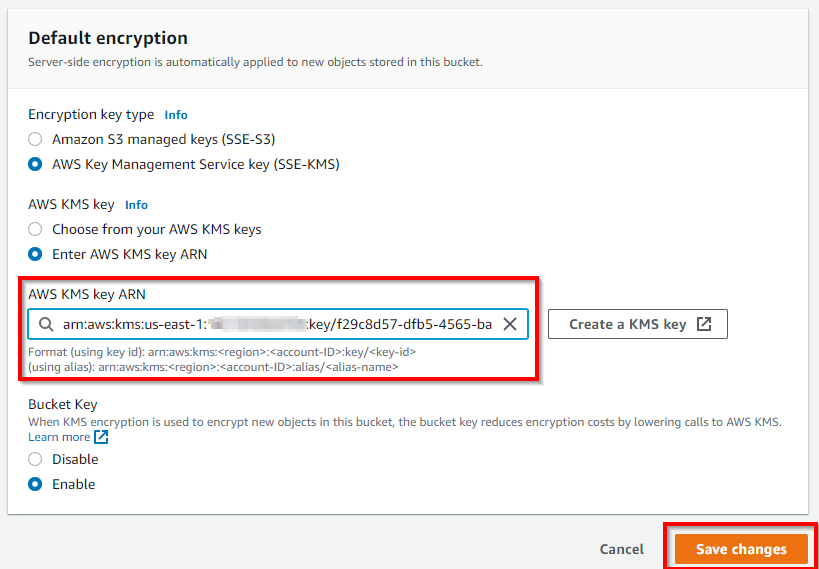
Navigate to the S3 Management Console to search for and select my-bucks-23 under the Bucket name. Under the my-bucks-23 pane. Select the Properties tab. Scroll down and click on Edit under Default Encryption to change default encryption.
On the Edit default encryption page, choose to enter the AWS KMS key ARN under the AWS KMS key, replace the existing Custom KMS ARN value with the ARN value copied to Notepad and click on Save changes.
This way, a user can encrypt and protect storage data with the help of customer- managed keys.

KMS to Amazon EBS Volume
Overview
Amazon EBS supports KMS. Its encryption provides data-at-rest security by encrypting data volumes, boot volumes, and snapshots using Amazon-managed keys or keys created and managed using AWS KMS.
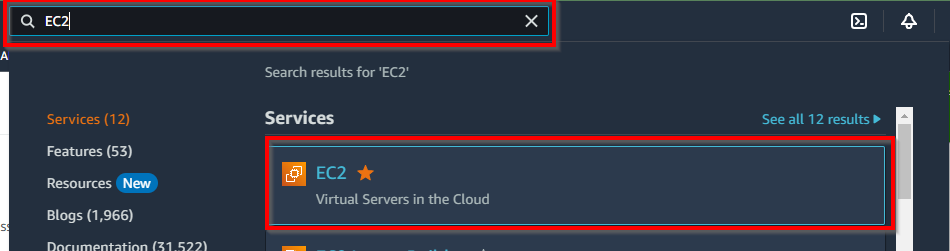
To encrypt EBS volumes with the KMS master key, click on Services from the menu bar and search for EC2. From the search results, click on EC2 virtual servers in the cloud, as shown in the screenshot below.
Once the EC2 Dashboard page opens, click on Volumes in the left pane under ELASTIC BLOCK STORE and click on Create Volume.

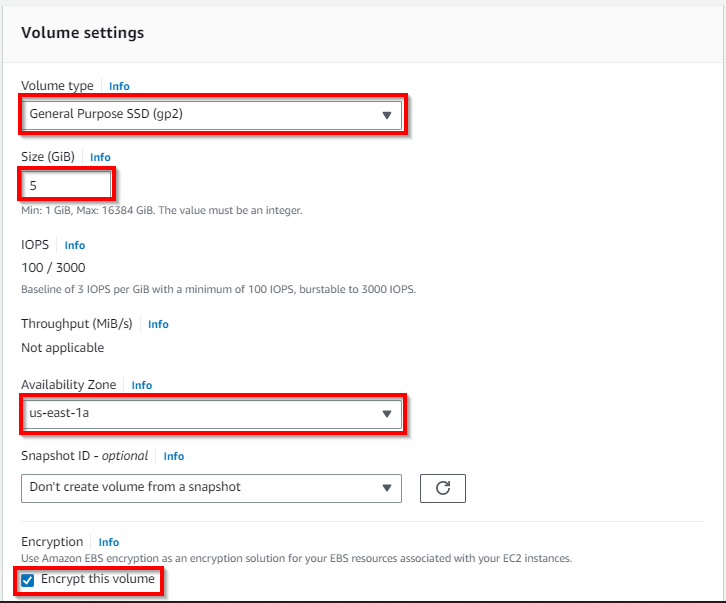
In the Create Volume page, select the volume type as General Purpose SSD (gp2). Specify the size of the volume as 5 in the Size (GiB) field. Select the checkbox for Encrypt this volume for encryption.
In the KMS Key field, select the customer-managed key that was created: Save_MasterKey.
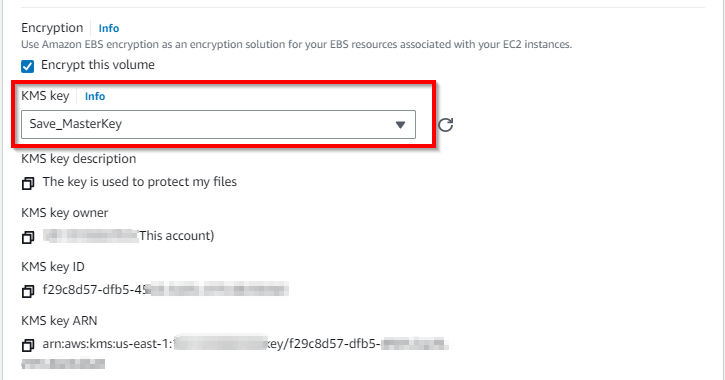

This is how the KMS master key is used to encrypt an EBS volume.
Mini Task
- Now, encrypt Amazon Redshift using the same KMS master key as you encrypted the EBS volume.
By following the above steps, you can now as a cloud security engineer implement AWS KMS.
Lab Clean UP
Note: Ensure you delete, shut down, or terminate all resources created or used in this lab to prevent AWS billing.
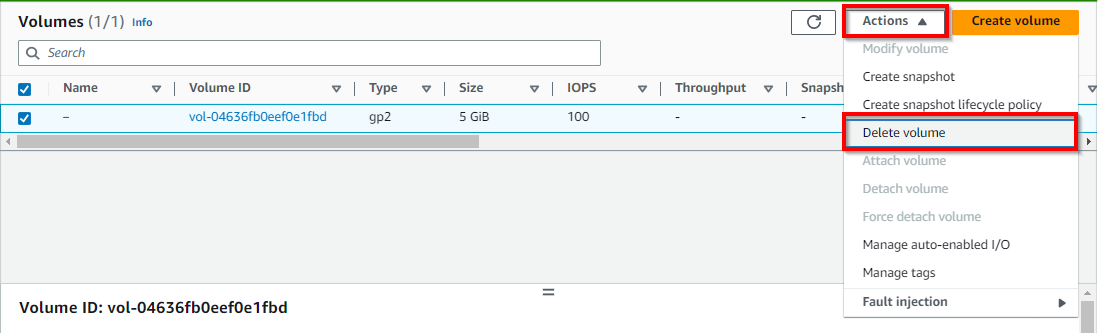
Deleting EBS Volume
- Navigate to the EC2 window and select Volumes. Select the checkbox for the volume created in this lab and click on the Actions dropdown. Click on Delete Volume. In the pop-up window, click on Delete.
Deleting S3 Volume
- Navigate to the S3 window and select the checkbox of the bucket created in this lab. Click on the delete button. In the pop-up window, enter the bucket's name and click on the Delete bucket button.
Deleting Customer managed keys
Navigate to the customer-managed keys under the KMS console and select the checkbox for the key created in this lab. Click on the Key actions dropdown and click on Disable option. In the pop-up window, click on the checkbox to confirm disabling and click on Disable key.